Jump to
- How to Download the Mobile Software
- Mobile App Overview
- How to Access Your Quick Menu
- Access Your Settings
- How to Place Calls
How to Download the Mobile Software
You can download the mobile client one of two ways:
- From your desktop client
- From the App Store or Google Play Store
Download From Desktop Client
Once logged into the desktop client, you can download the mobile application from your desktop dashboard. Using this method ensures that you are downloading the correct version.
To download from your desktop client dashboard, follow these steps:
Step 1
Click Use your Vonage Business phone on the go! in the lower right-hand corner.
Step 2
Proceed to select your correct country code.
Step 3
Enter your 10-digit mobile number. You will receive a text message on your device with a link to download the mobile client.

Step 4
Click the Send button.
Step 5
It will bring you to either the iTunes Store or Google Play, depending on your device.
Step 6
Click to install the app.
Download from the App Store or Google Play Store
You can download the application by searching the App Store or Google Play Store from your mobile device. Search Vonage Business Communications.
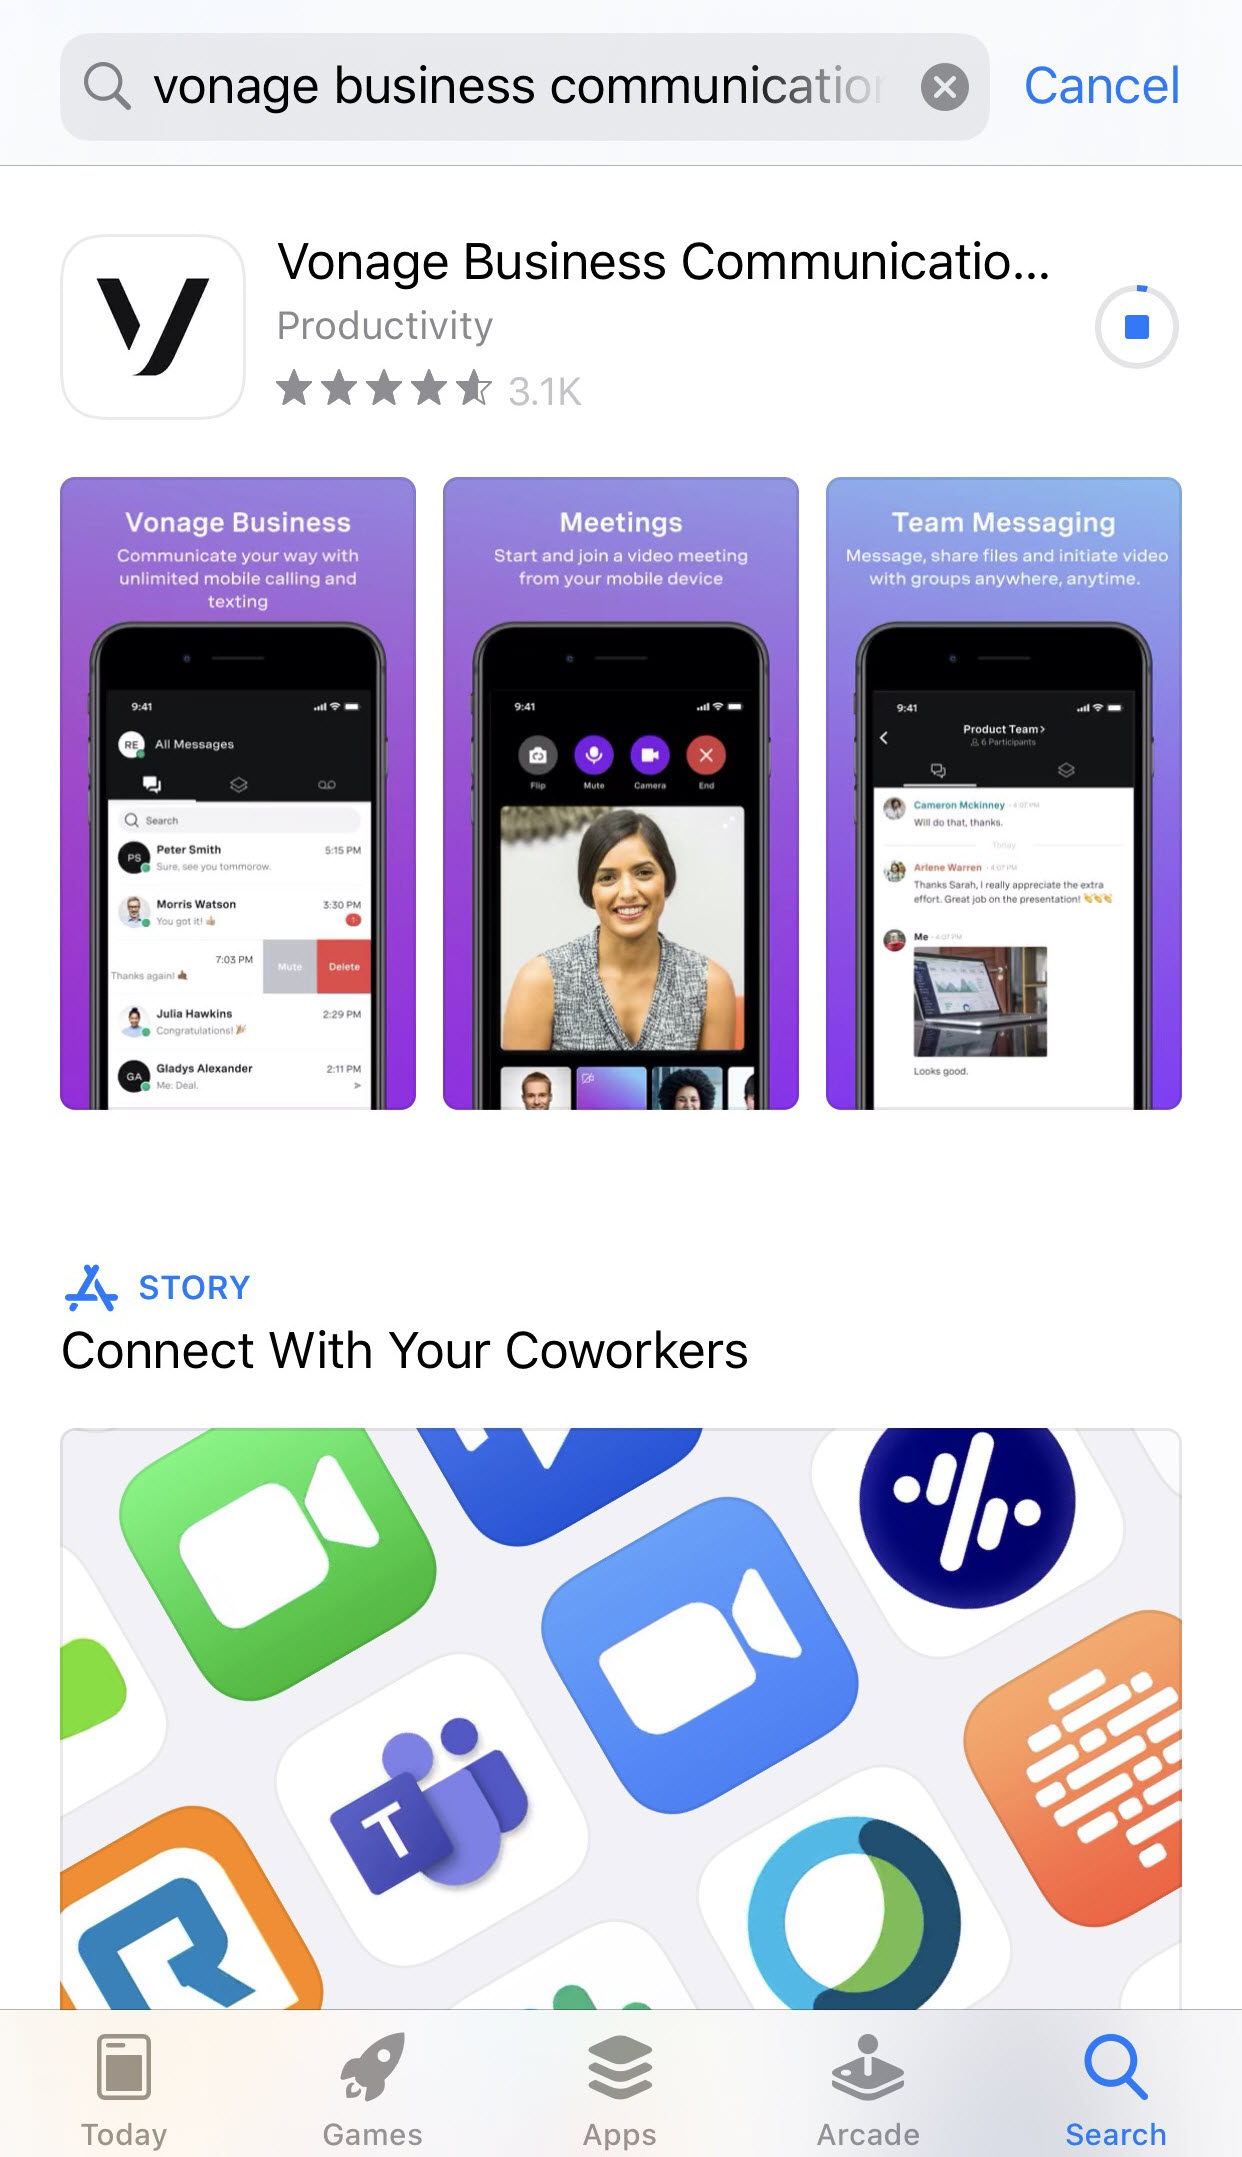
Once installed, you will be asked to log into the mobile app through Single Sign-On.
Mobile App Overview
Upon logging in, you will see the dashboard, with Messages being the first page you see. Here are details about the mobile client to familiarize yourself with the app.
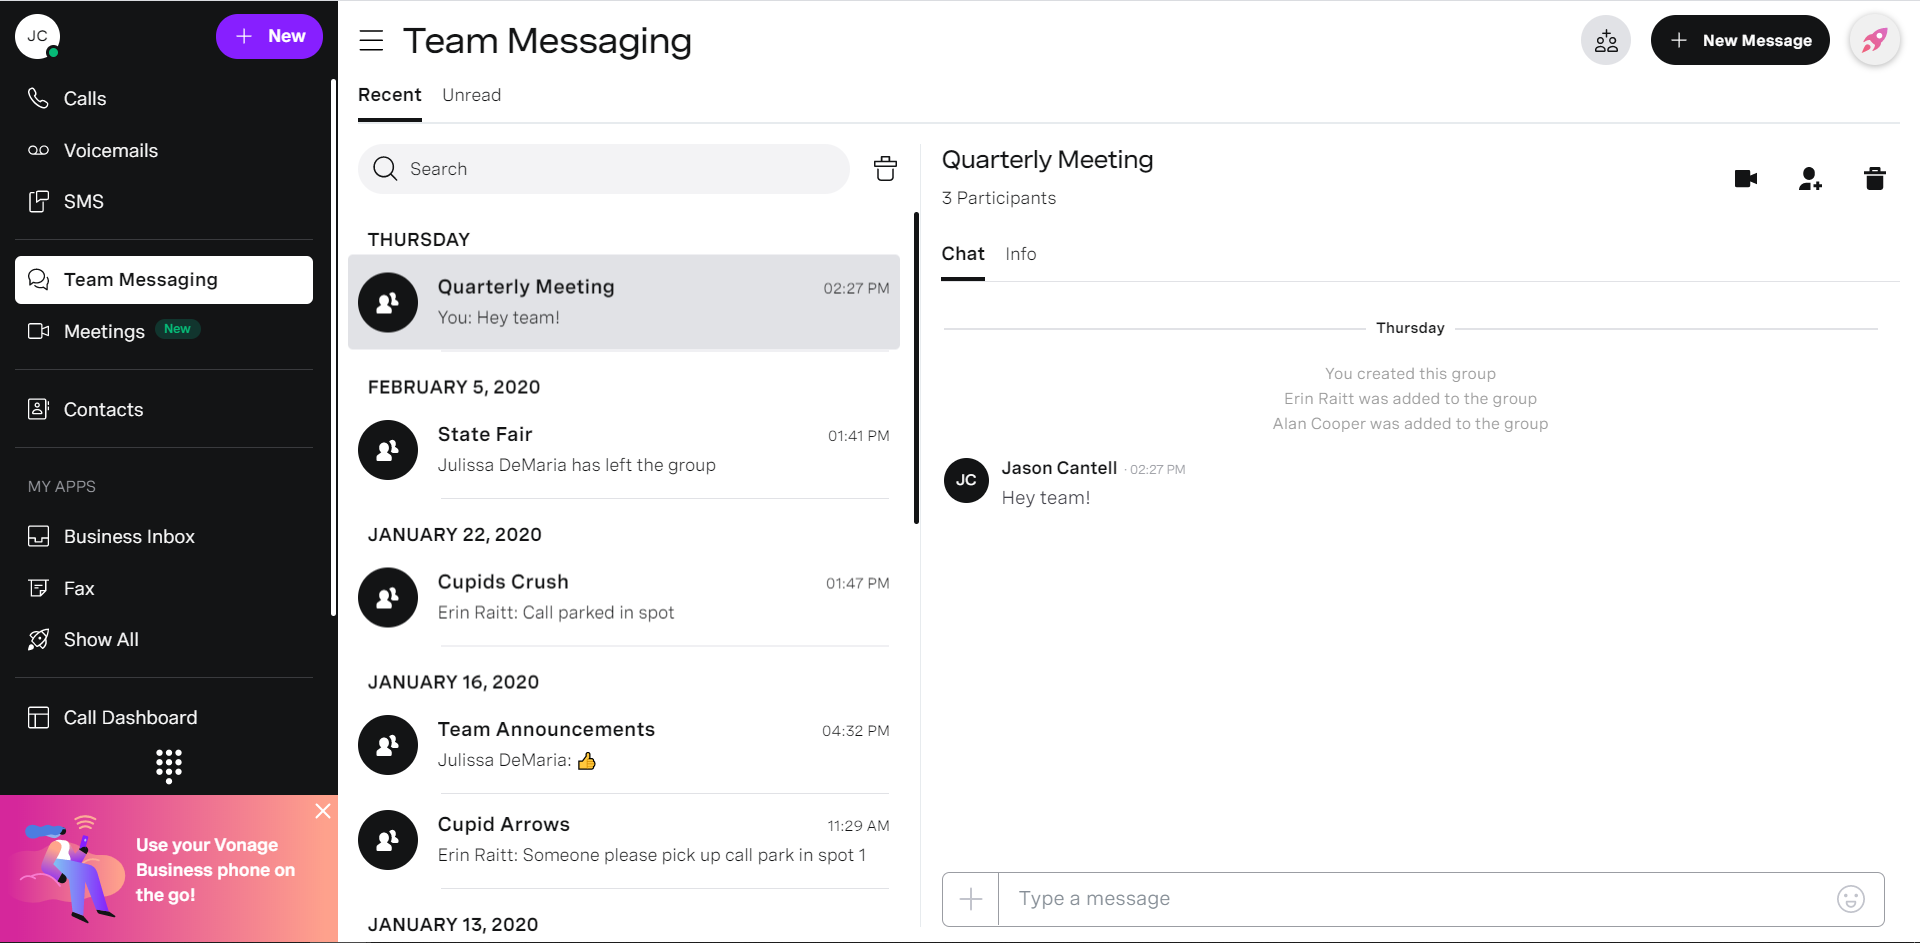
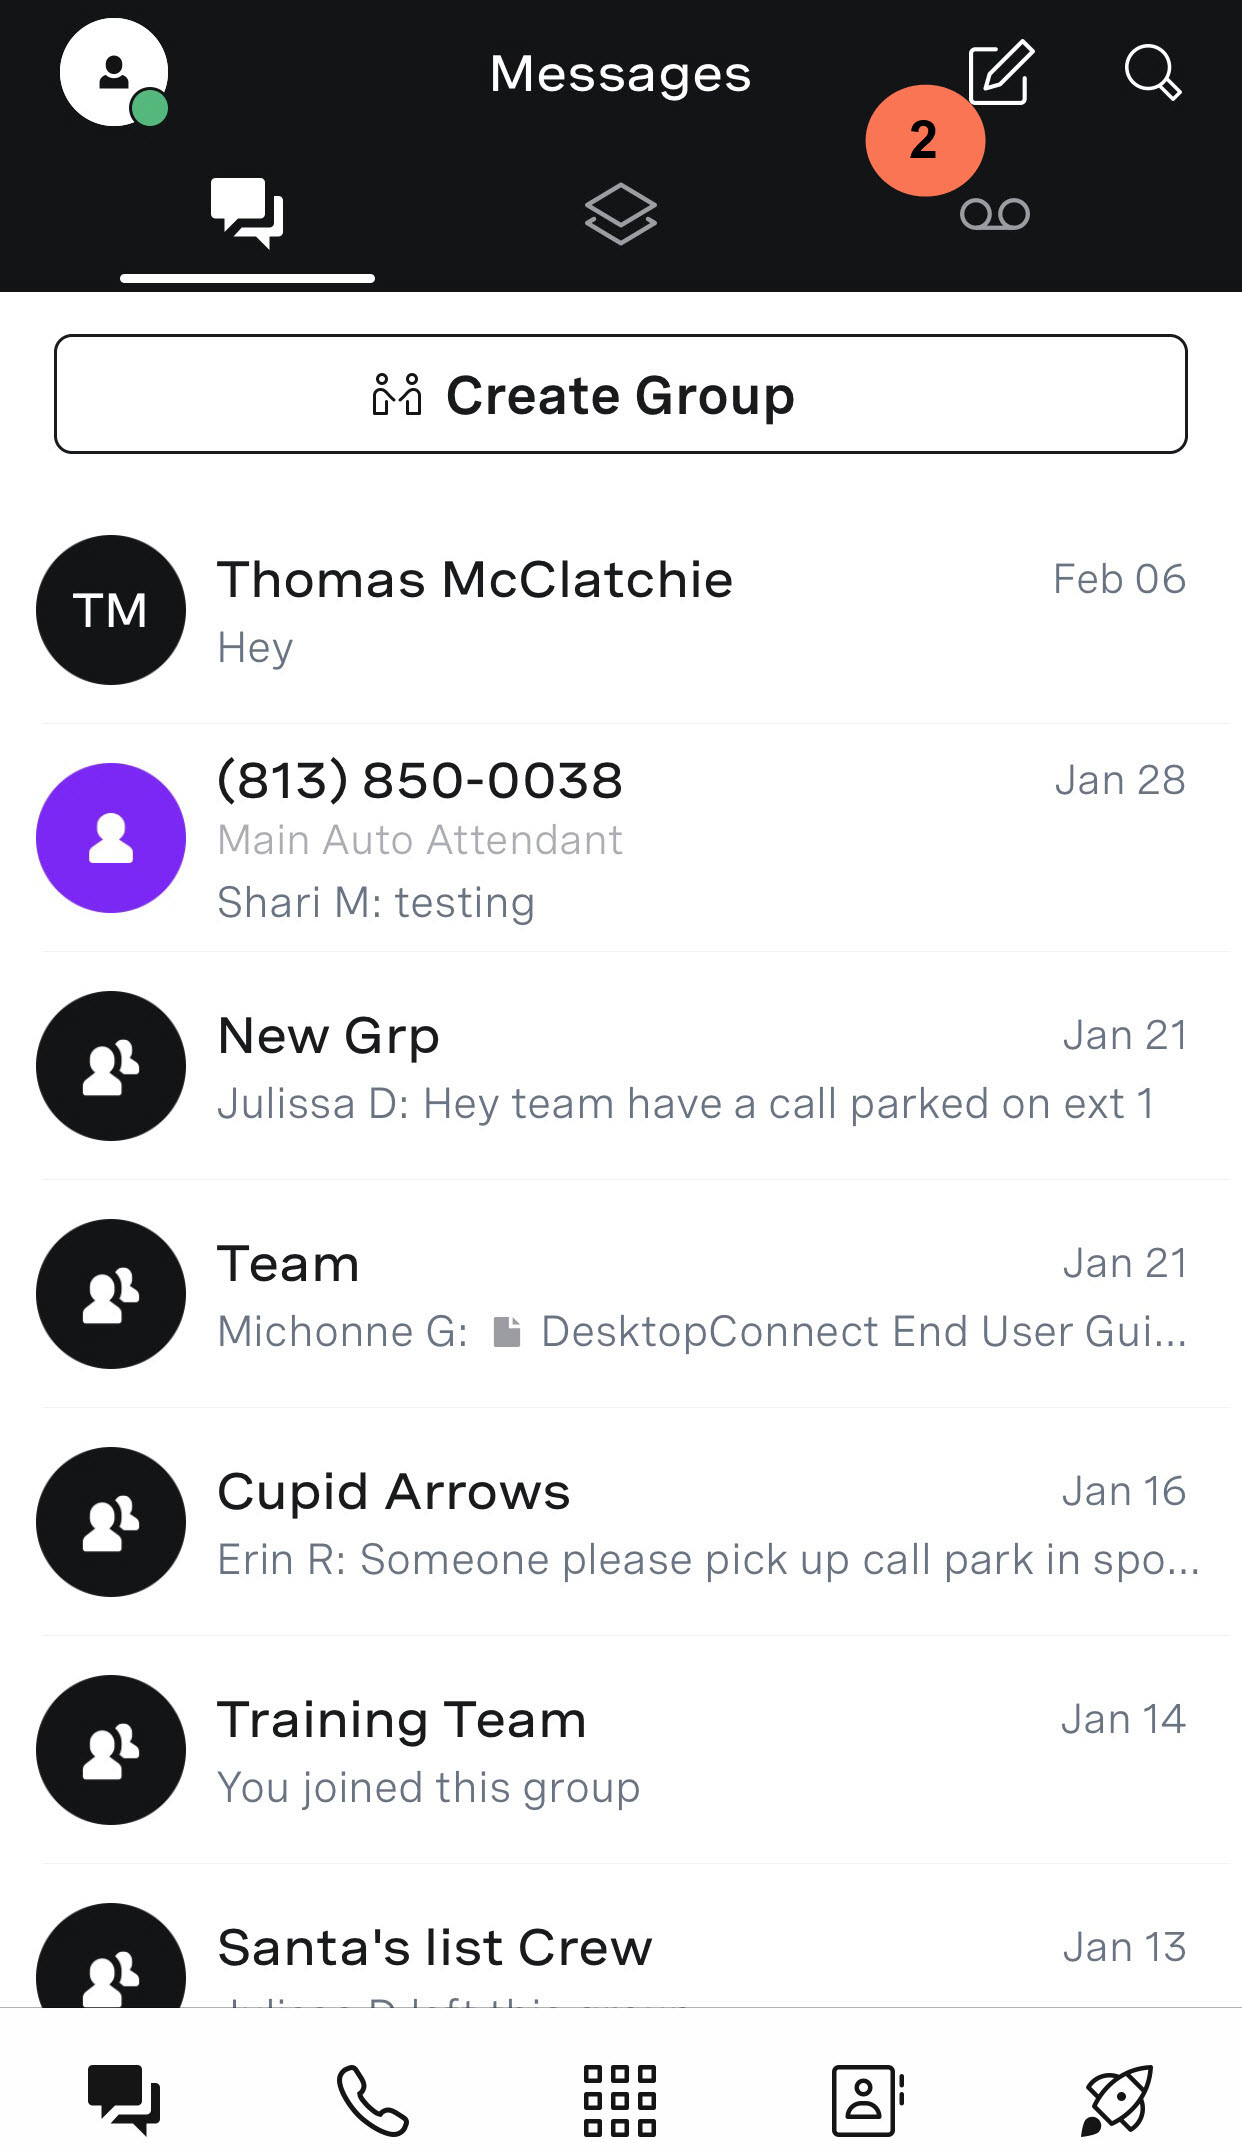
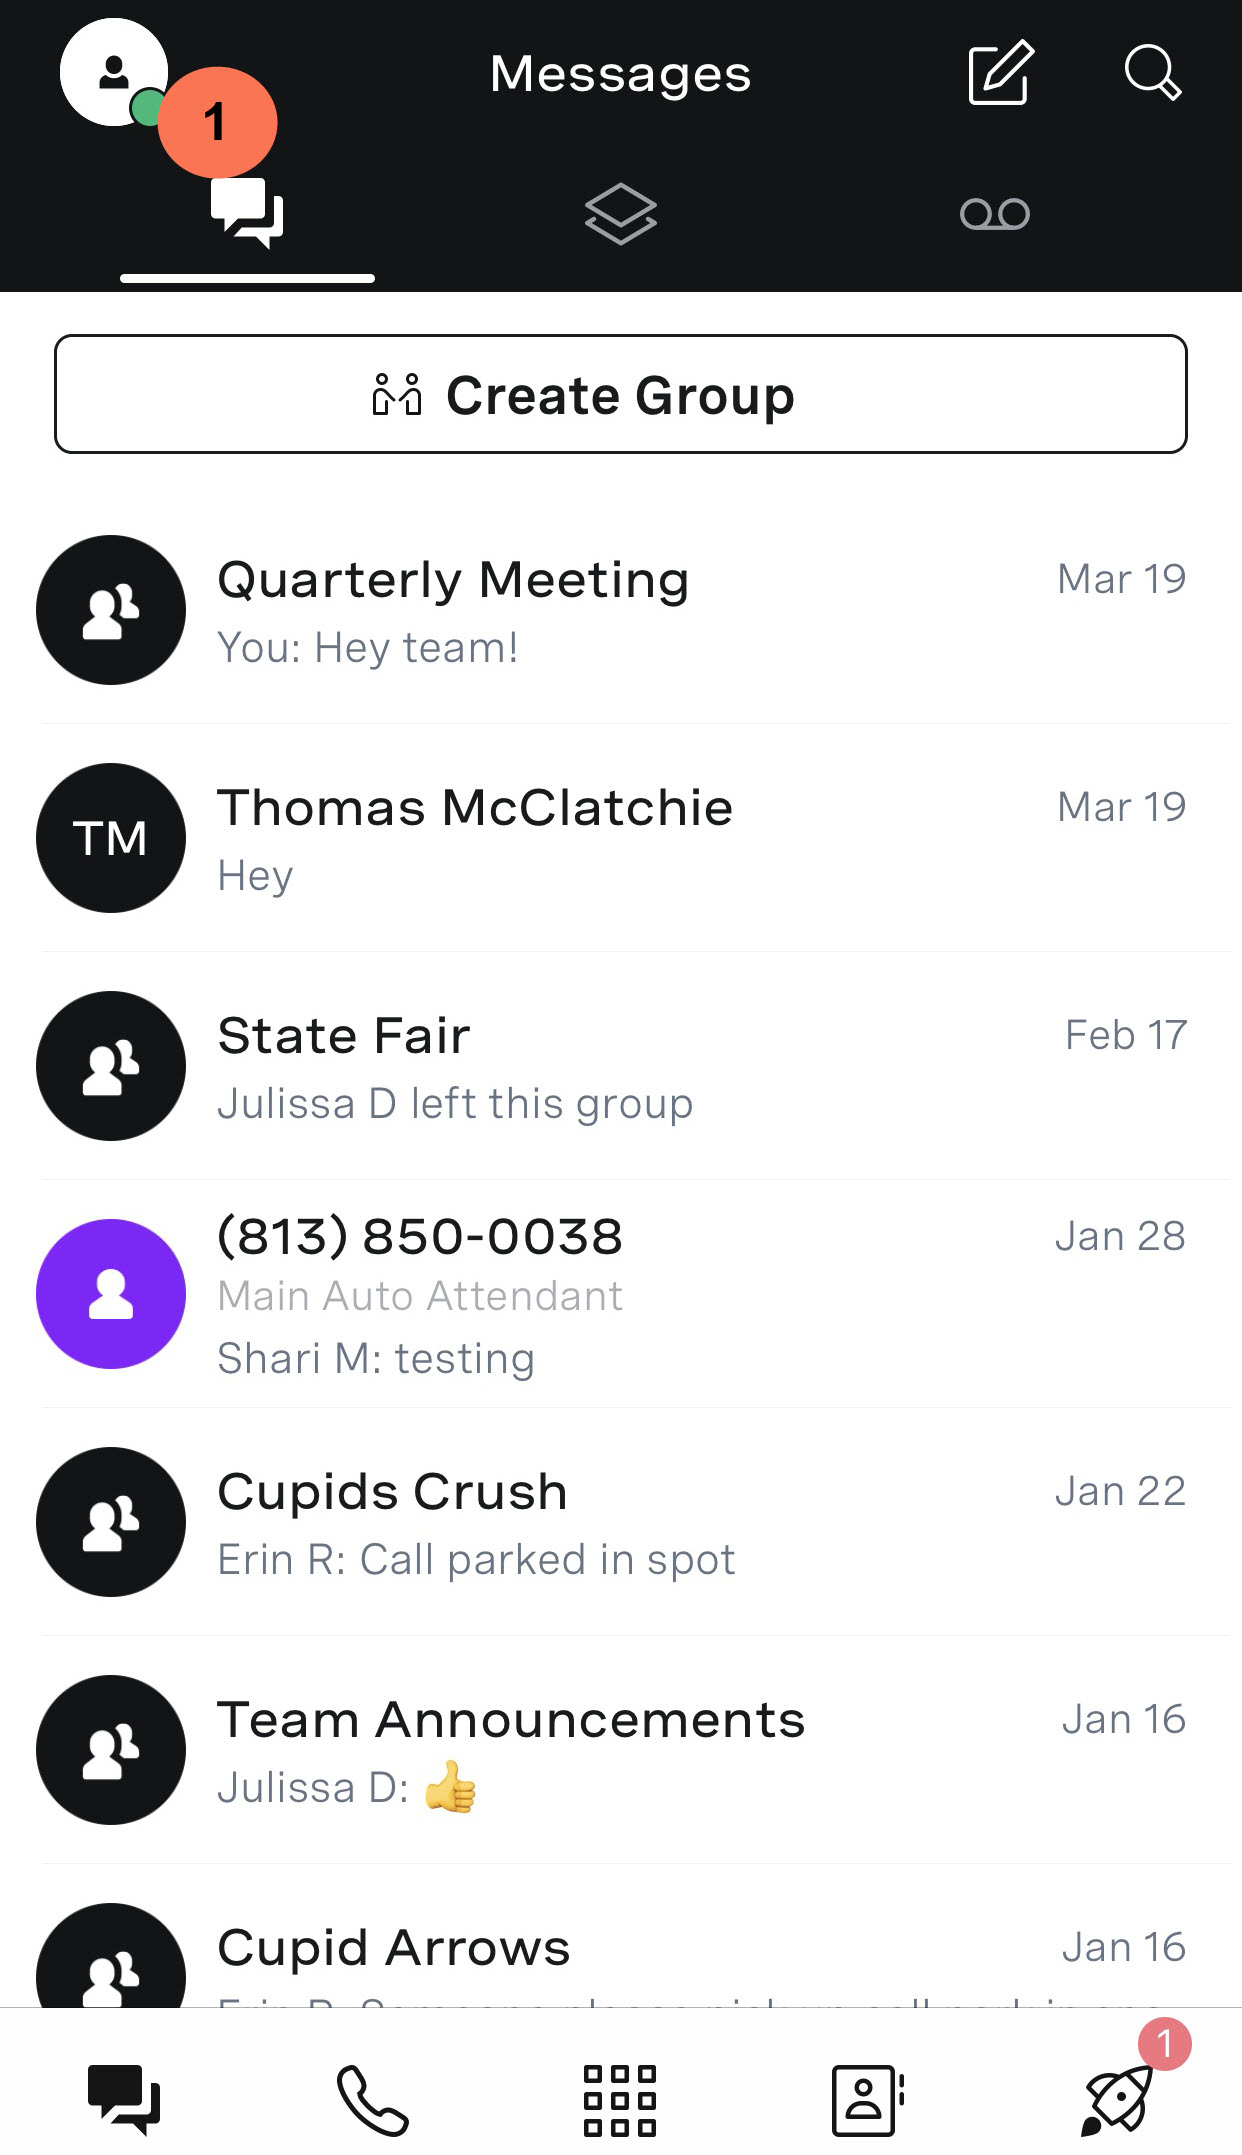
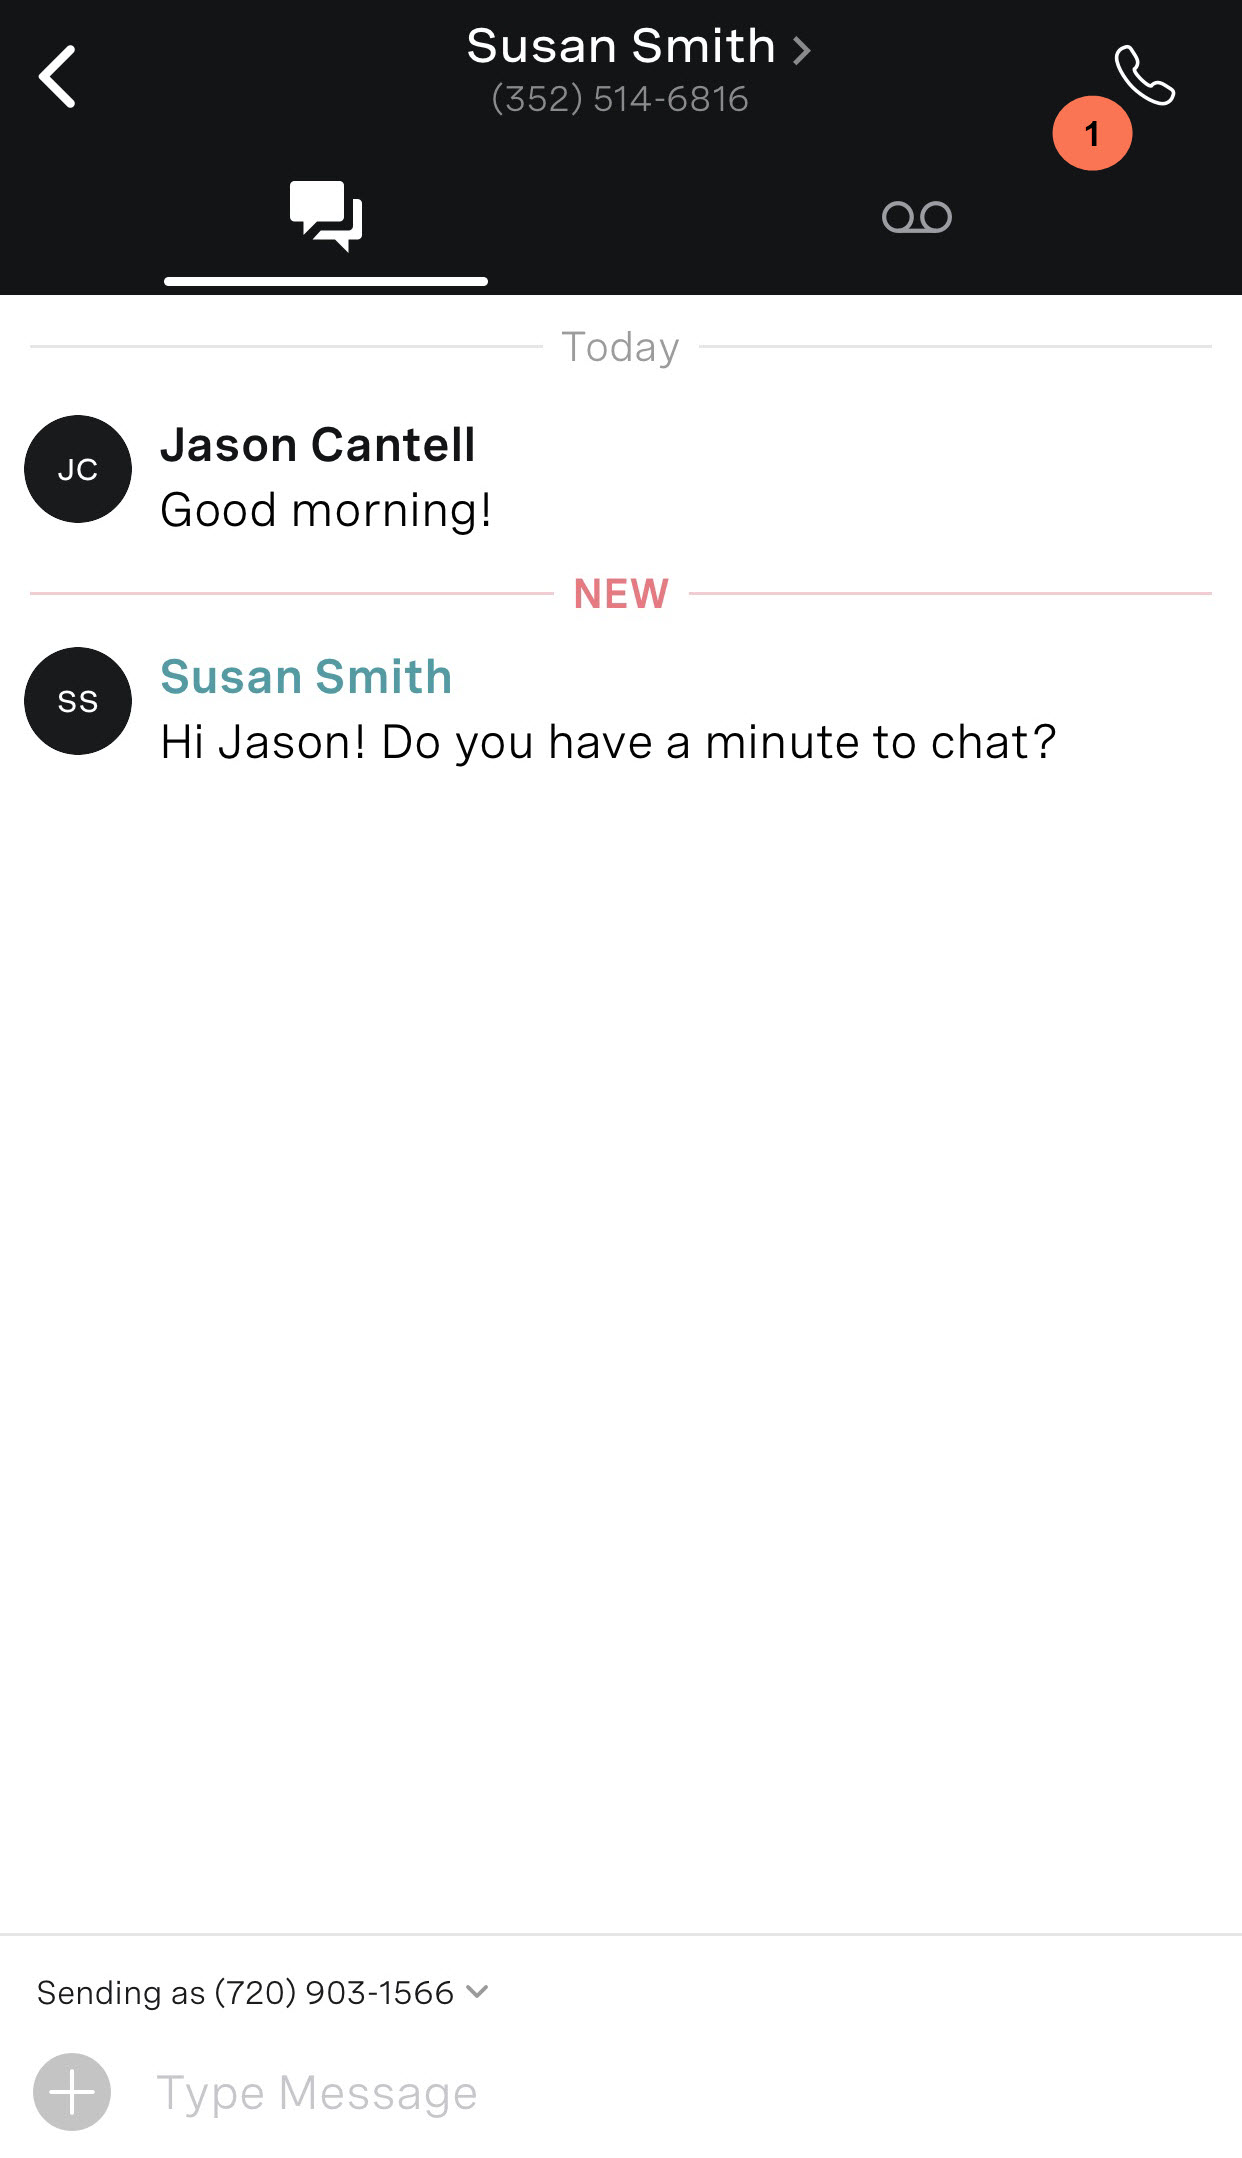
Chat Tab
The Chat tab is where you send and receive chat messages and where a list of recent messages is displayed. Chats are listed chronologically, with the newest messages on top. Viewing and sending messages is easy.
Step 1
To continue a chat, open the message field and continue that conversation.
Step 2
To begin a new chat, click the Chat icon in the upper right corner.
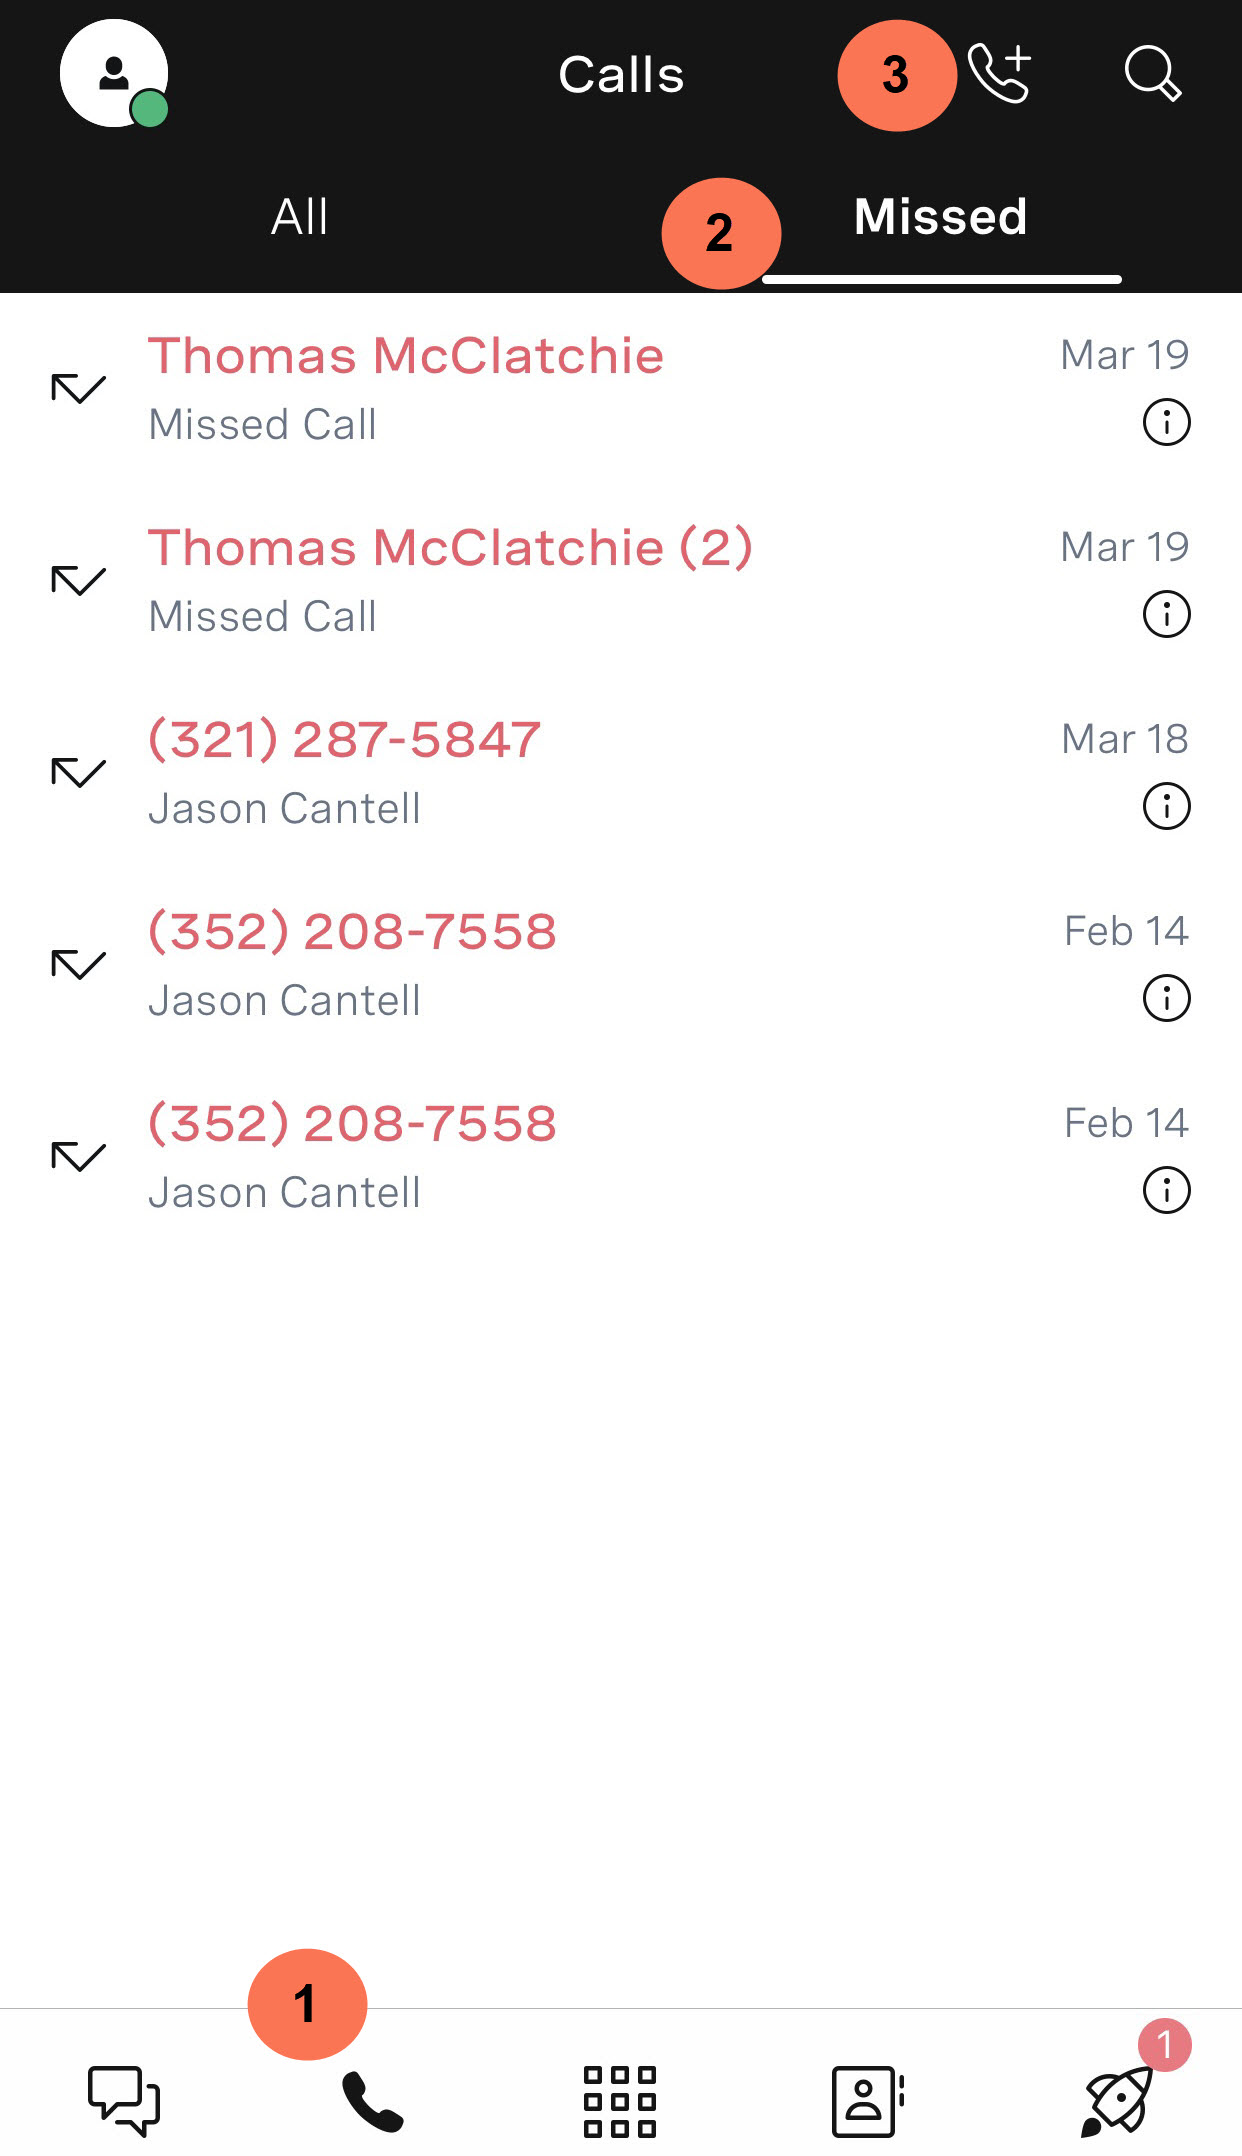
History/Call Tab
The History or Call History tab displays all recent calls, including those you made, received, and missed.
- To view only the calls you’ve missed, click the Calls tab at the bottom of the application.
- To view missed calls, click the Missed (2) tab.
- Initiate a new call from this page by clicking the New Call icon.
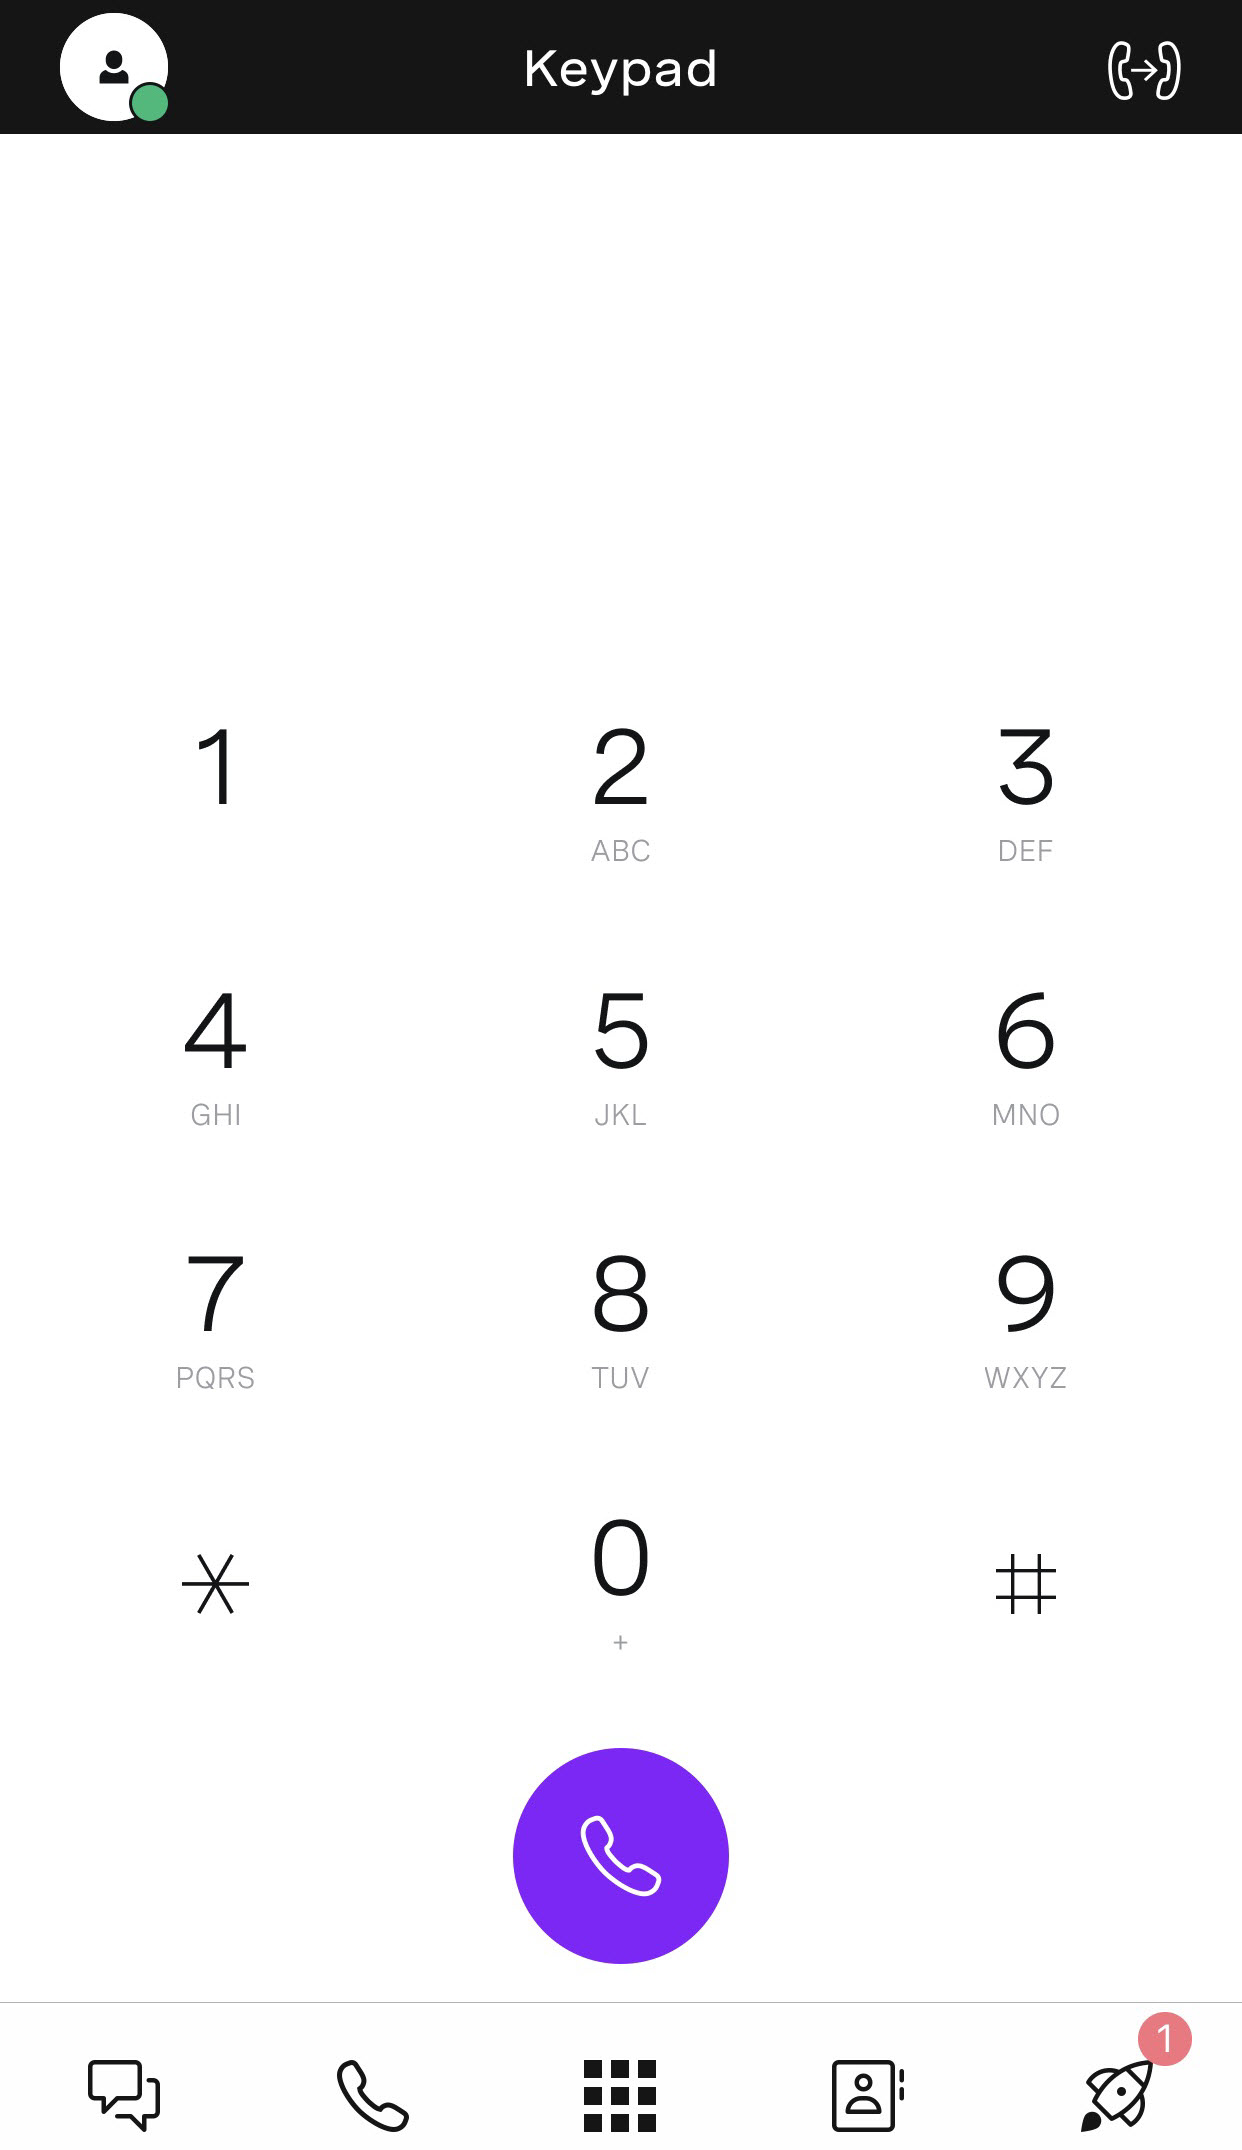
Dial Tab
The Dial tab works the same as the normal iPhone dialer and can be used for making calls to numbers not saved as contacts. It can also be used to enter special star codes that allow you to perform various actions, including retrieving group-parked calls or enabling Do Not Disturb.
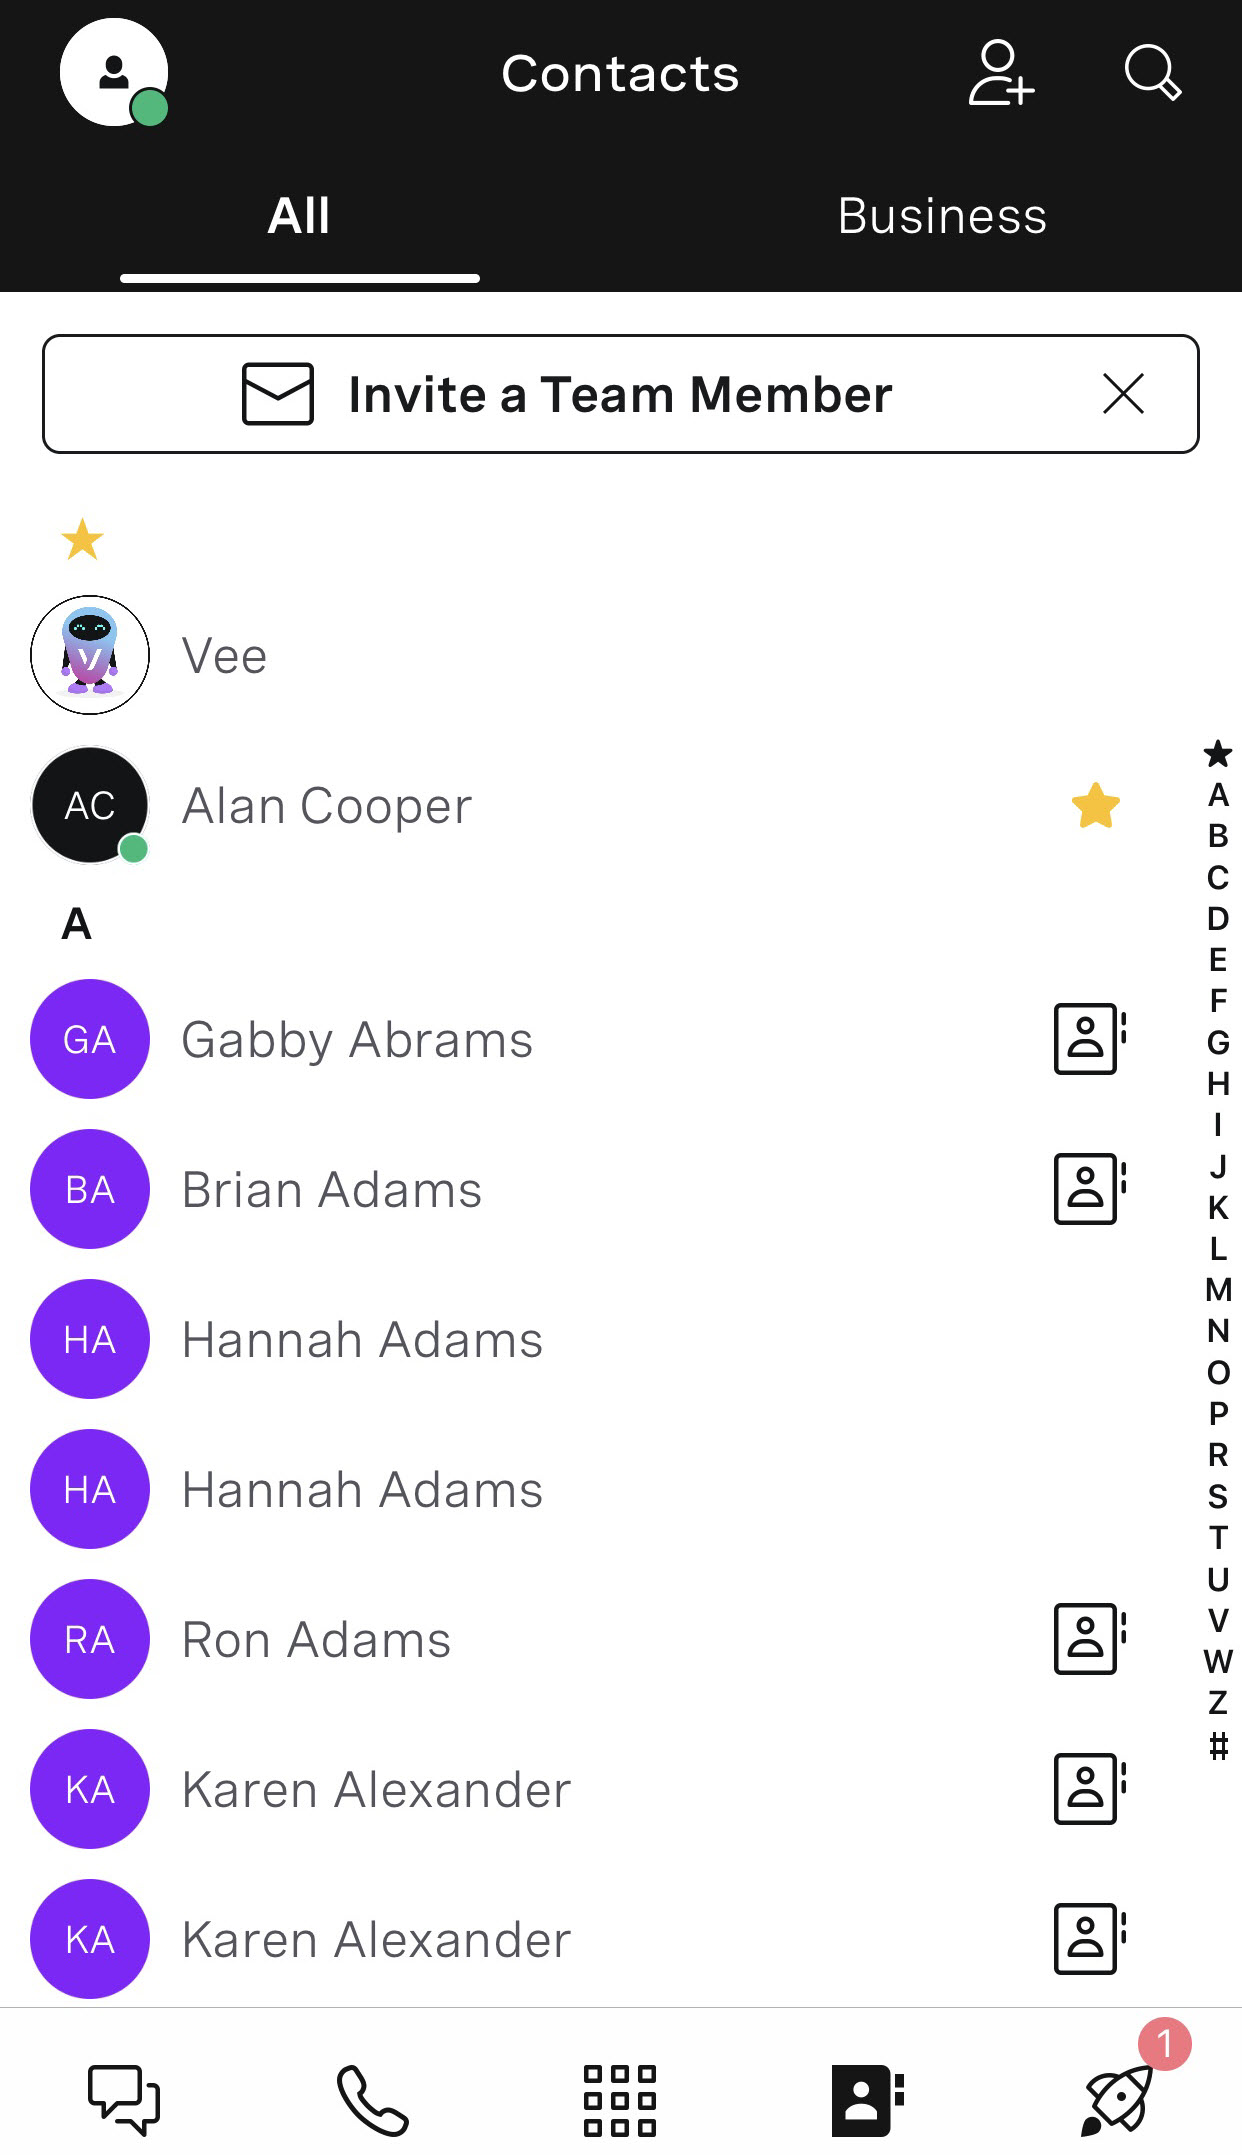
Contact Tab
The Contacts tab contains all of your saved contacts. It is broken down into two distinct areas. All Contacts, which displays your saved contacts, and your Business Contacts, which displays contacts listed in Mason’s directory.
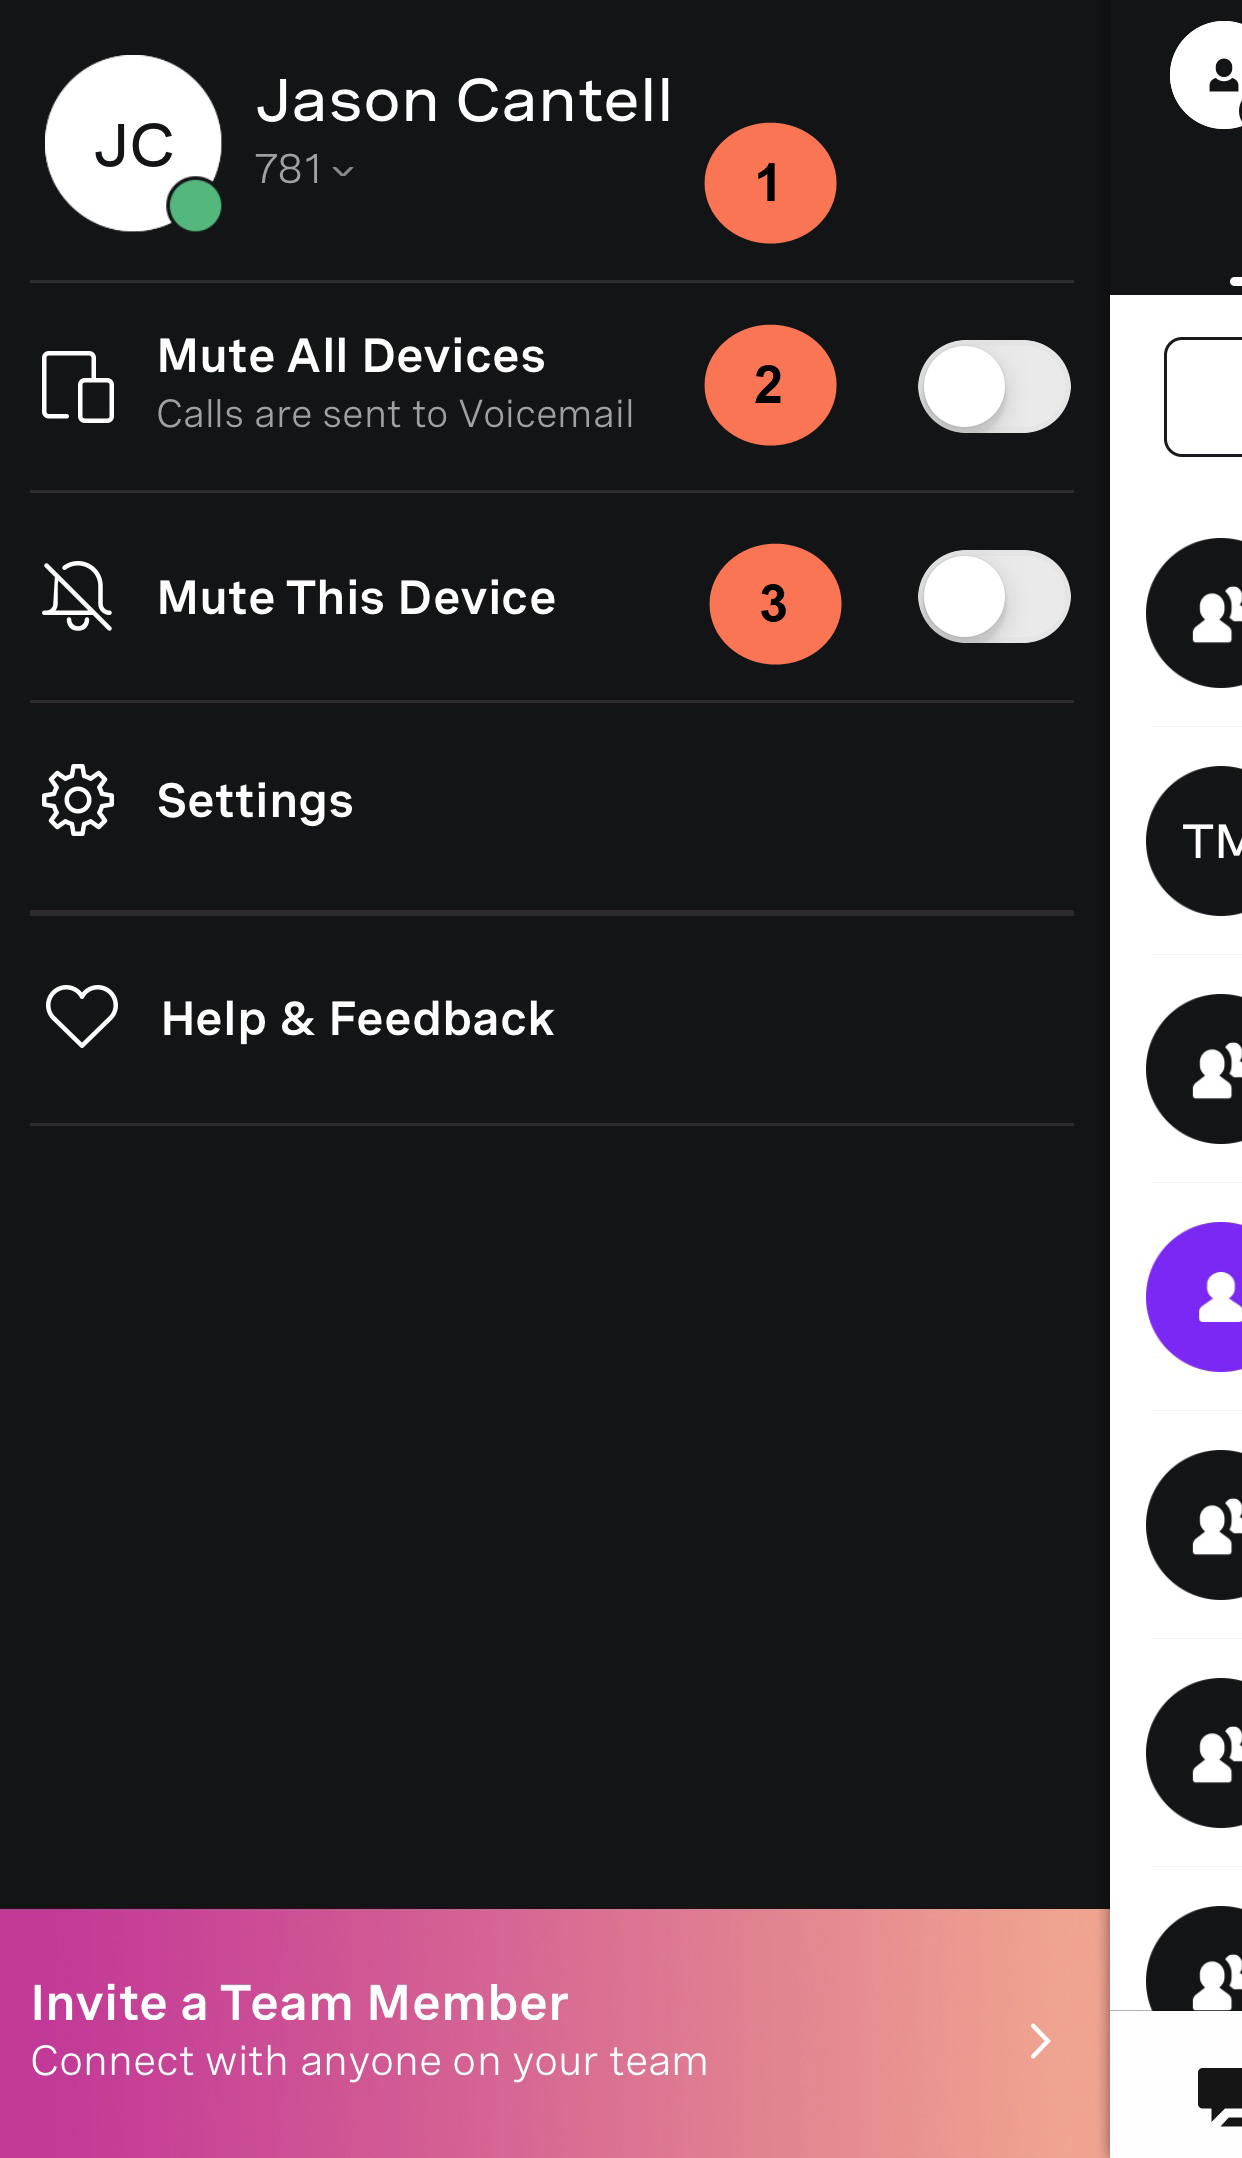
How to Access Your Quick Menu
On the left side of the dashboard, you will see your Profile icon displaying your initials. This is the mobile client’s quick menu, to access this menu:
Step 1
Click your Profile icon, and the menu window appears.
Core menu options include:
- Personal information, including your name and extension.
- Mute all Devices, which disables inbound calls to all of your extension-related devices as well as disables all notifications.
- Here you can mute calls for the mobile client. When this option is enabled, all incoming calls will no longer ring the mobile app but will ring other devices associated with your number or extension.
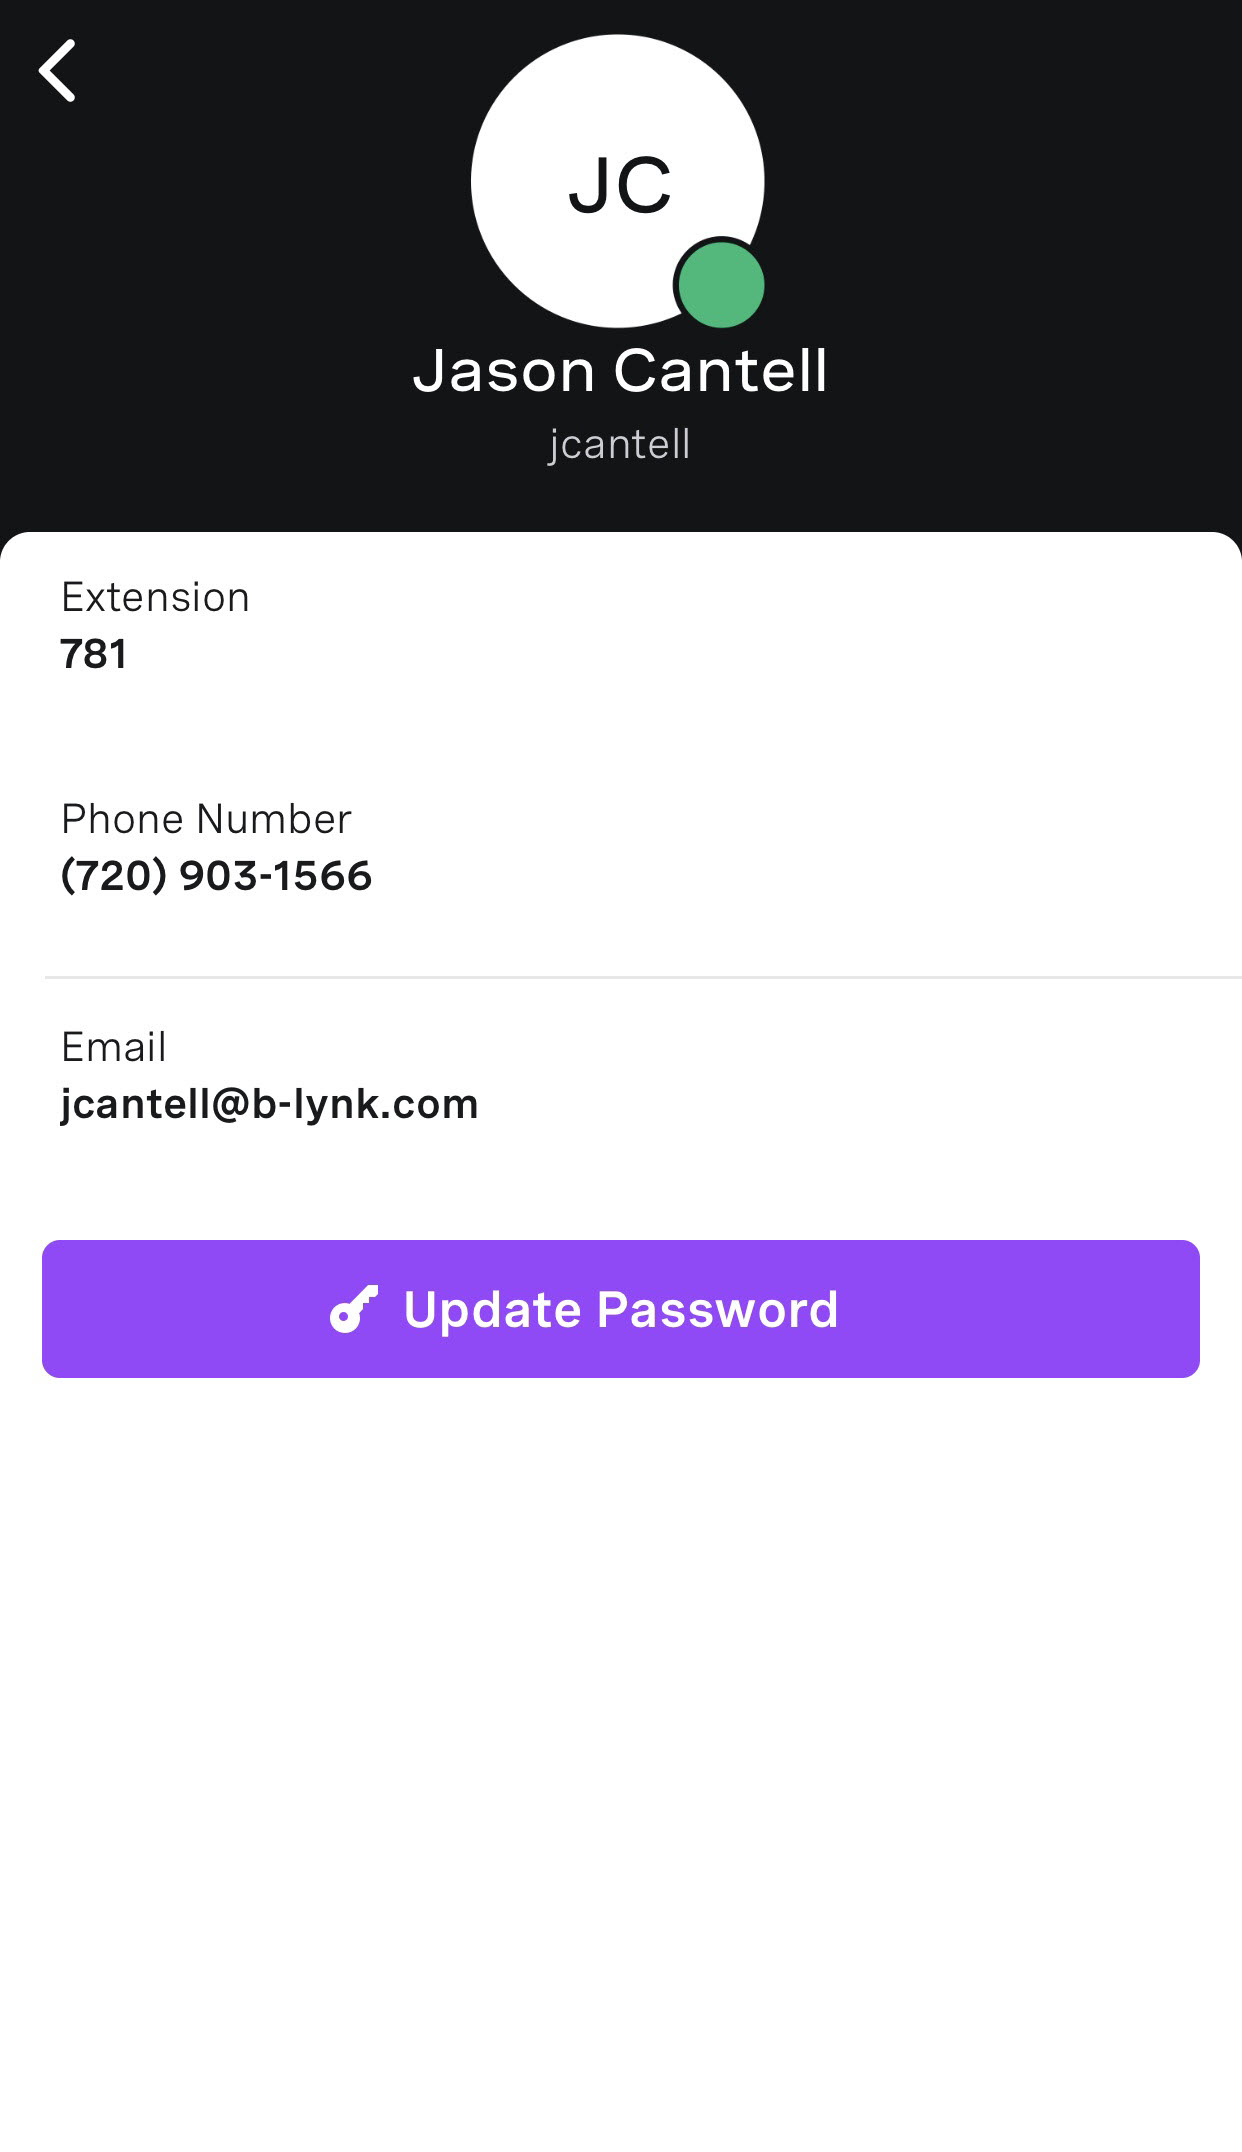
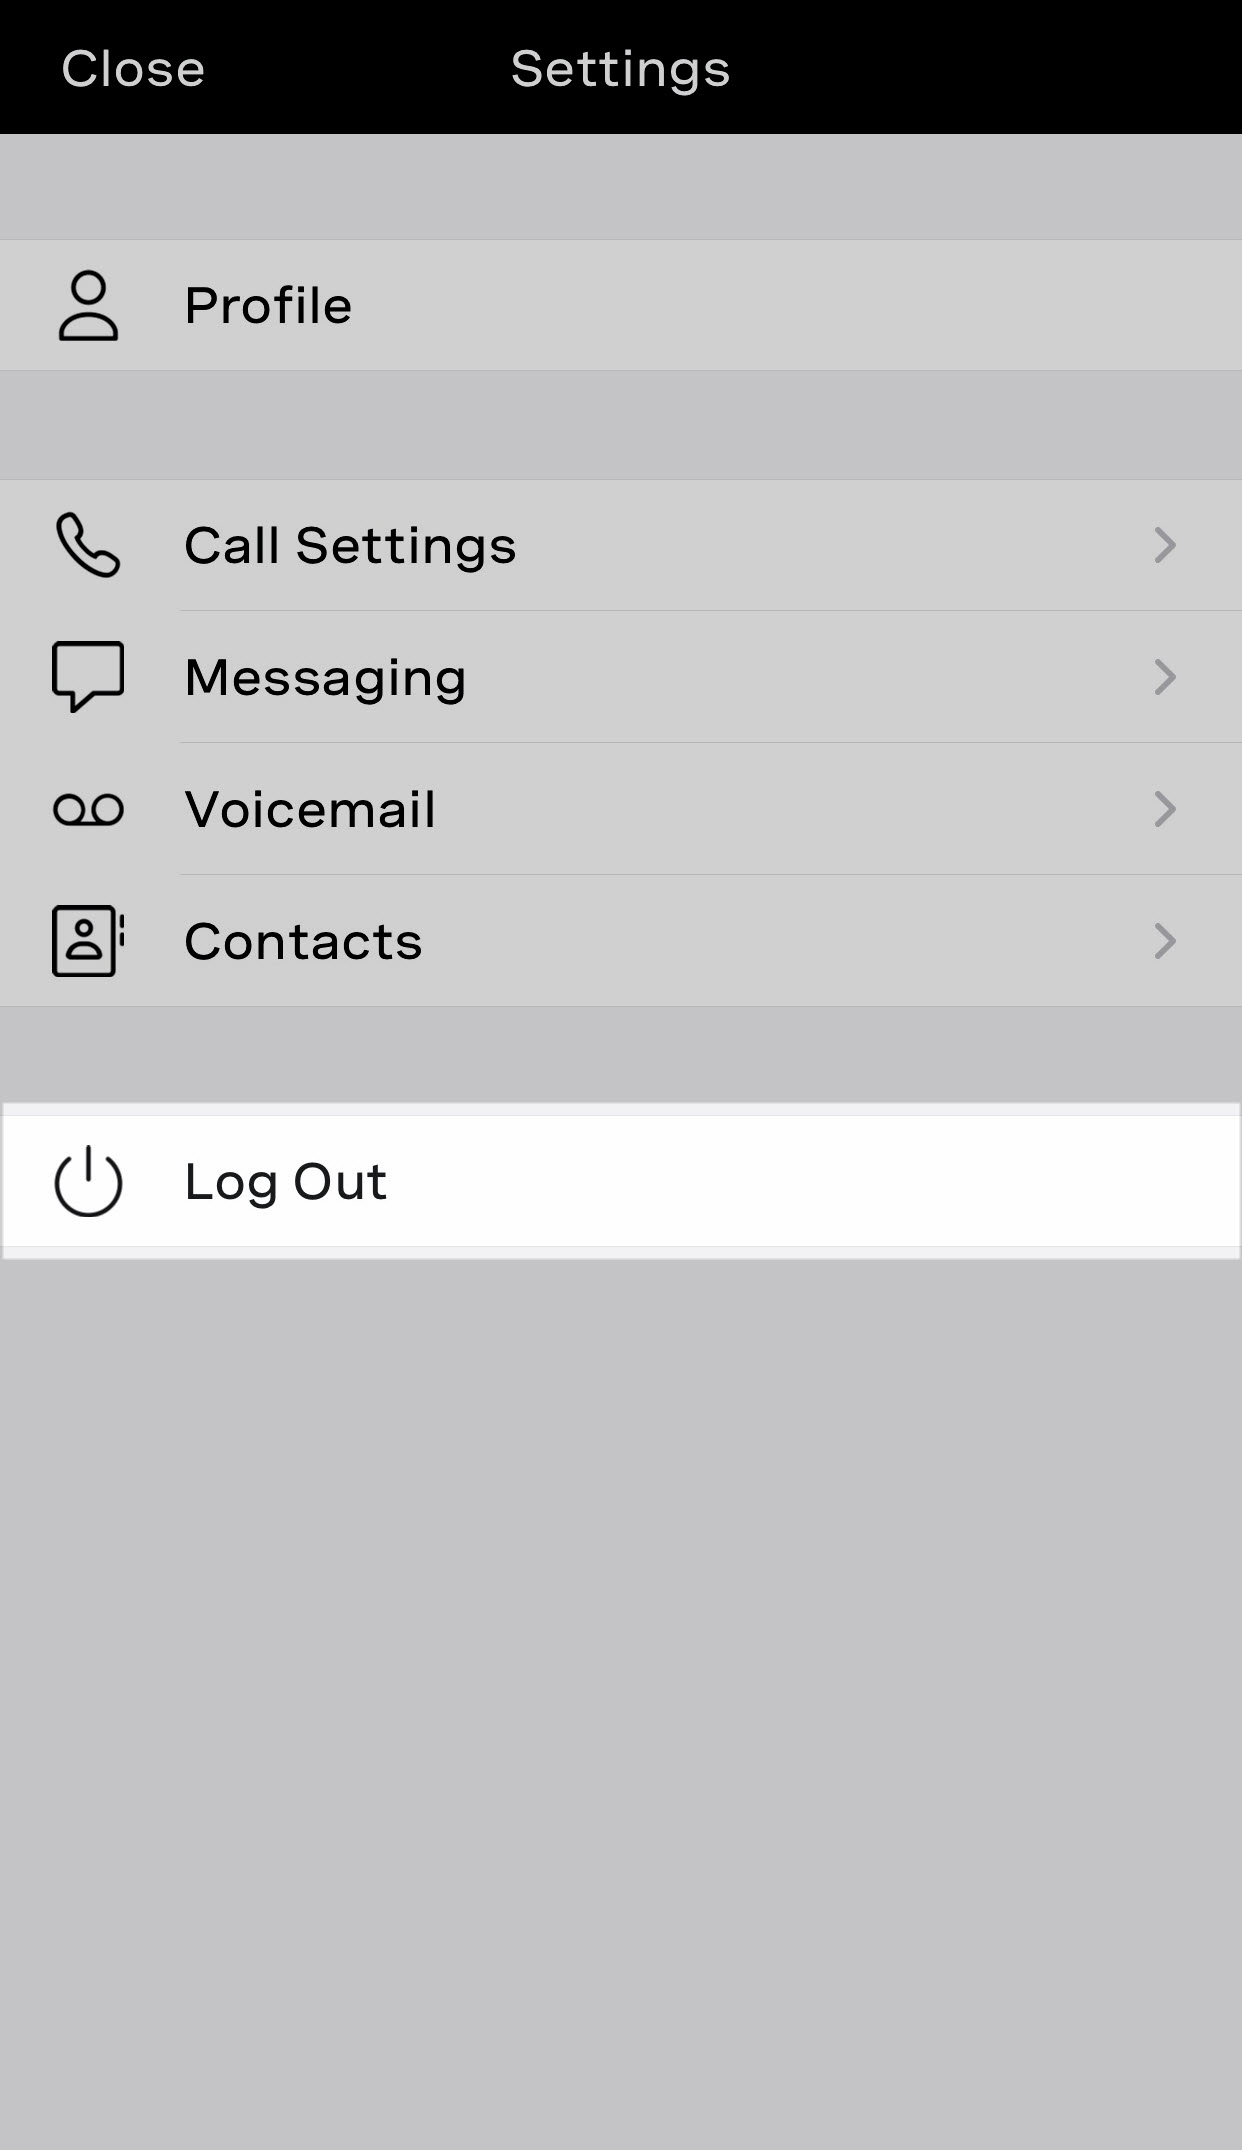
Access Your Settings
To access your settings from the Quick Menu, click Settings. Here, you have the option to configure the following areas.

Profile
Here you can see and edit your contact information, username, password, and security questions.
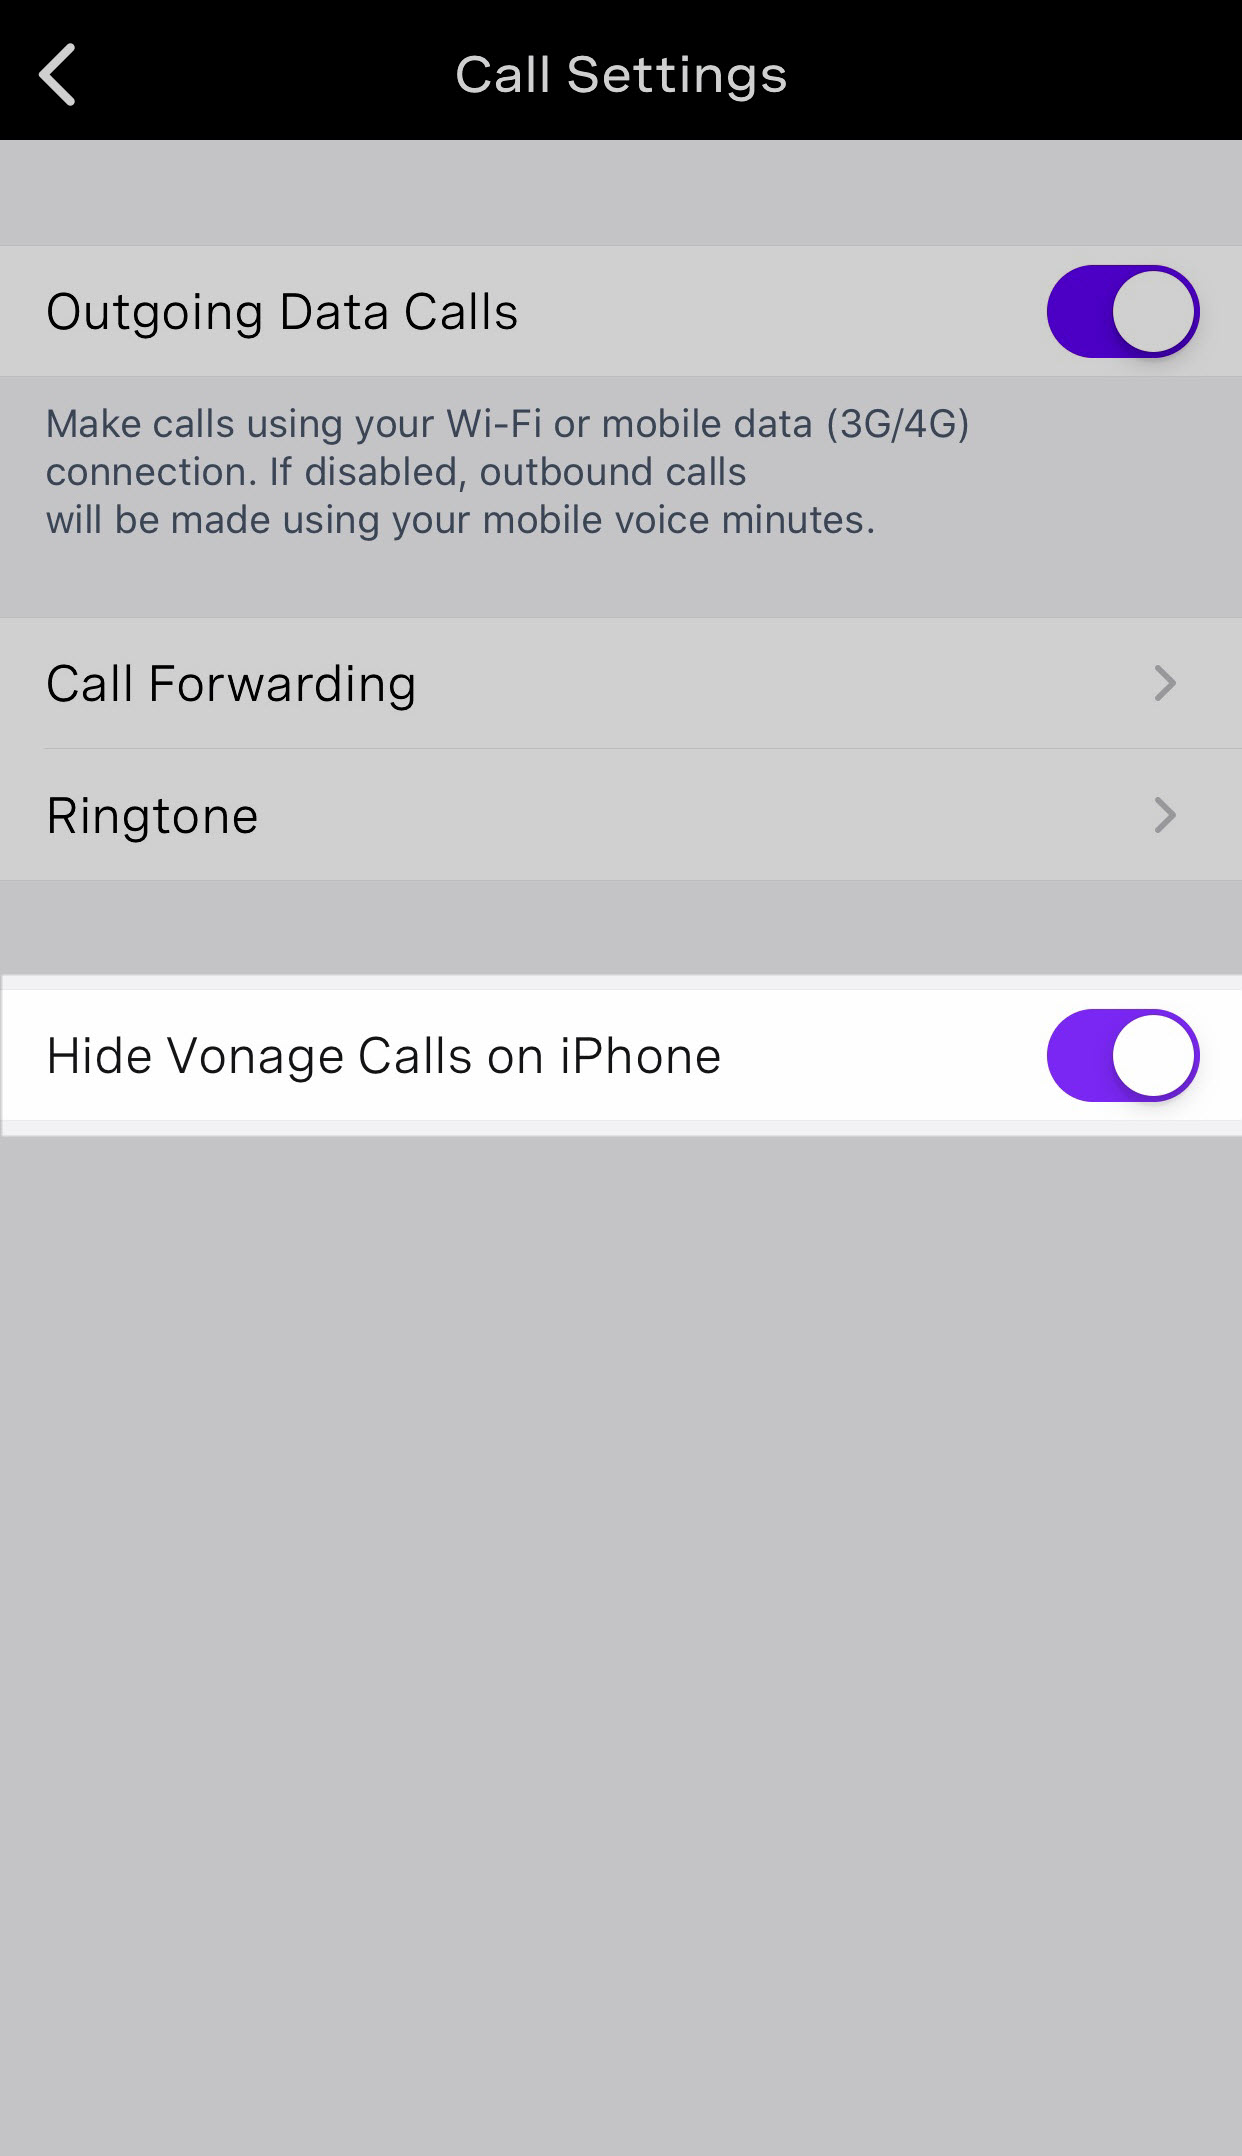
Call Settings
This tab gives you access to configure certain calling features for your device, including:
Outgoing Data Calls
When enabled, you can tell your phone to either use Wi-Fi or the phone’s data to make calls. If it is disabled, calls will be made using your cellular data.
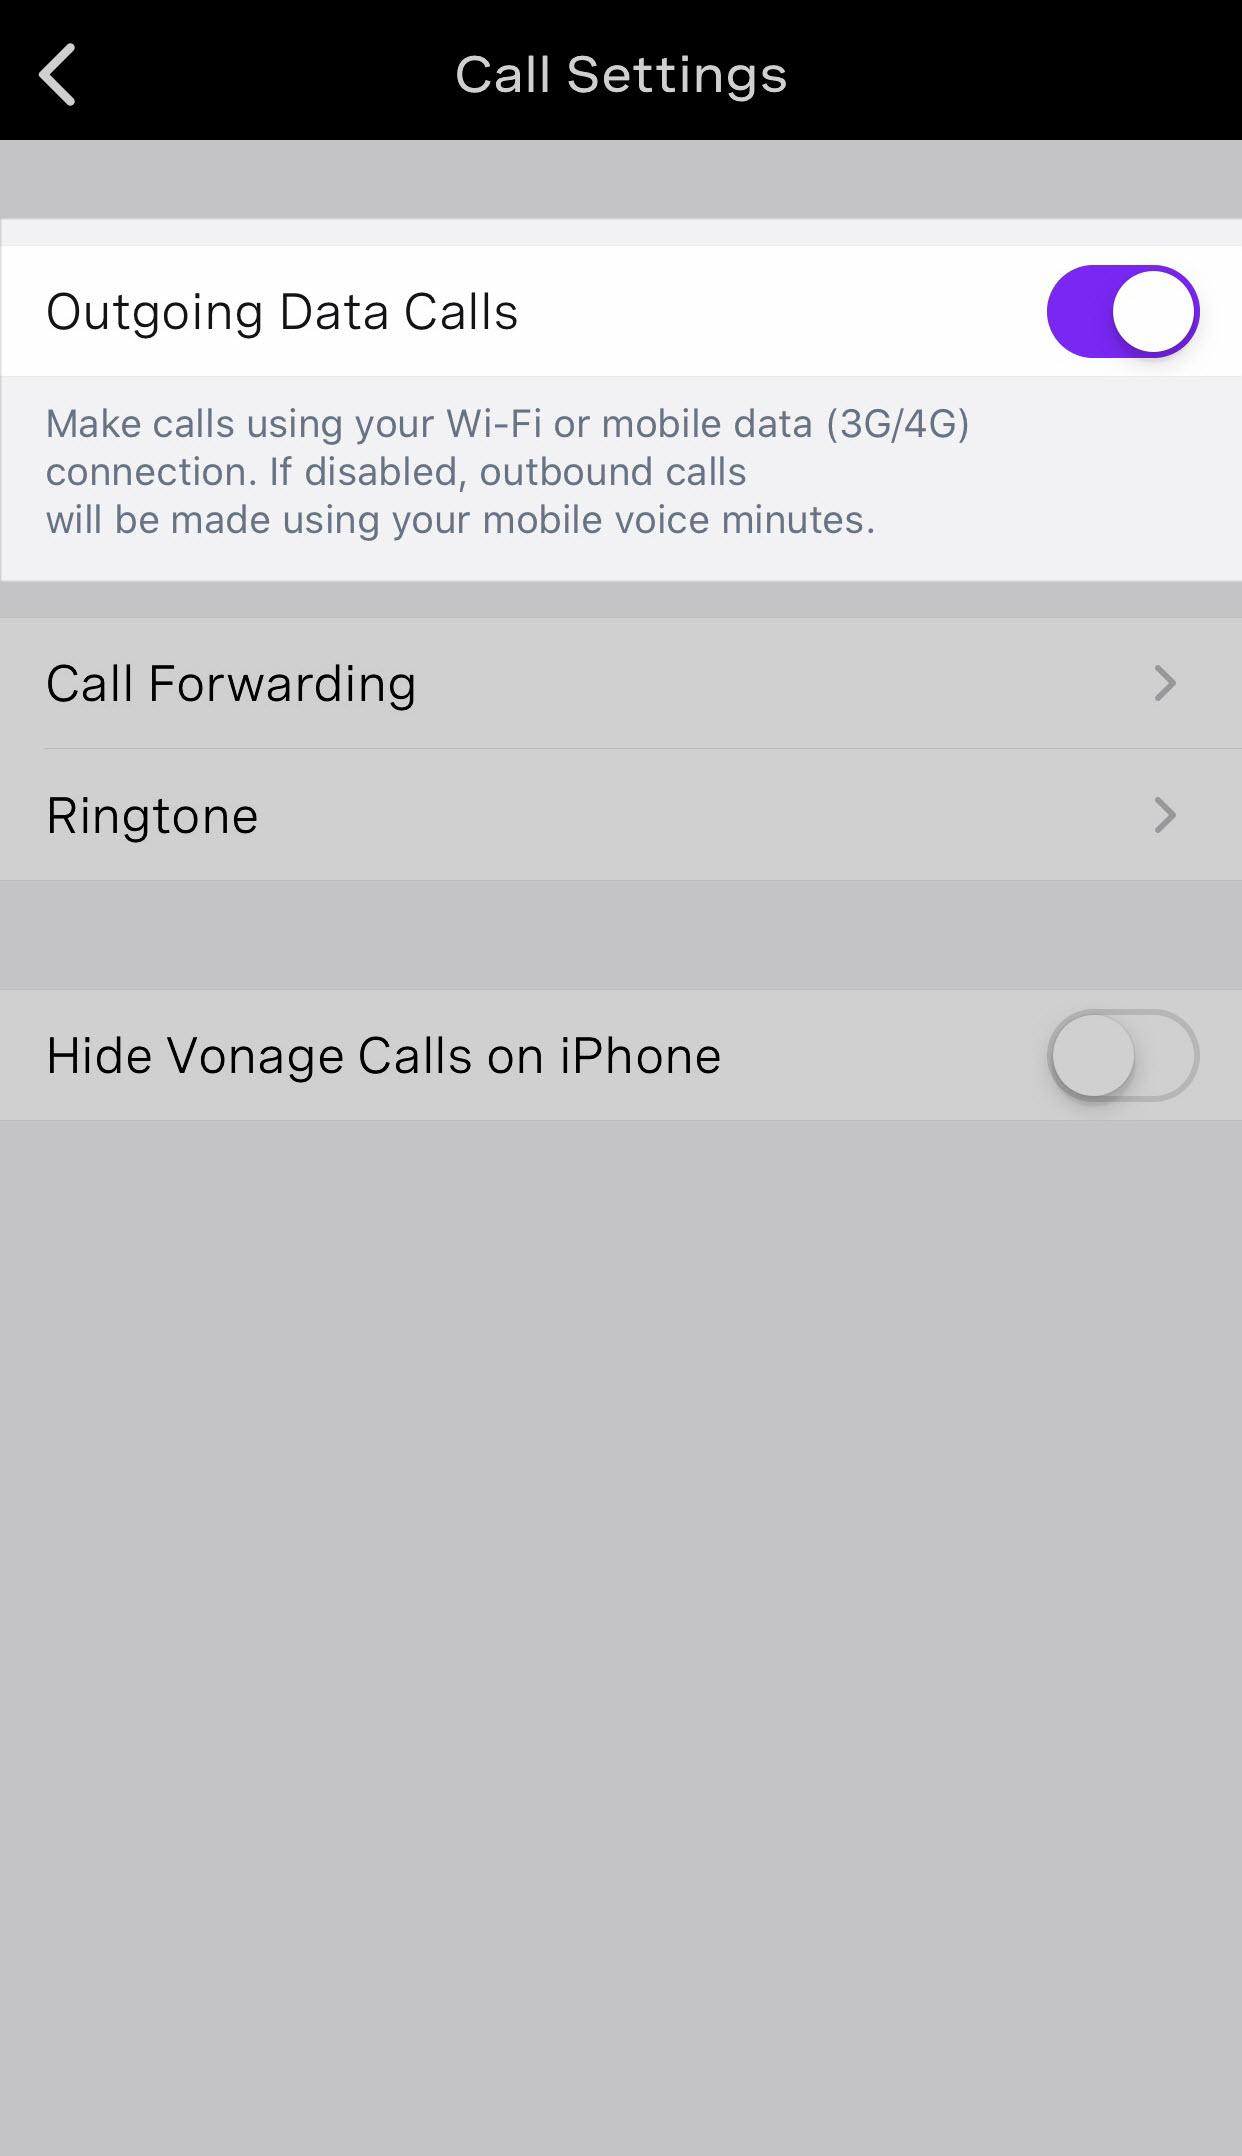
Call Forwarding
Call Forwarding allows you to choose how to direct calls when you’re not available. For the purpose of this guide, we will demonstrate how to Forward All Calls. You can call forward in the following ways:
Send to Voicemail
This enables you to call to be sent directly to your voicemail if there is no answer after a certain time period. To enable this feature:
- Click the Settings icon.
- Choose the length of time from the drop-down menu.
- Hit back to move back to the Call Forwarding menu.
- Click Save to save your changes.
Forward All Calls
This allows you to forward incoming calls to an outside number. Most of the time, your mobile phone is the forwarded device. To enable this feature:
- Click the Settings icon.
- Enter a valid 10-digit number.
- Select the Caller ID to use, this is usually the default Originating Number option.
- Hit back to move back to the Call Forwarding menu.
- Click Save to save your changes.
Follow Me
Follow Me allows you to direct incoming calls to ring up to five numbers in a sequence for a duration that you specify. To enable this feature:
- Click the Settings icon.
- Click Add and enter a valid 10-digit number.
- Proceed to select the number of seconds you want this number to ring for.
- When complete, click the back button.
- Once complete, proceed to provide the no-answer number. The default option is usually the best, as this is your extension.
- Finally, select the Caller ID to use. This is typically the default Originating Number option. Click Save when complete.
Simultaneous Ring
Simultaneous Ring allows you to ring multiple devices at once. To enable this feature:
- Click the Settings icon.
- Click Add and enter a valid 10-digit number.
- Proceed to select the number of seconds you want this number to ring for.
- When complete, click the back button.
- Once complete, proceed to provide the length of time it will ring before going to voicemail.
- Finally, select the Caller ID to use. This is usually the default Originating Number option. Click Save when complete.
Ringtone
Ringtone allows you to choose the specific ringtone for this Vonage app. Click the Ringtone tab to view your options. Your selected ringtone will be shown with a checkmark on the right-hand side.

Hide Vonage Calls on iPhone
This option allows you to hide Vonage calls on the iPhone.
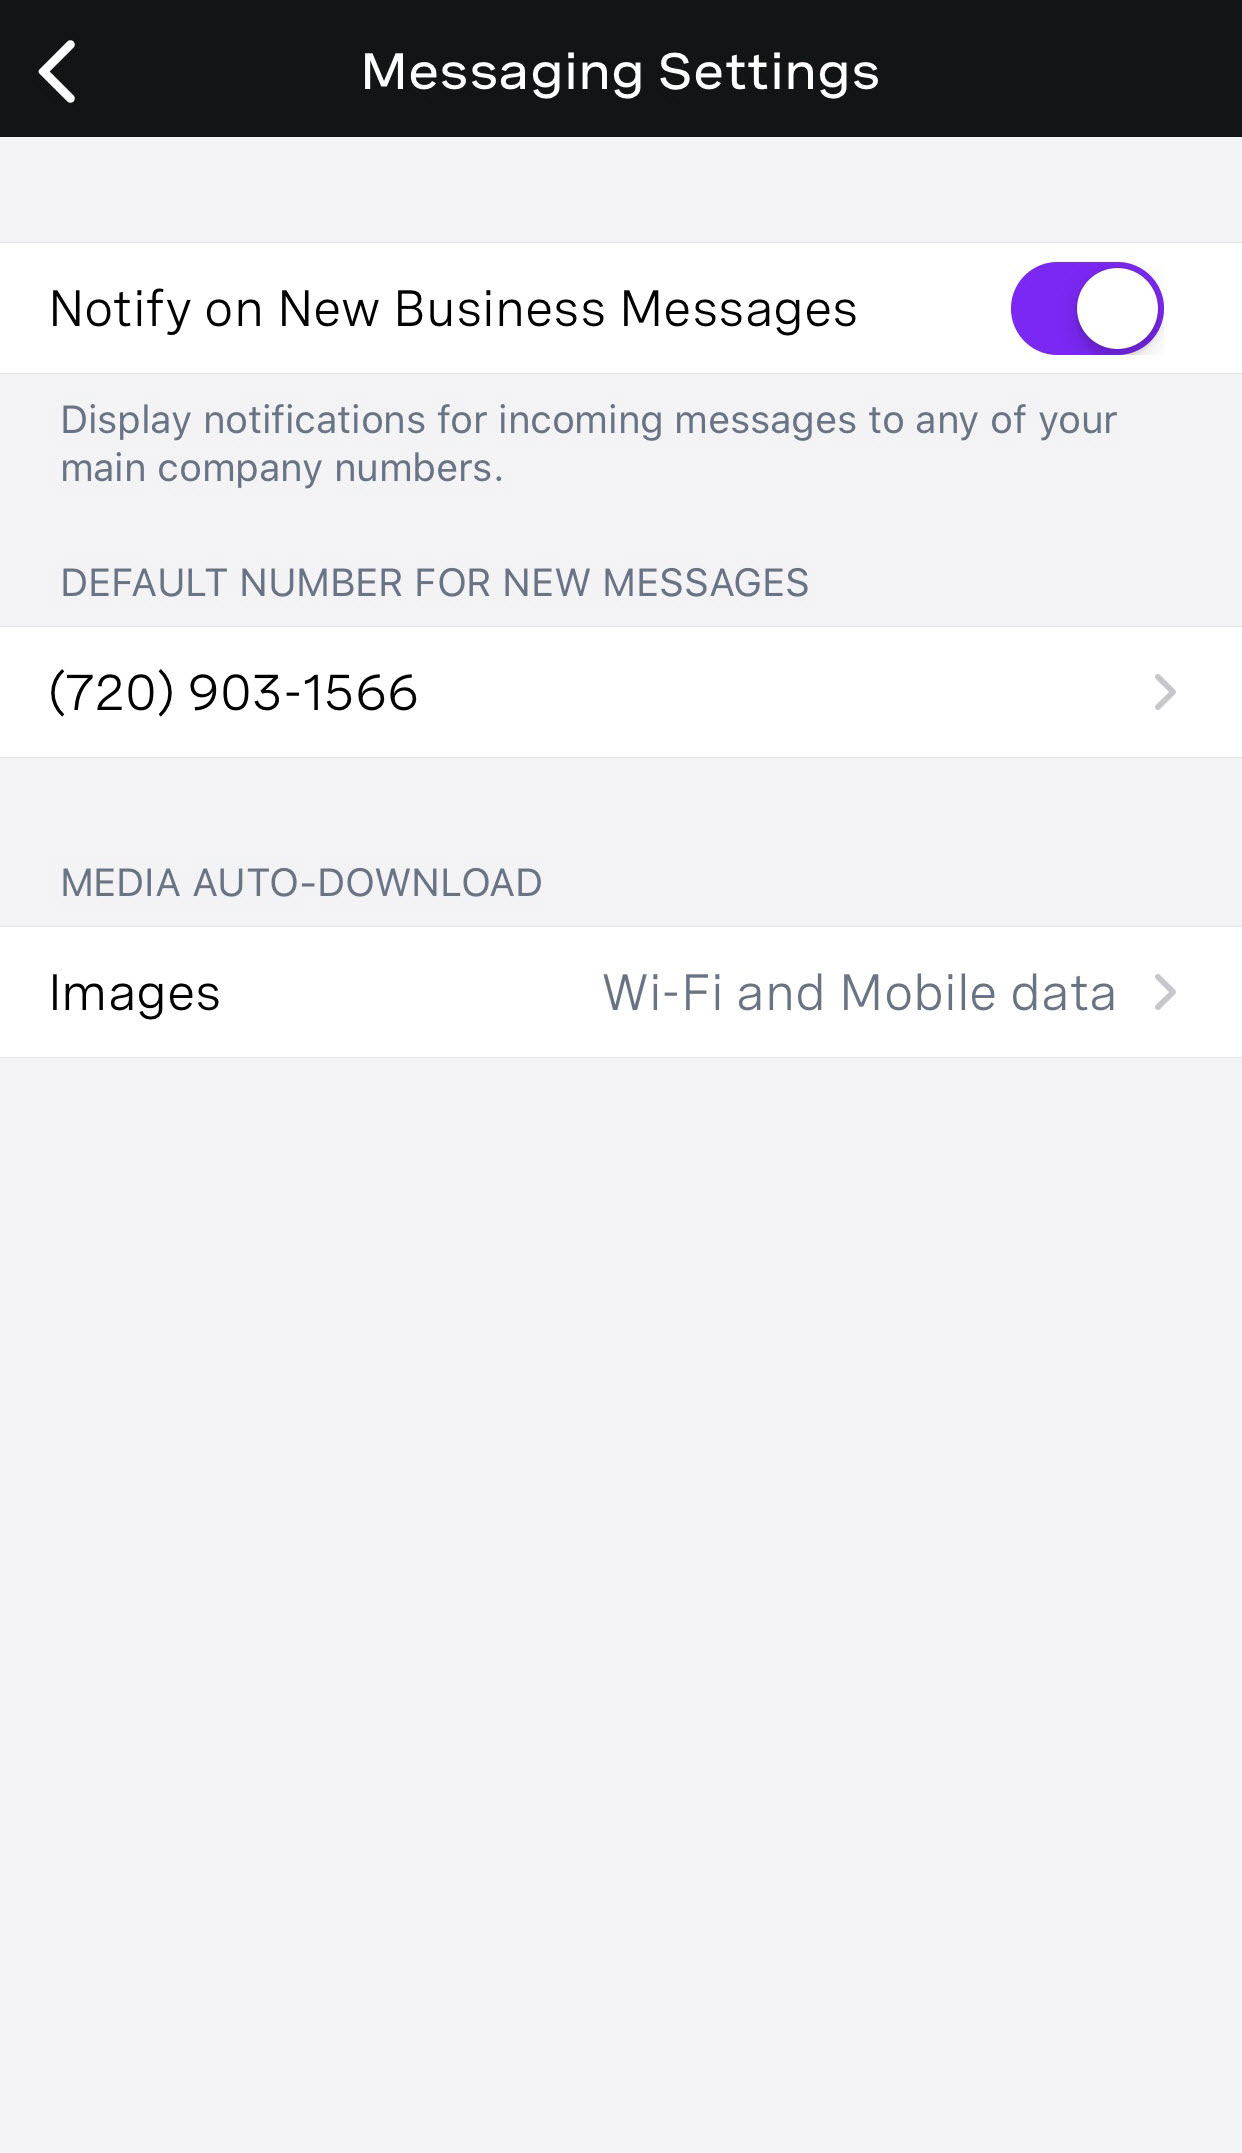
Messaging
Messaging allows you to choose whether or not to be notified of new business messages. Choose the default numbers for business messages. Enable images to auto-download given the data type.
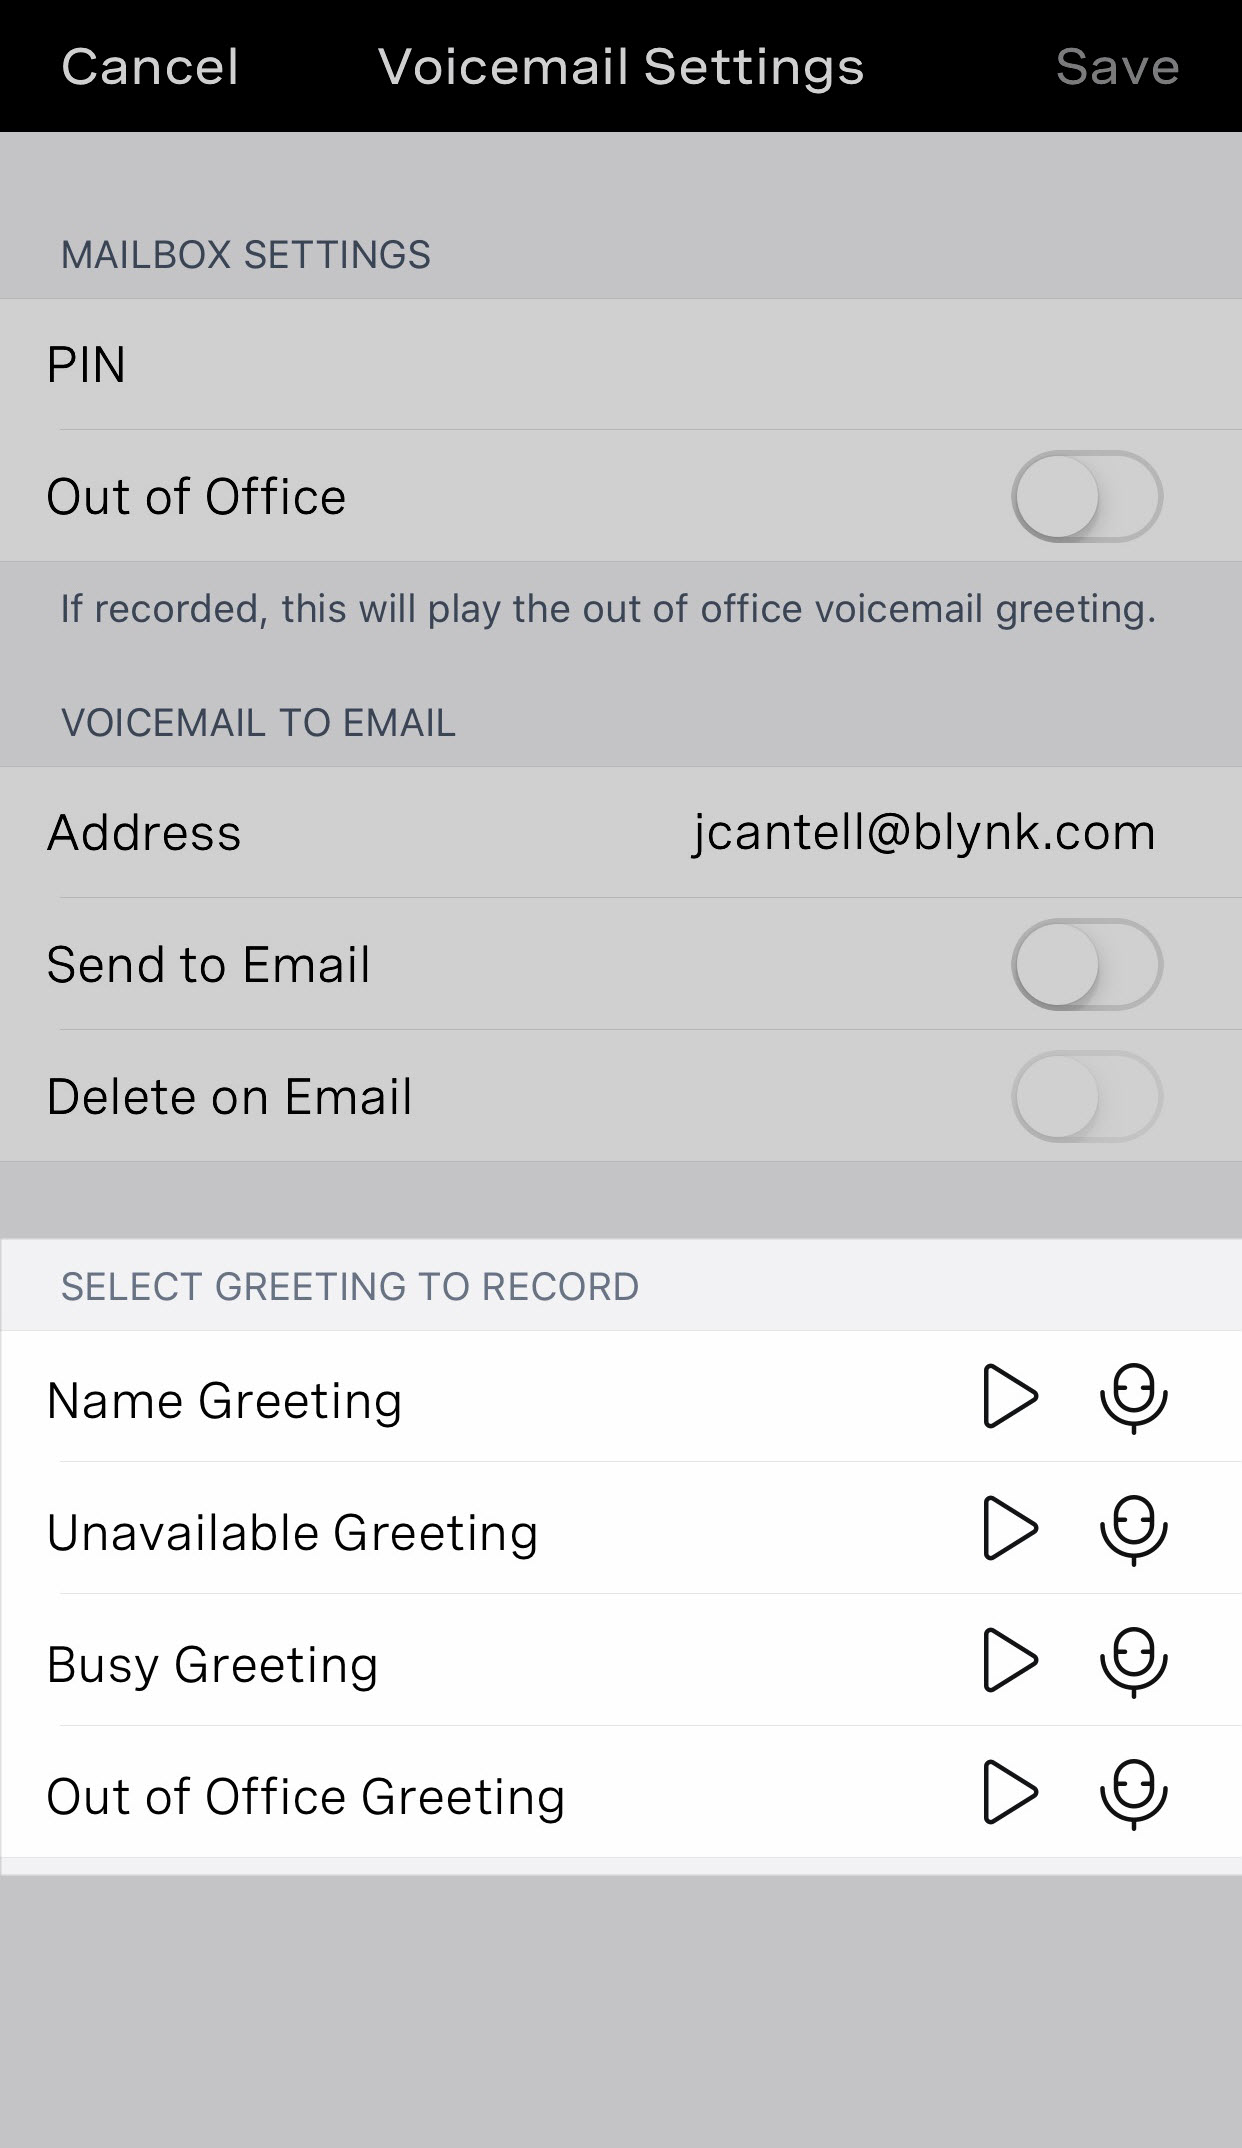
Voicemail
The Voicemail settings allow you can view your voicemail options.
Mailbox-Settings
In the Mailbox Settings, you can update your pin number and enable the Out of Office Service. When enabled, this will play your out-of-office message.
Voicemail to Email
Under Voicemail to Email, you can enable the application to send a notification to your email address when a new voice message arrives.
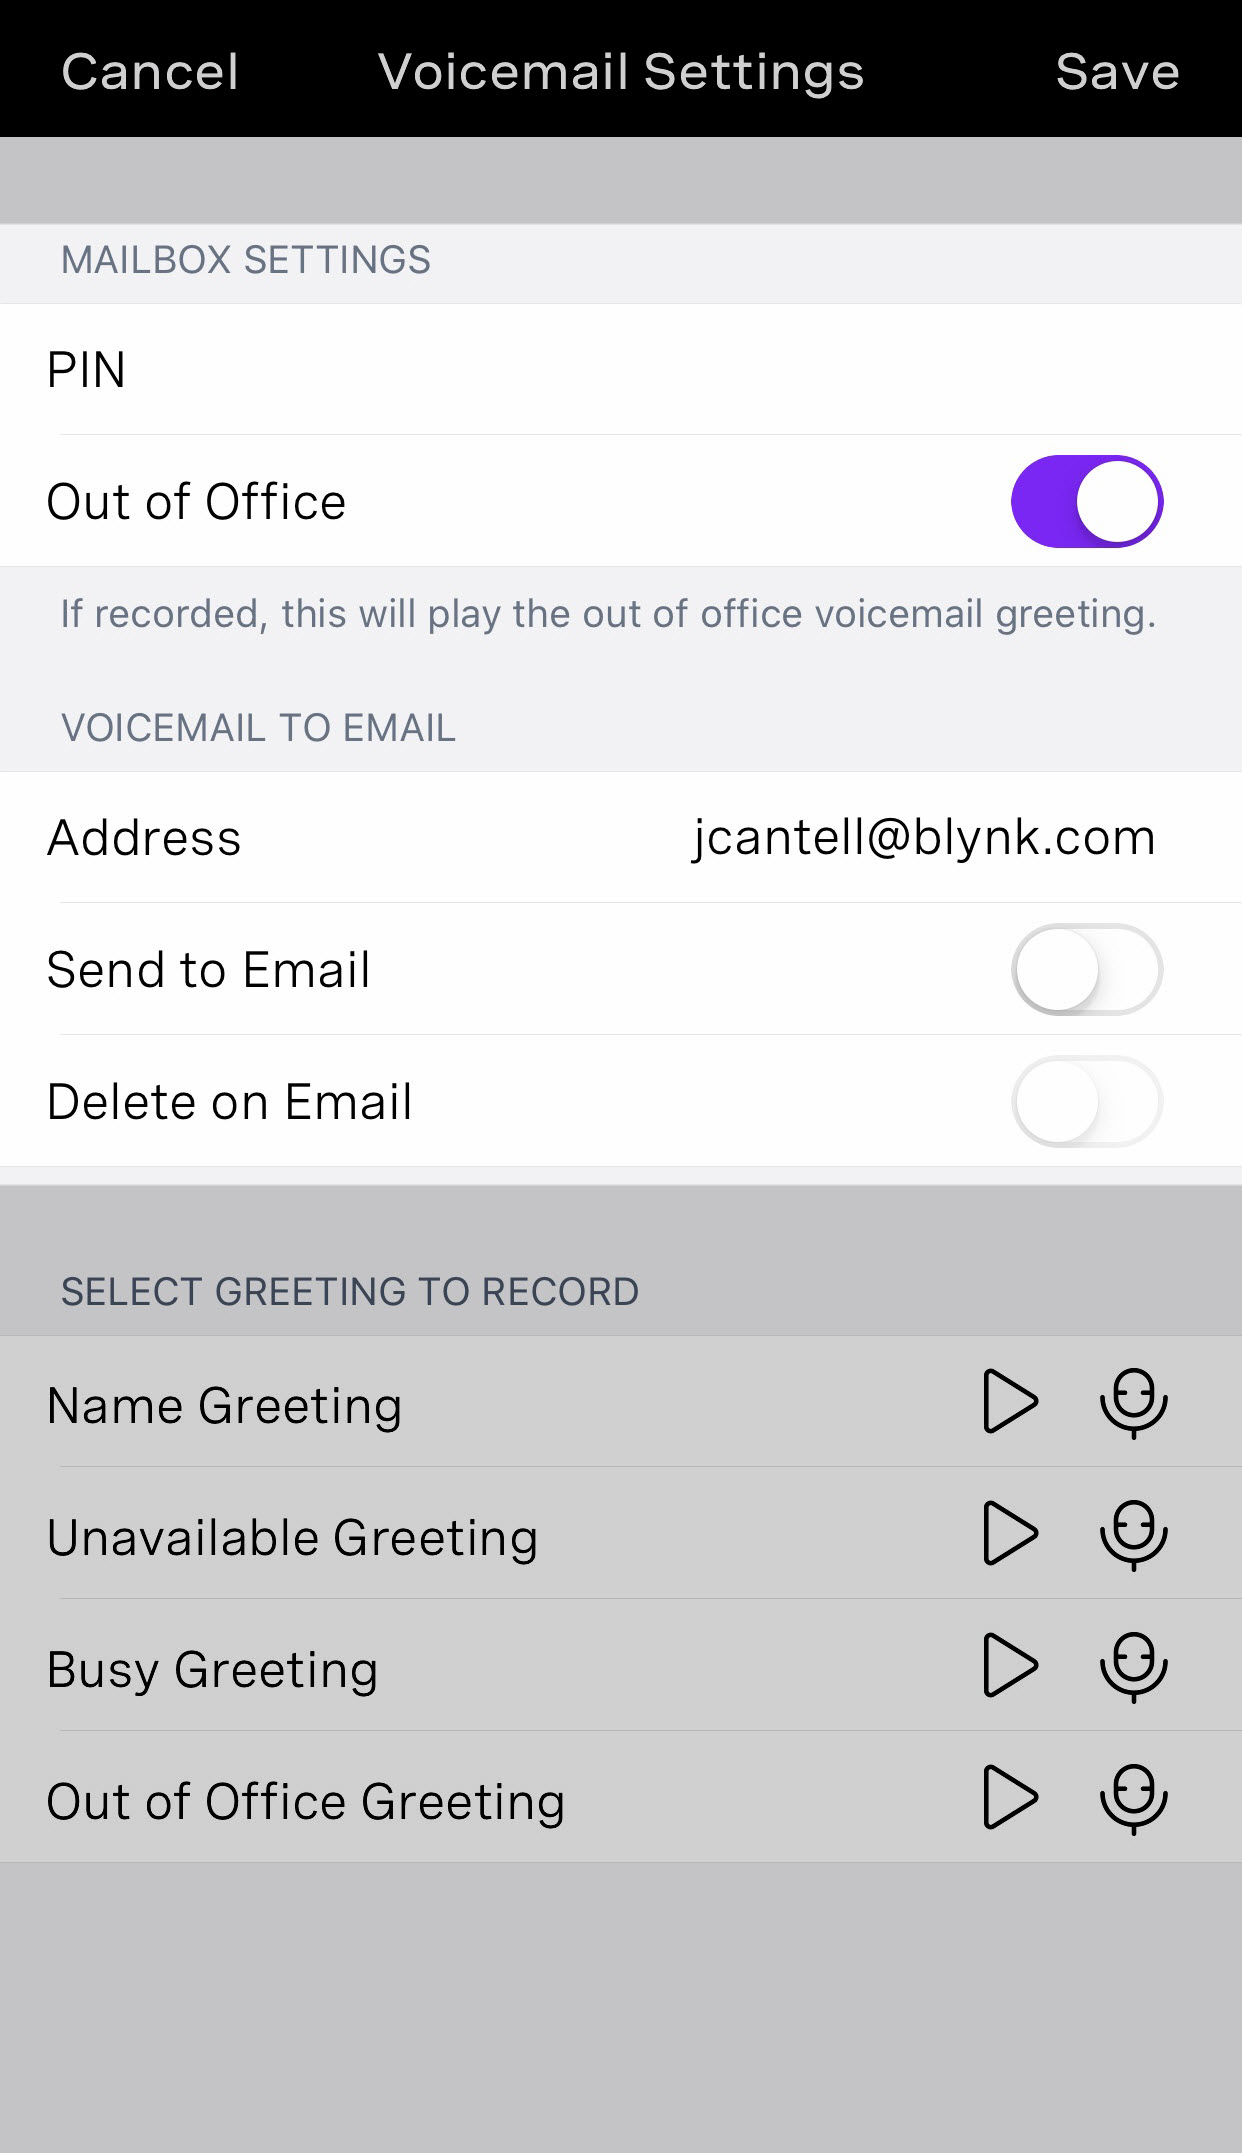
Greetings
Within the Greetings settings, you can record a greeting for the following greeting types:
- Name Greeting
- Unavailable Greeting
- Busy Greeting
- Out of Office Greeting
To record a greeting for one of these items:
- Click the Microphone icon.
- When ready, click Record. Begin relaying your message. When complete, click Stop. You can either listen to it or re-record it.
- If you are satisfied with the way it sounds, click Use. The recording will now be used for the greeting you chose.
Contacts
Within your Contacts Settings, you can add your device contacts to Vonage Business. This will make your phone contacts available on all devices and platforms used. To add contacts, click the Contacts tab. Proceed to click Add Business Contacts. Your contacts will appear. Navigate and select the ones you want to add, and click Done when completed.

Logout
The logout area allows you to log out of the Vonage Business Communications mobile app.
How to Place Calls
There are several ways to place outbound calls using the mobile app.
Place a Call From a Contact
Step 1
Find the contact in either your Favorites list or by searching your Directory.
Step 2
Select their name.
Step 3
Click the Call icon.
You can also initiate a call from a Chat Message by clicking the Call Phone icon from the chat window.
Place a Call Using Your Dial Pad
Step 1
Select the Dial pad tab from the Main Menu.
Step 2
Enter a phone number.
Step 3
Click the green Dial button.
Blind Transfer
To transfer a call during an active call:
Step 1
Click Transfer.
Step 2
Select Blind Transfer.
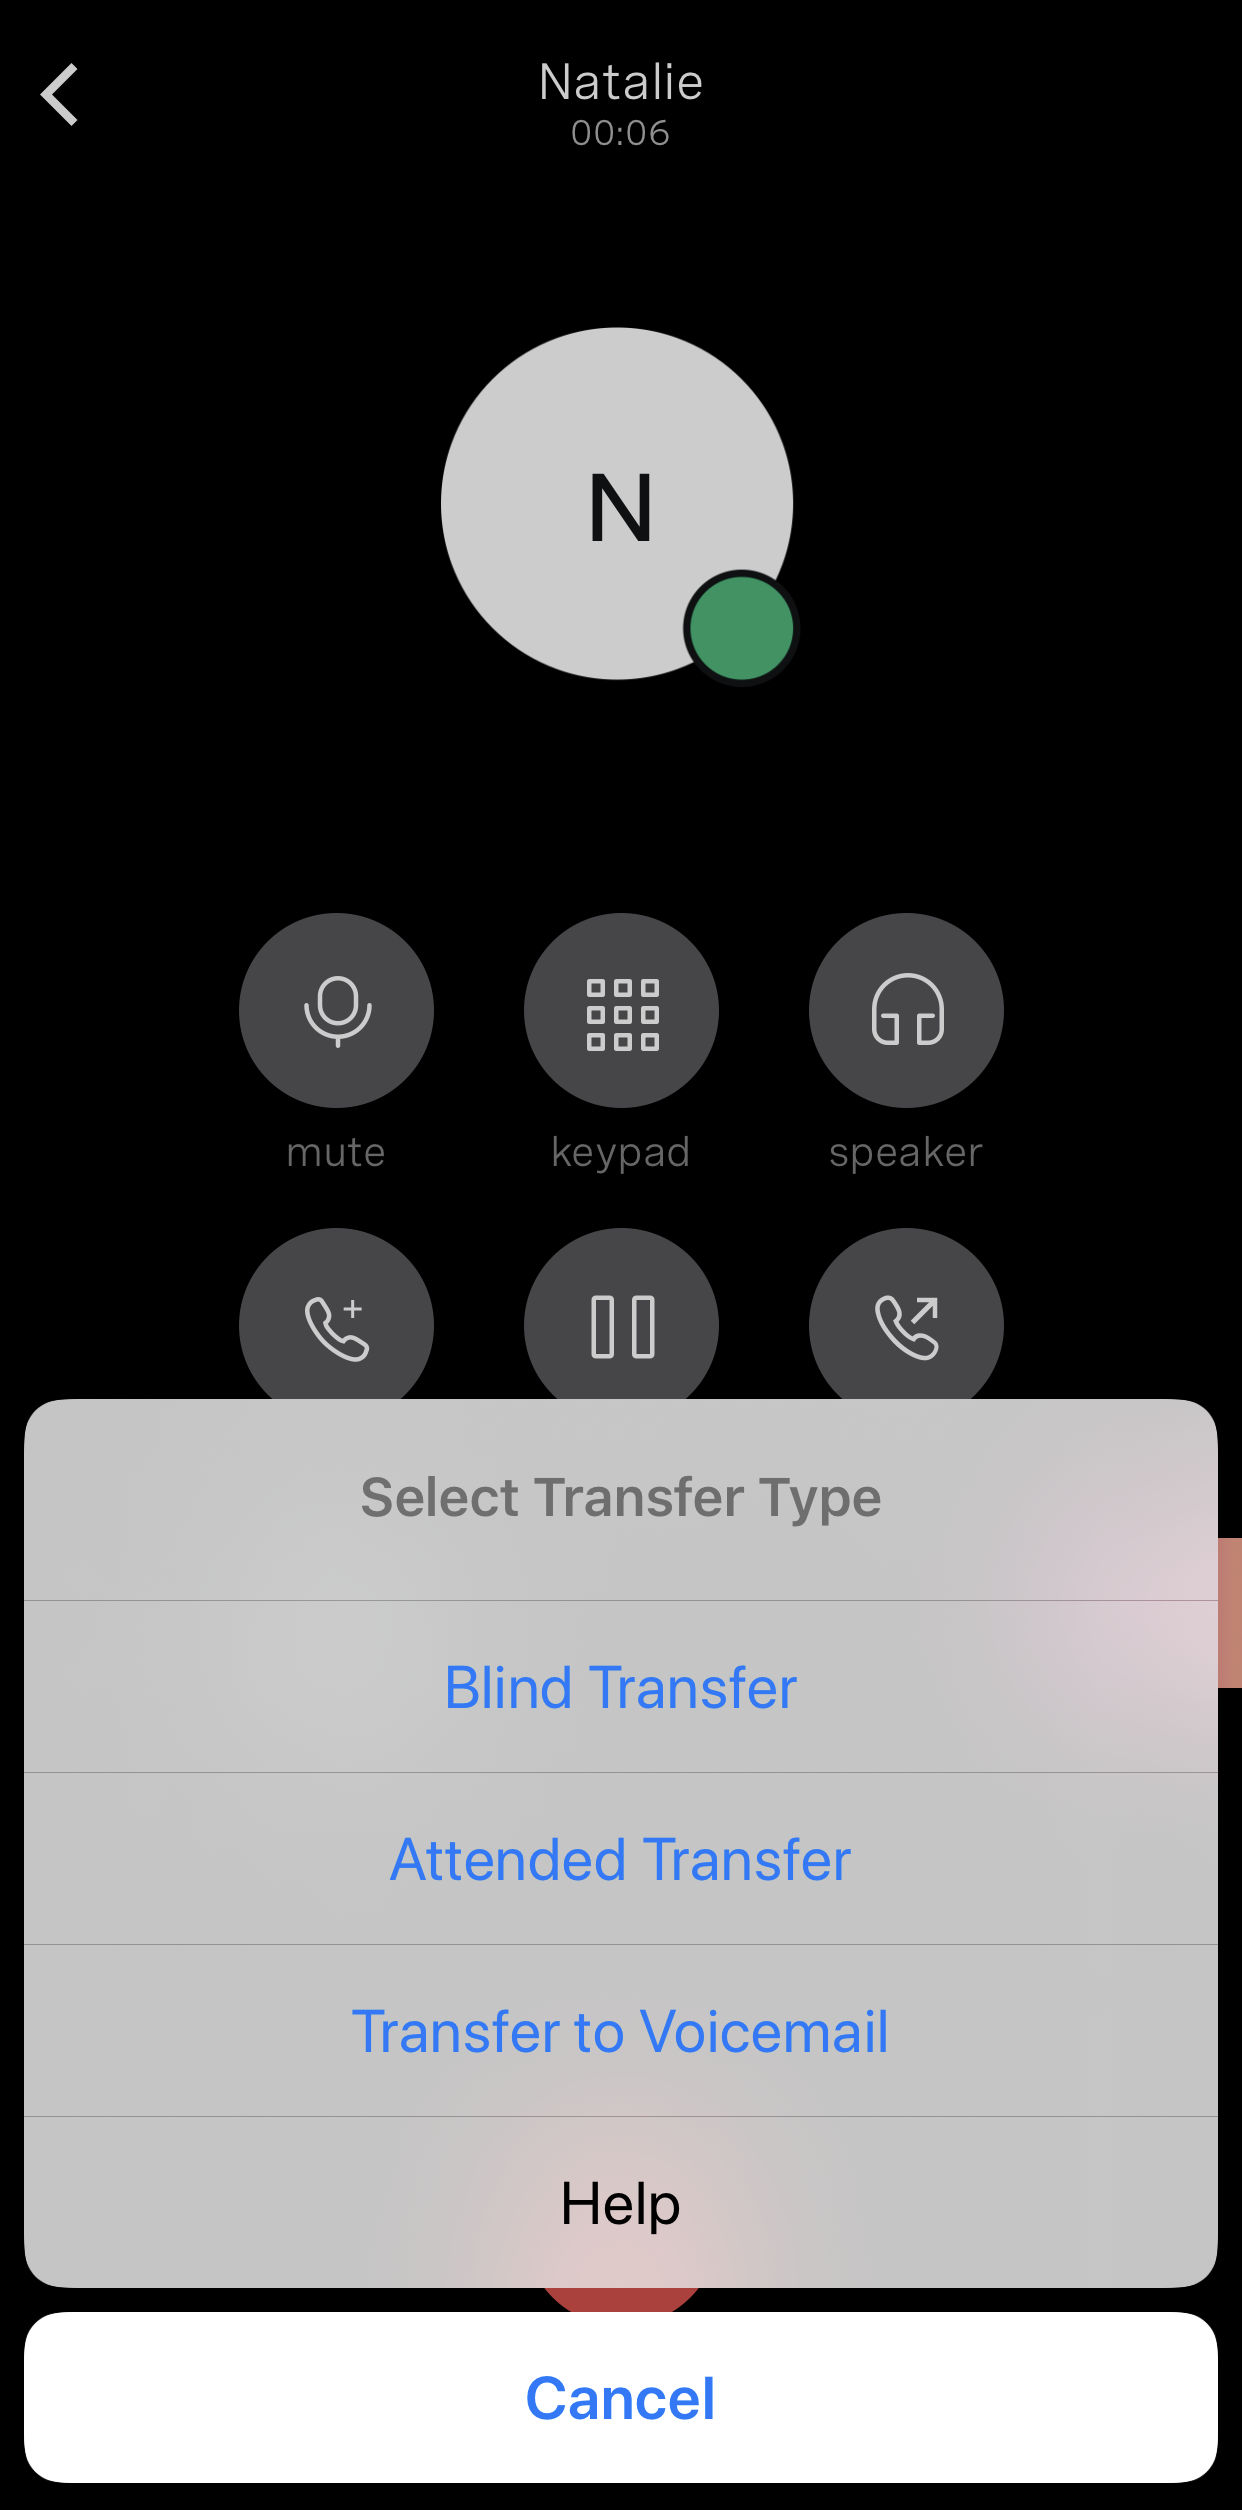
Step 3
You can transfer the call to a contact within the directory by searching and clicking the contact you wish to transfer the call to. Or, you can transfer the call to an ad-hoc number by using the dial pad.
Step 4
Once selected or entered in the dial pad, the call is transferred to the recipient.
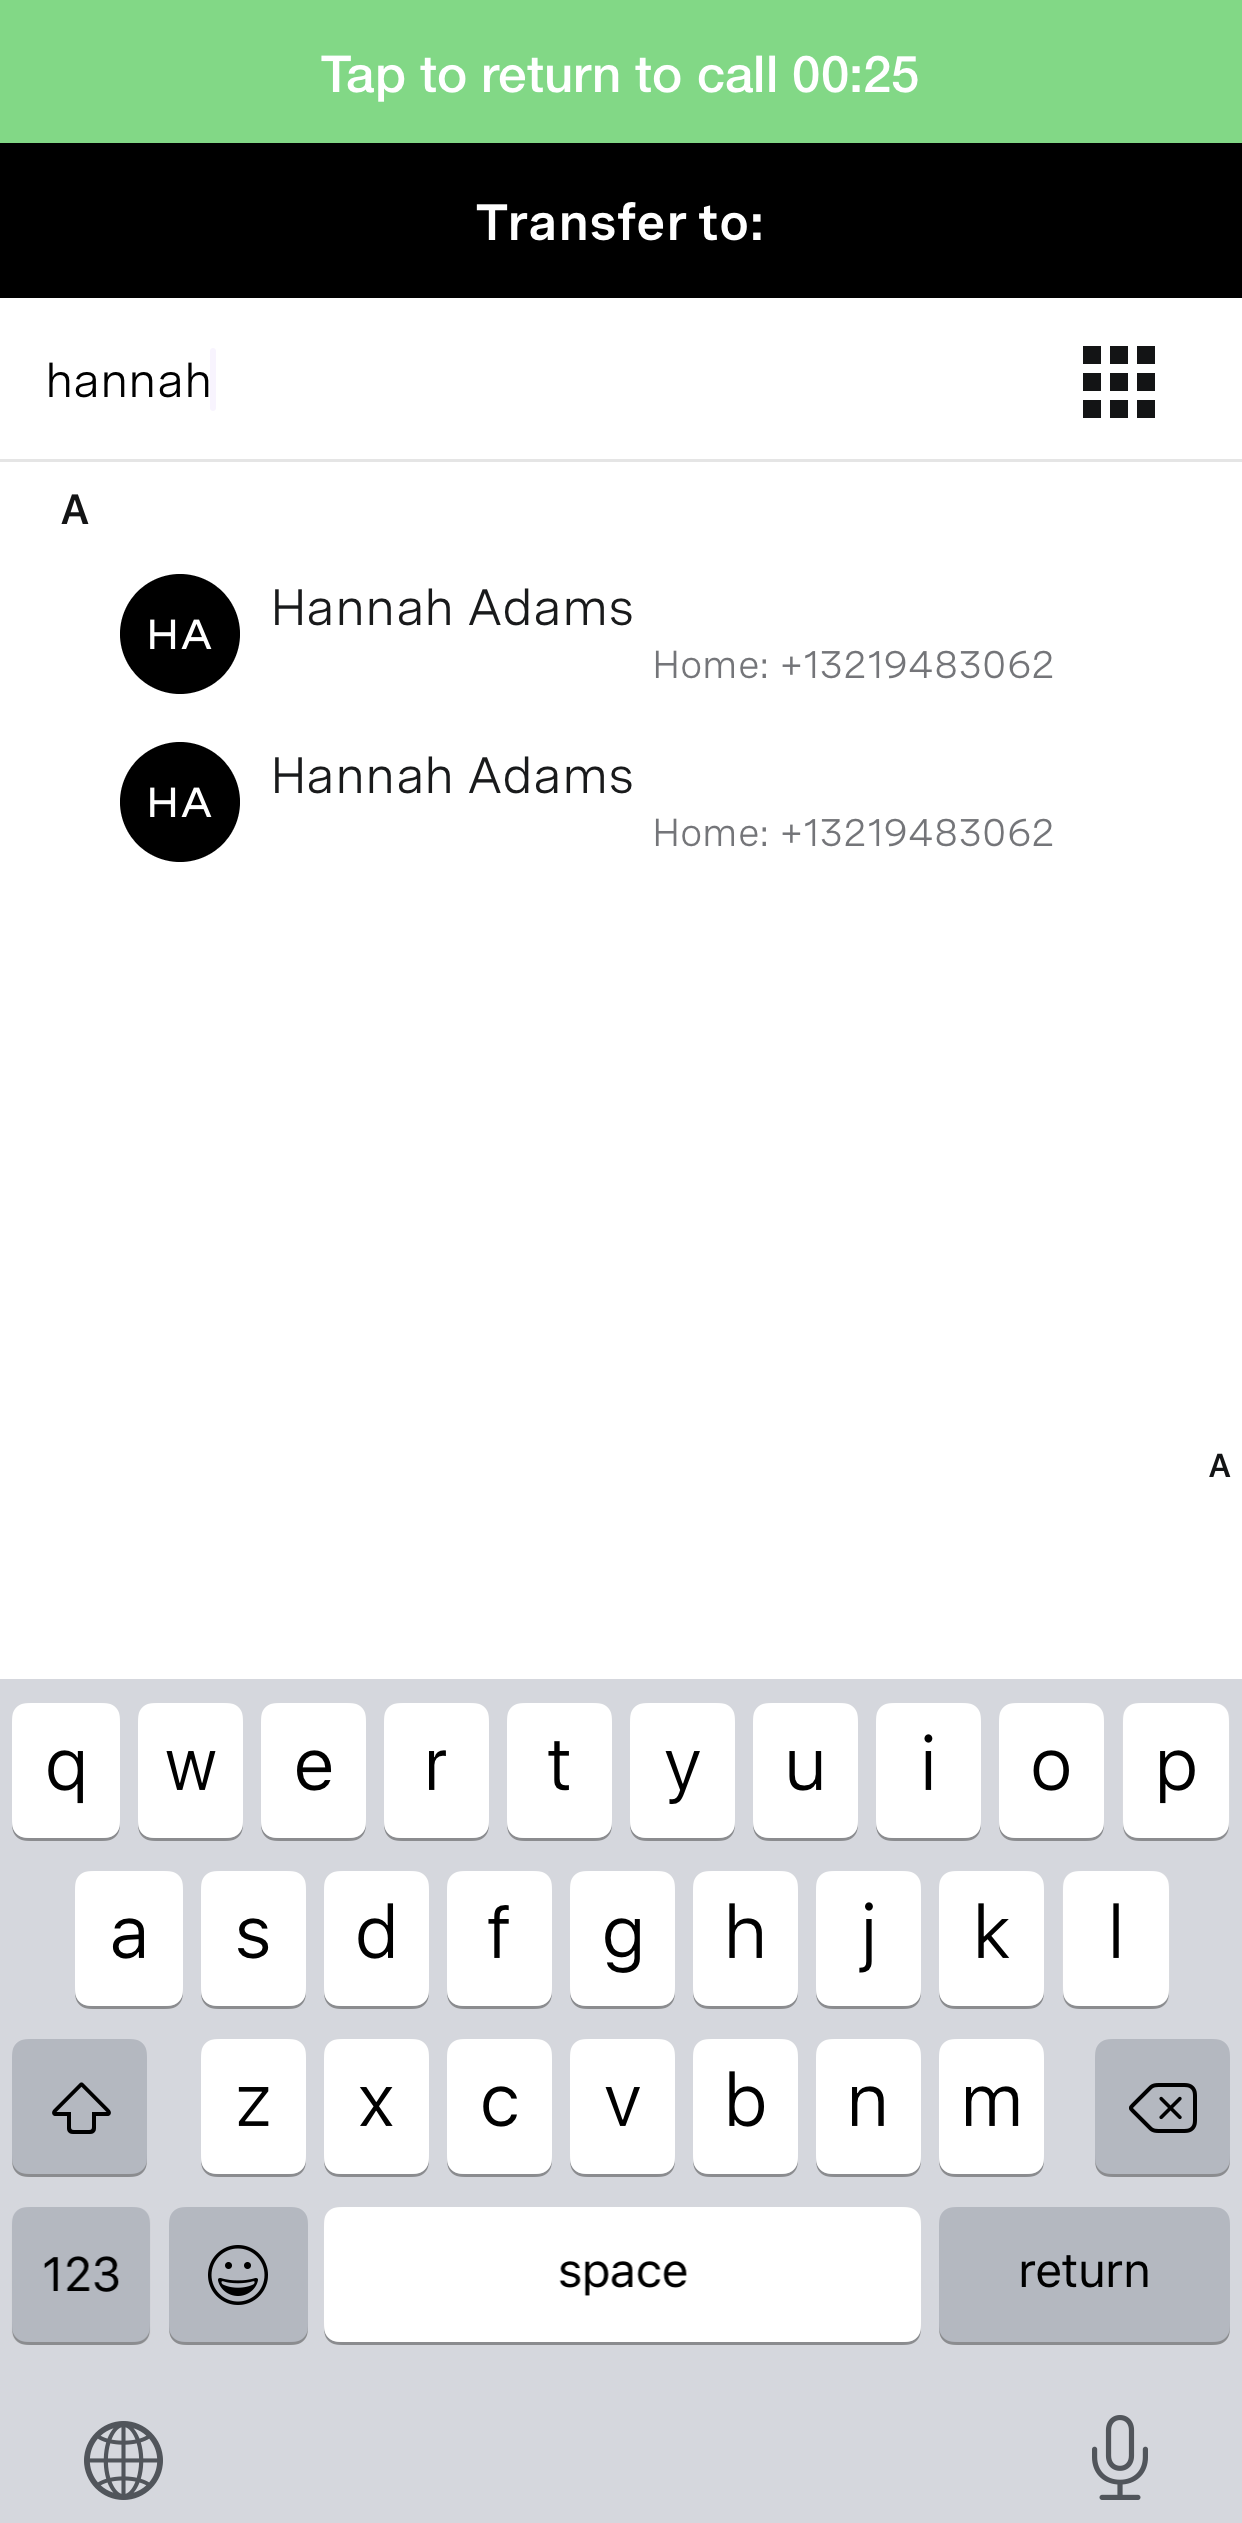
Attended Transfer
If you are on an active call, you can perform an Attended Transfer to another contact within the company directory or any other number you dial via the dial pad.
To do this while on an active call:
Step 1
Click Transfer.
Step 2
Click Attended Transfer.

Step 3
You can transfer to an ad-hoc number by using the dial pad here. To do this, click the Dialpad icon.
Step 4
Enter the number. Once finished, hit the Call button.
Step 5
Once the third-party answers, you can then click Complete to complete the transfer.
Call on Hold
To put a call on hold during an active call:
Step 1
Click Hold. The caller will go on hold and hear the on-hold audio based on the Music-on-Hold file that has been set up for your business.
Step 2
To resume the call, click the Hold icon again.
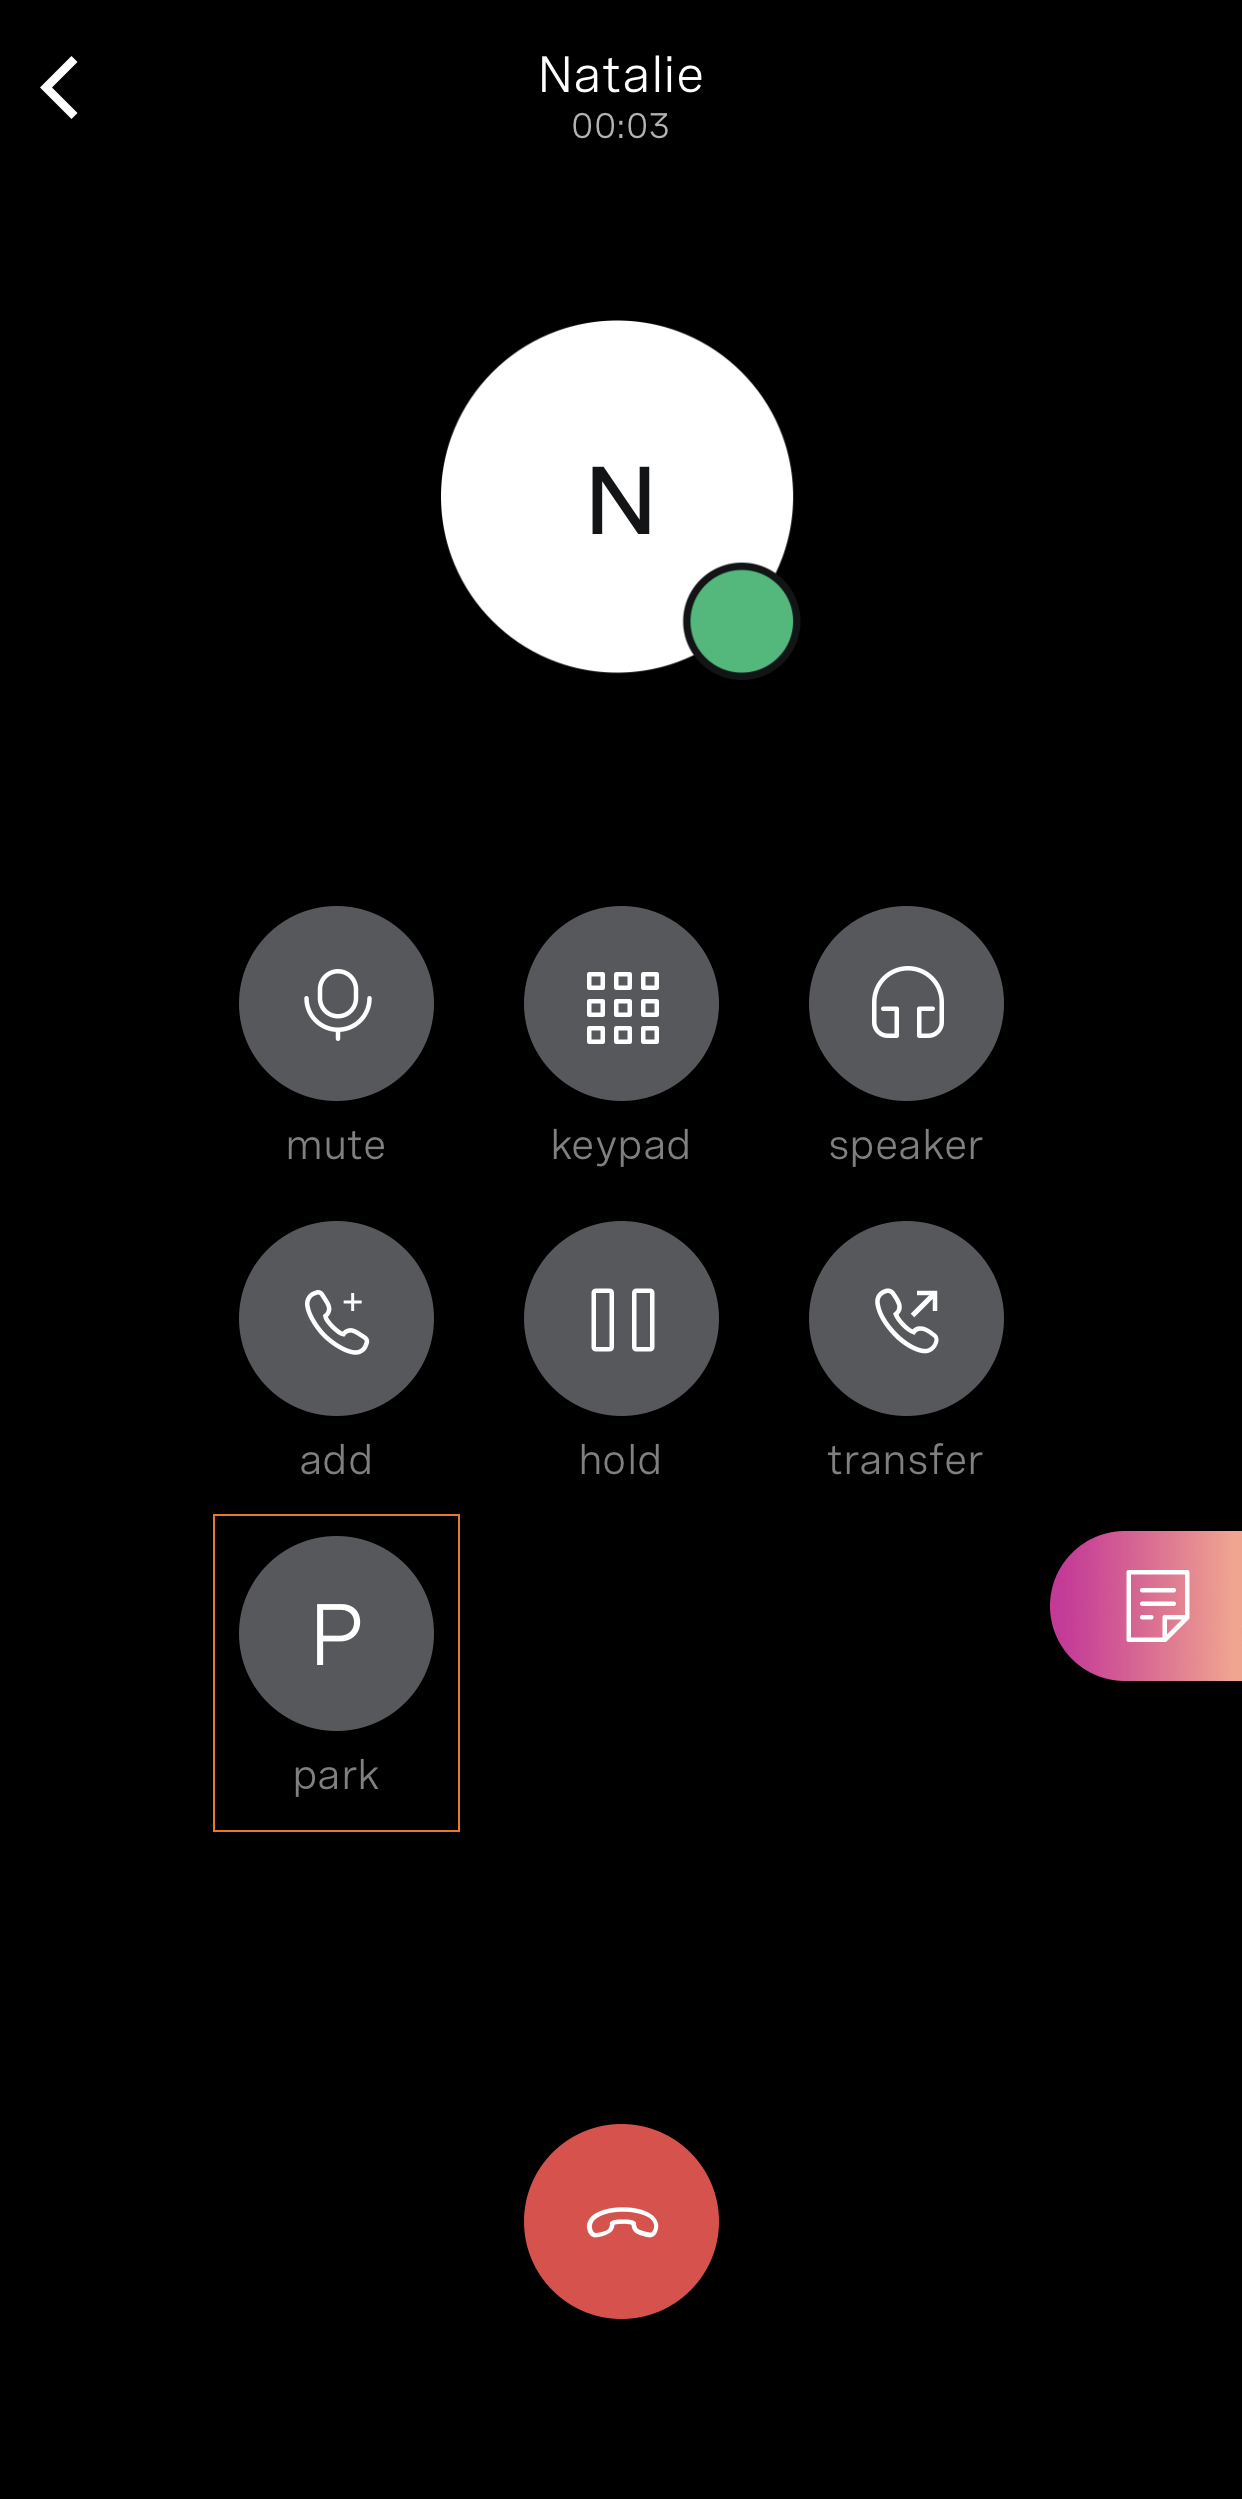
Call Park
To park a call while on an active call:
Step 1
Click the Park icon. This will park the call.
Step 2
A dialog box will appear with the Call Park spot, make note of the number for future reference.
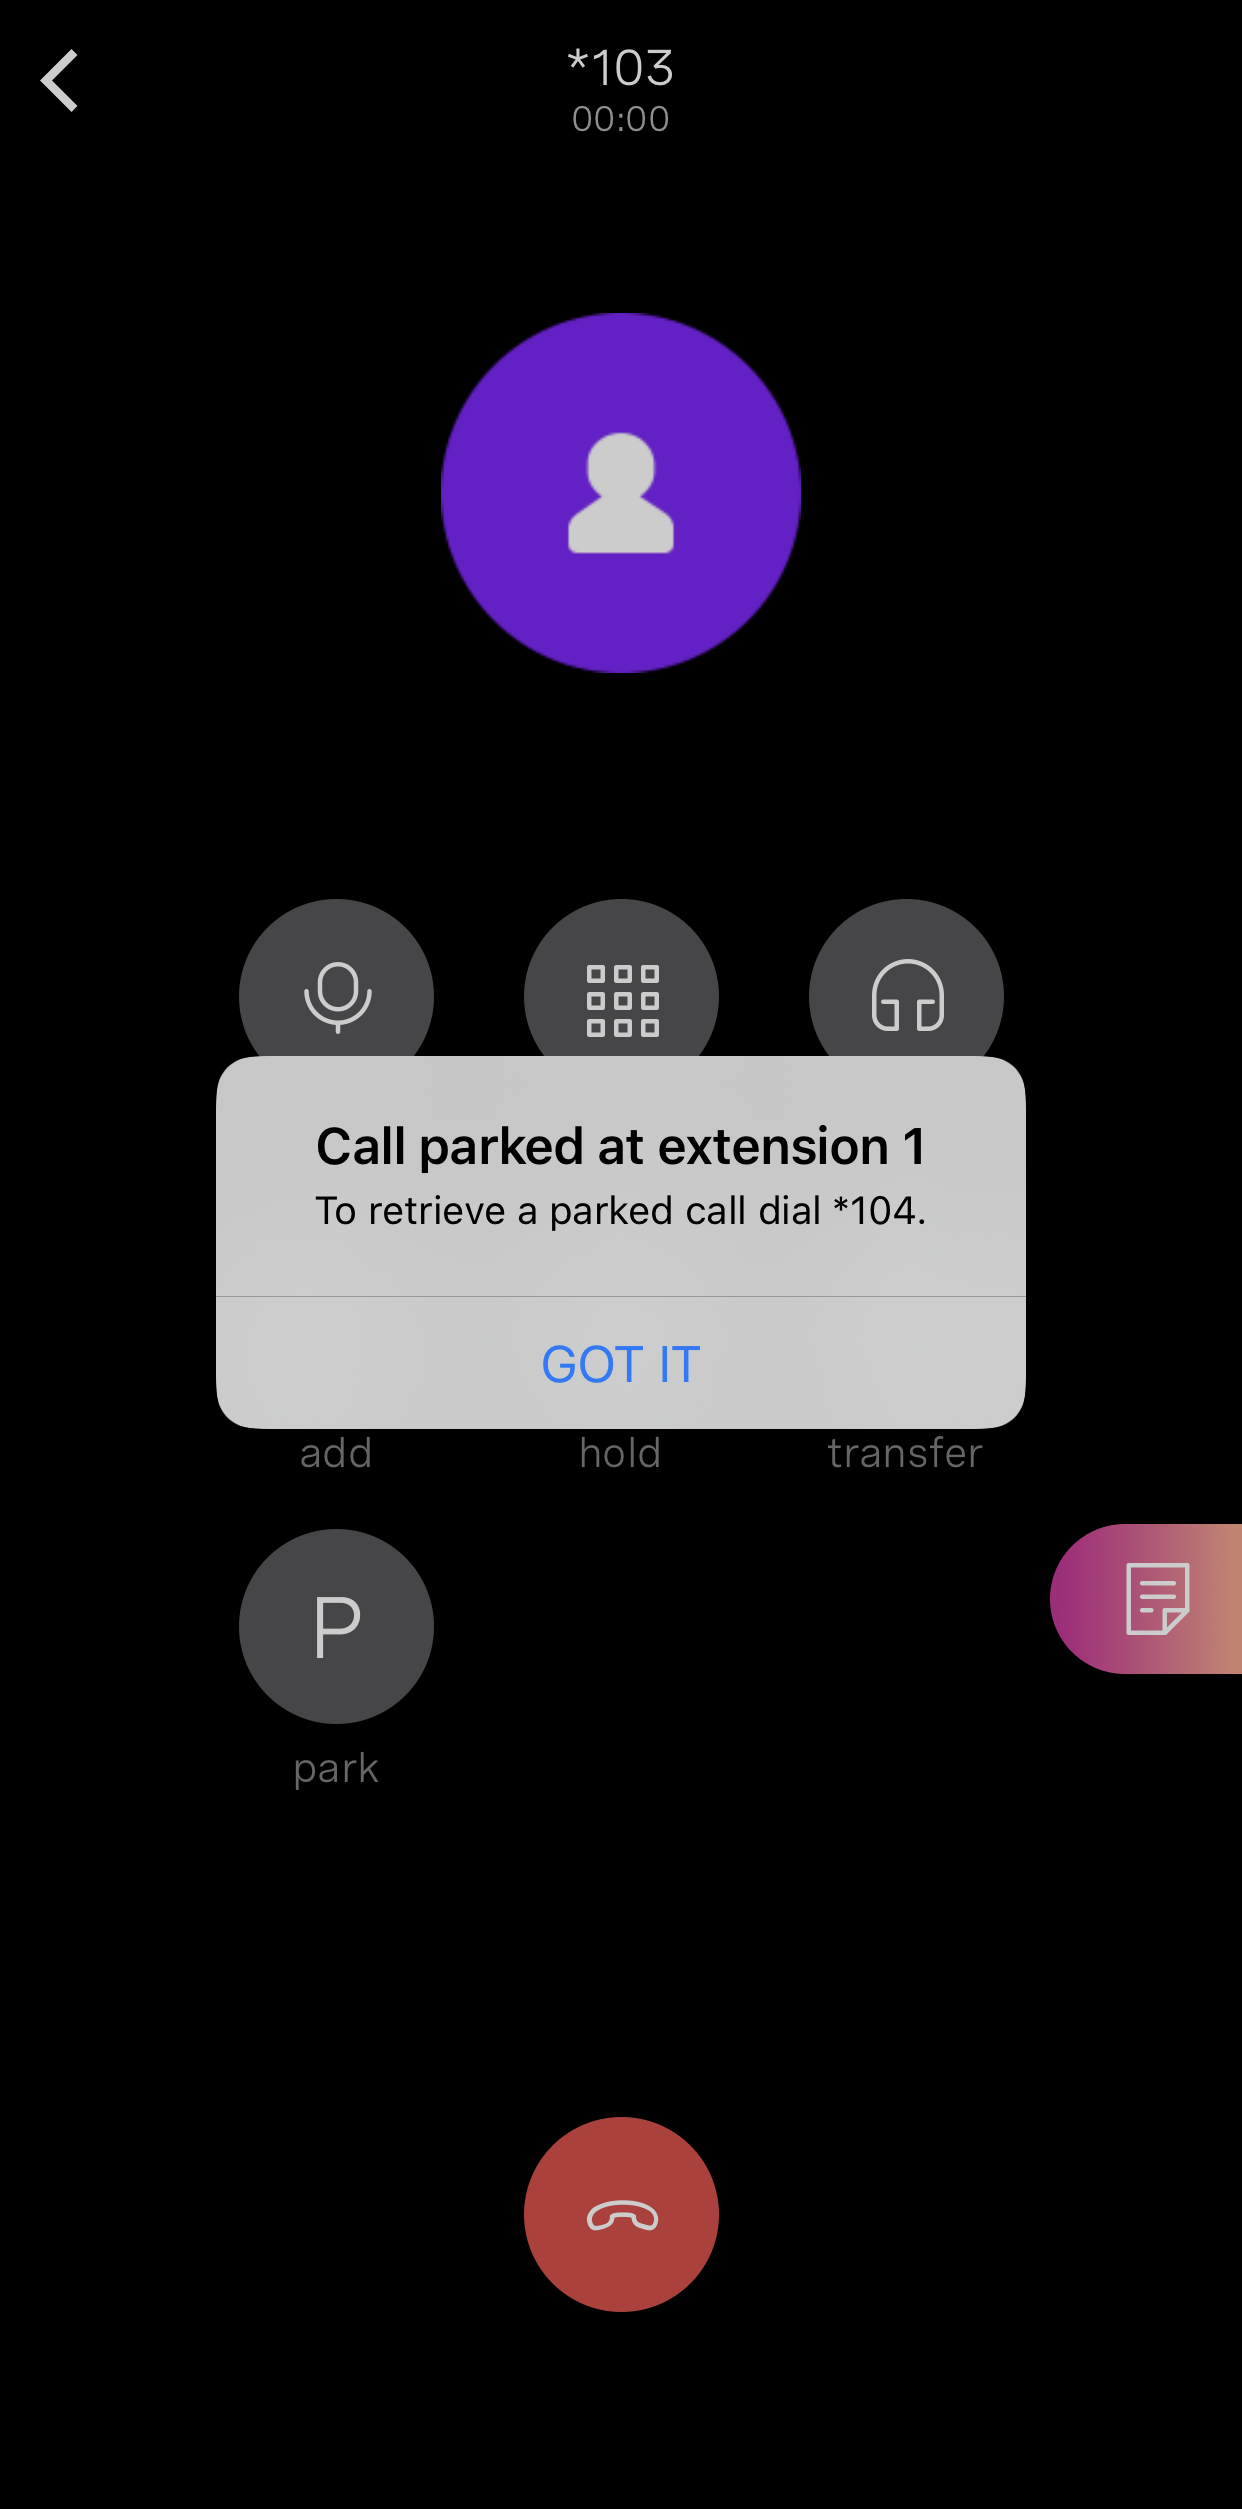
Step 3
Your call is now parked.
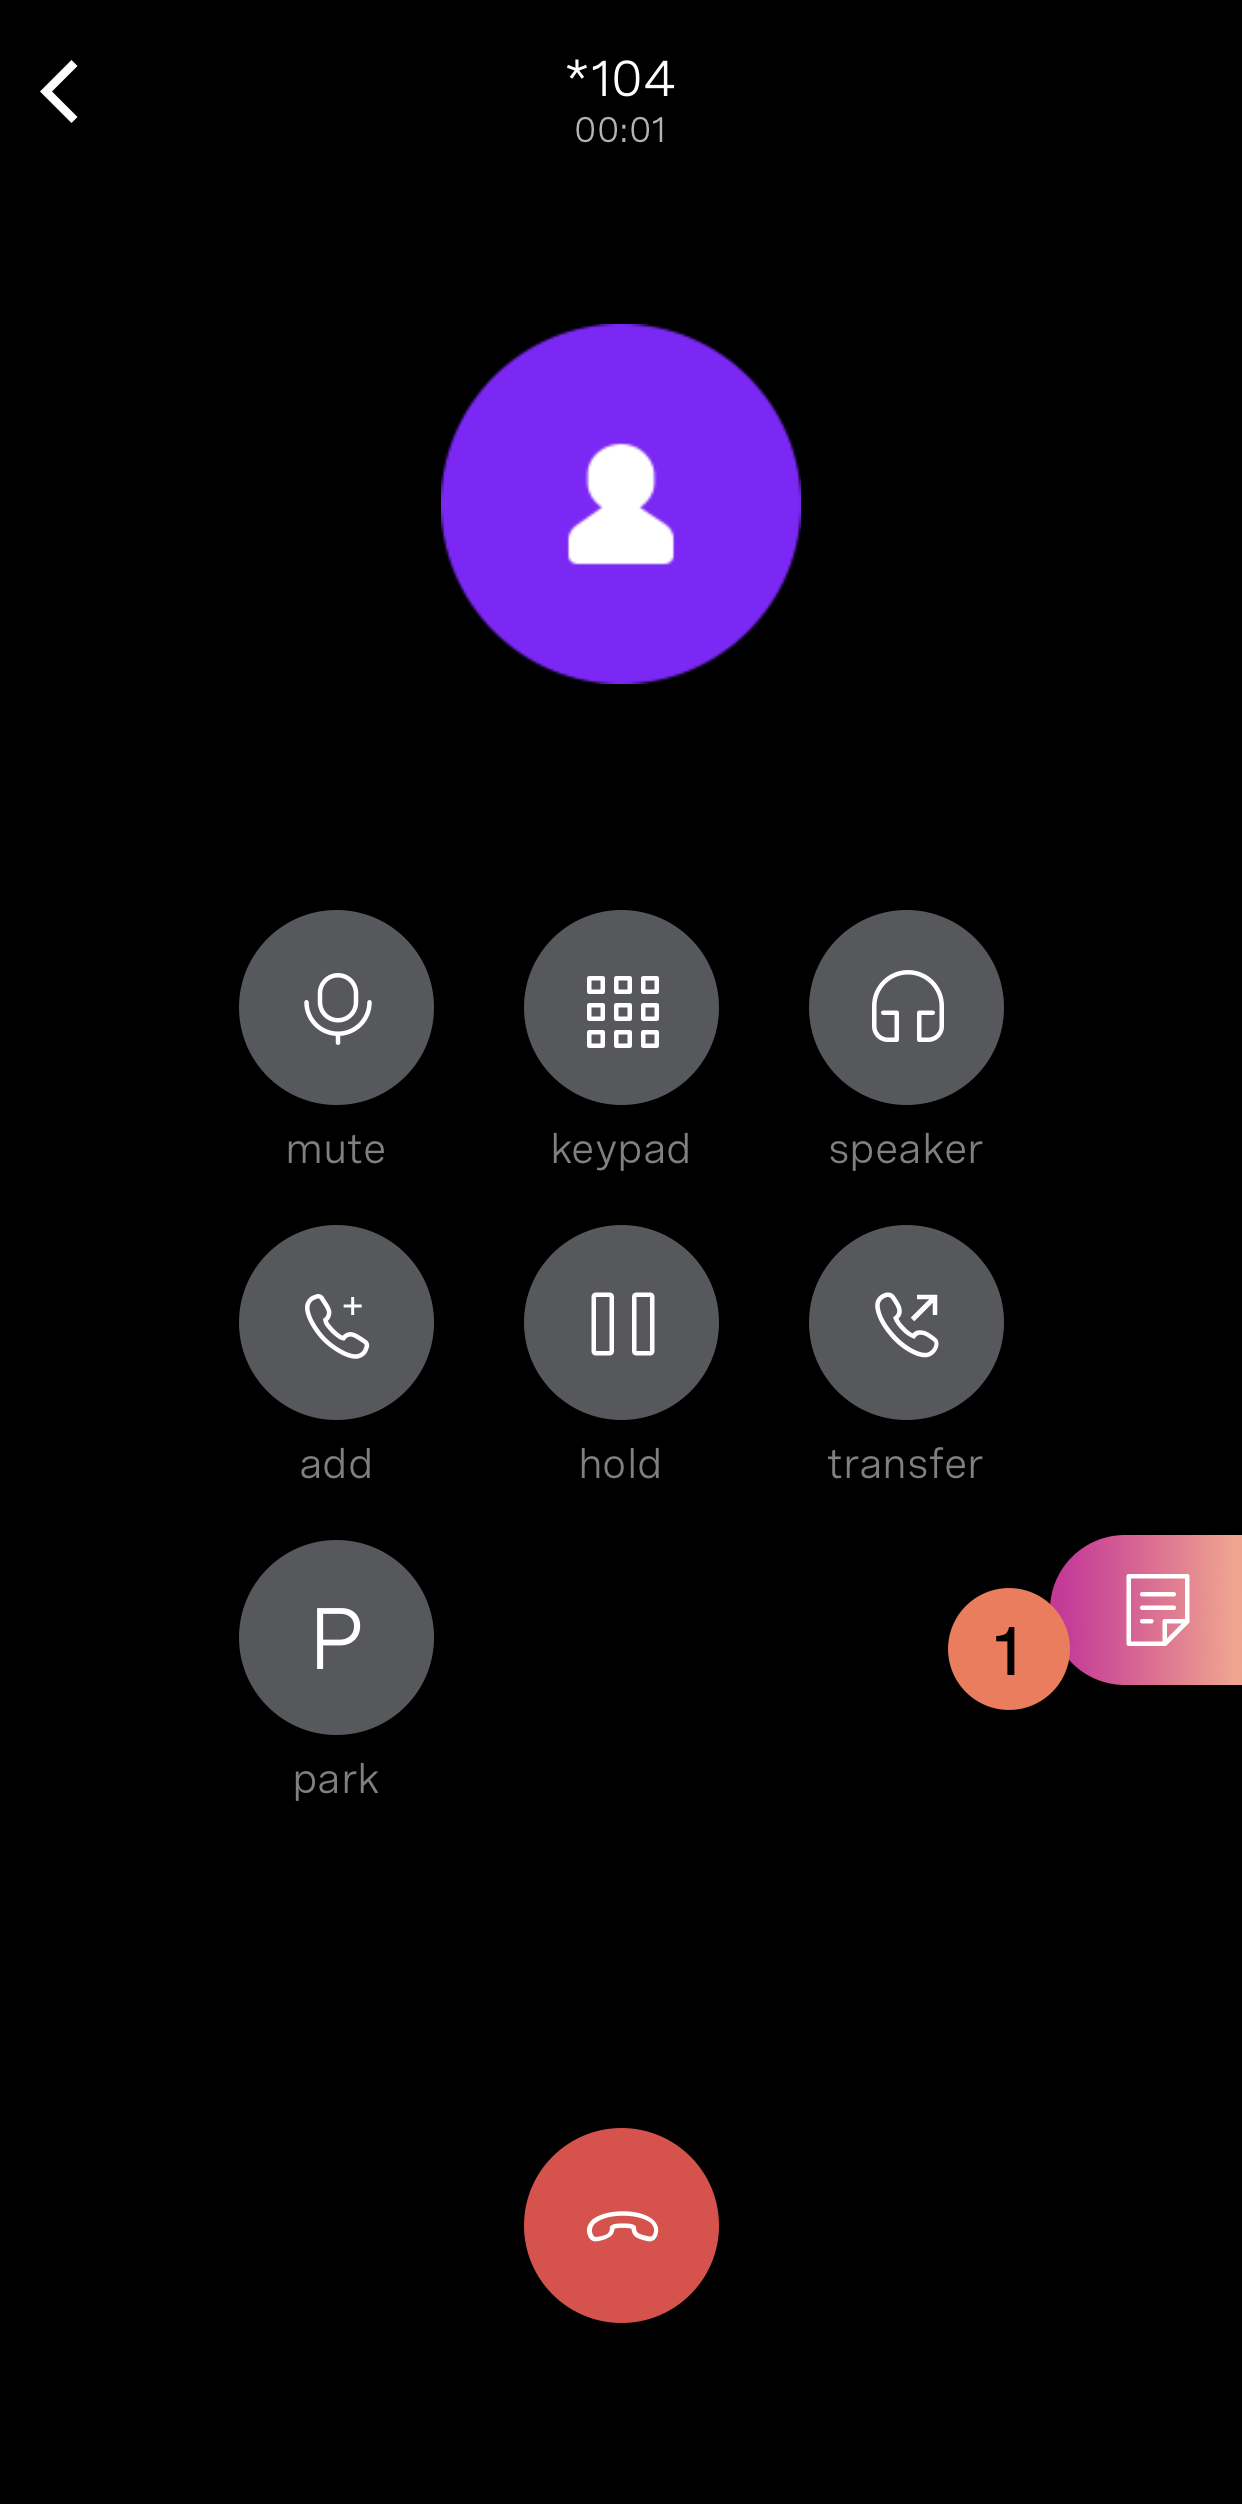
To retrieve a parked call from the dial pad:
Step 1
Dial *104.
Step 2
Enter the Call Park spot number.
Step 3
You will now be connected to the parked call.
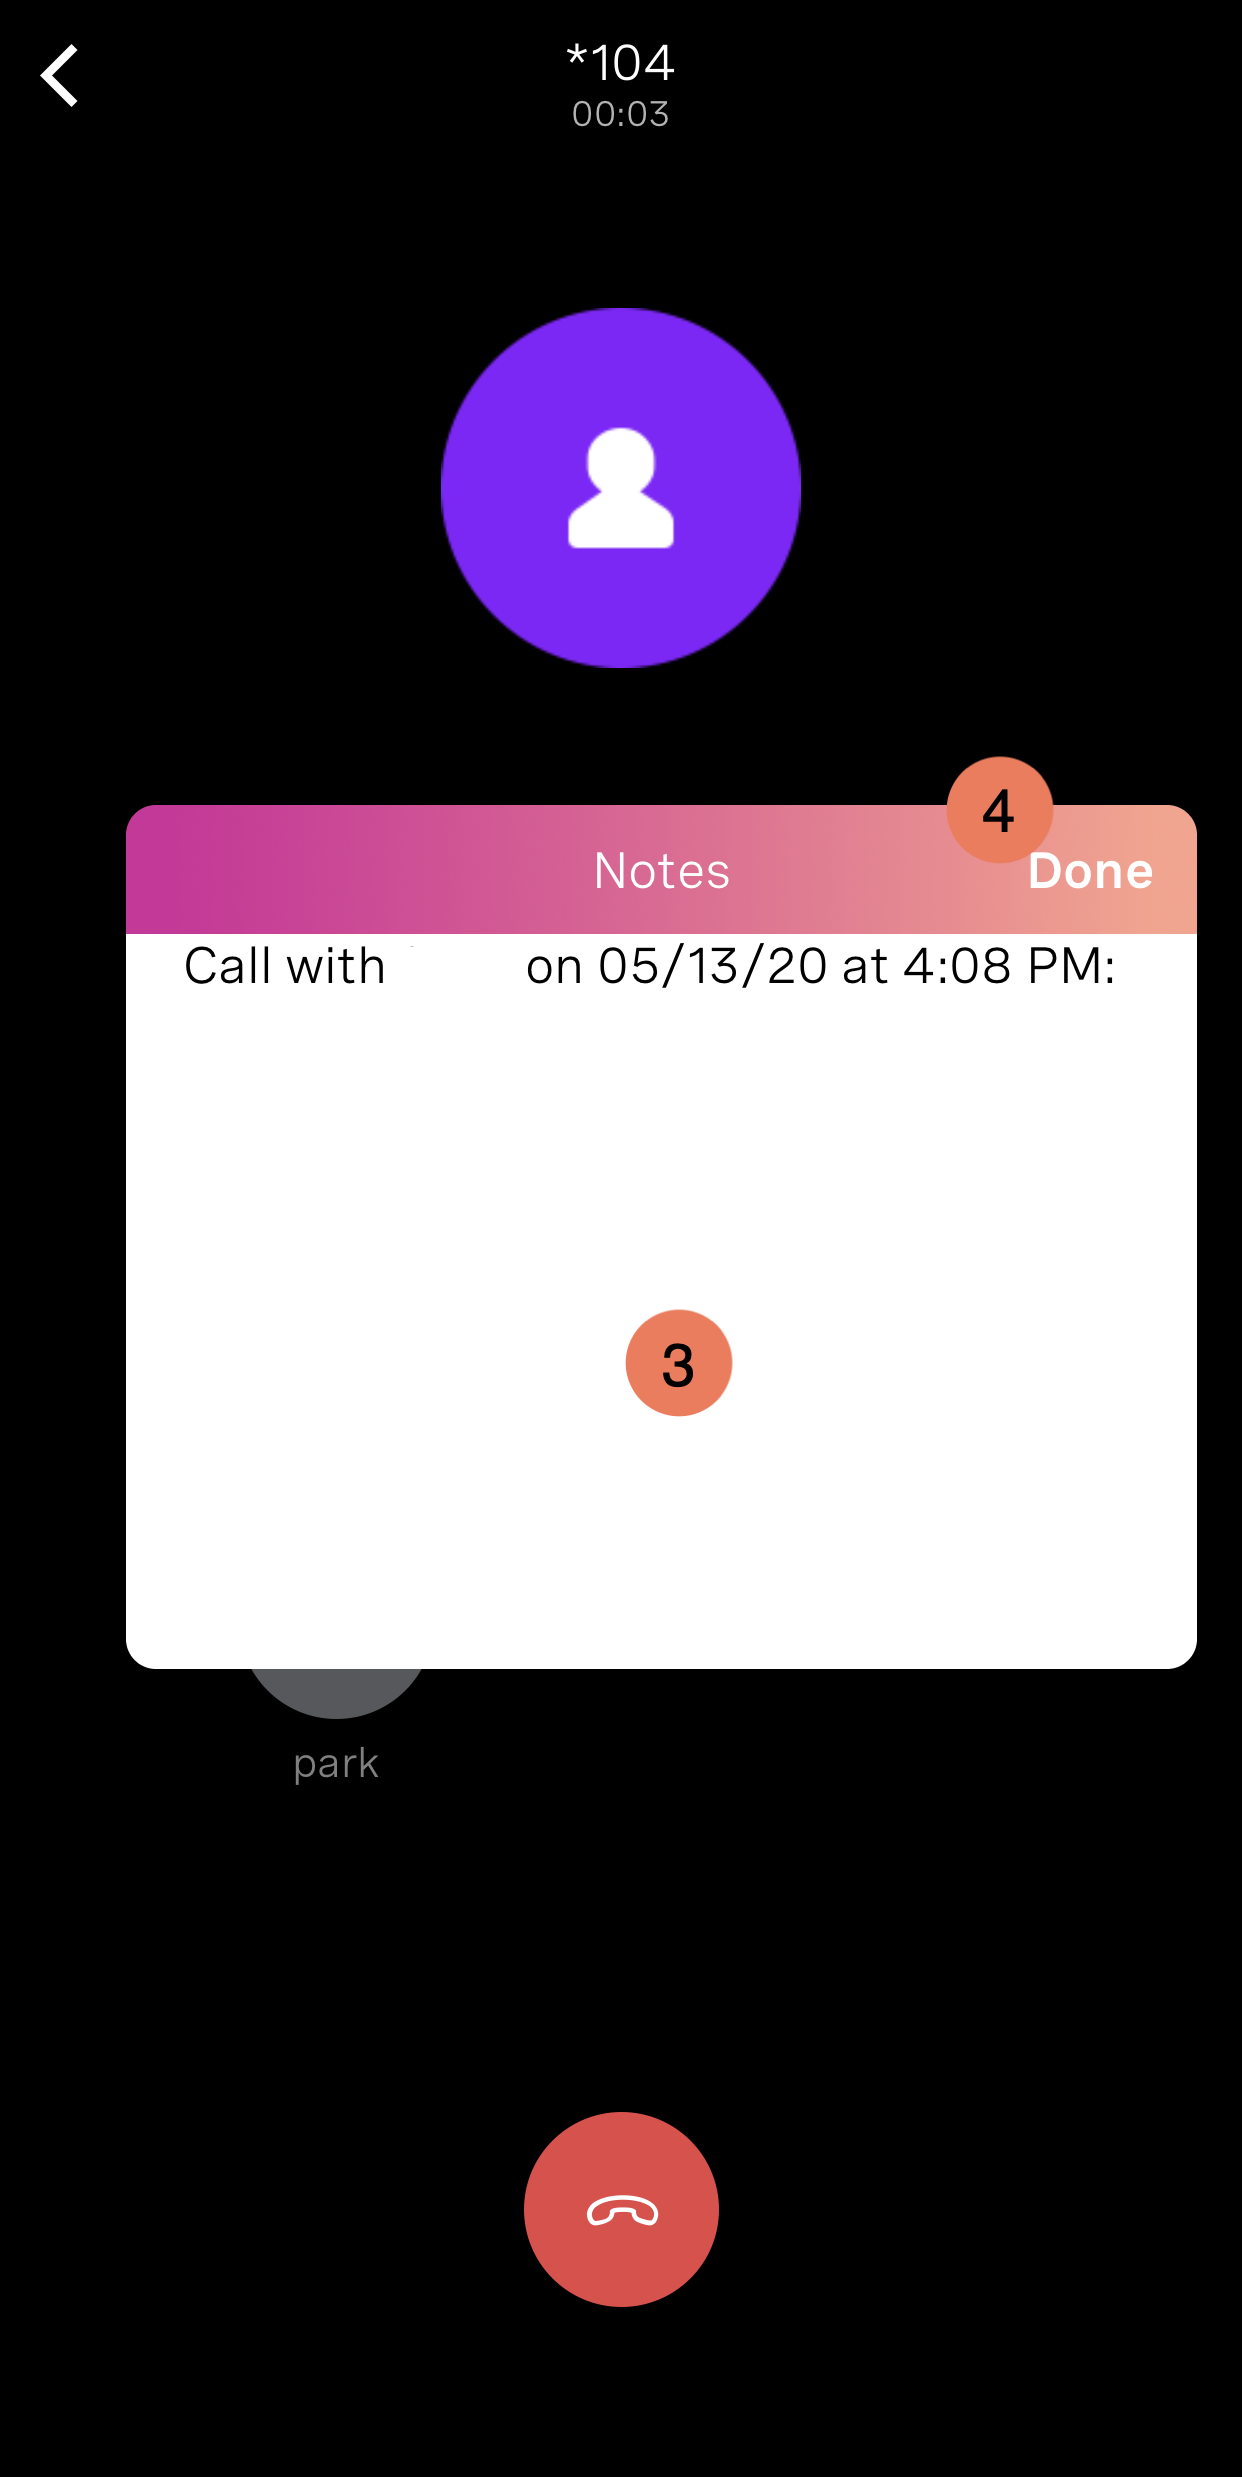
Call Notes
To actively take notes while on an active call:
Step 1
Click the Notes icon.
Step 2
A little sentence should appear on the note page along the top with the caller and date information.
Step 3
You may now begin to enter notes about the call.
Step 4
When finished, click Done. Your notes will now be saved.