
The Kaltura MyMedia library is your personal media repository in Canvas. It contains all of your uploaded or recorded videos, audio files, and images—regardless of which course they are used in. Zoom cloud recordings from faculty and staff are also stored here automatically. In addition, any media shared with you by others will appear in your MyMedia library.
From your MyMedia library, you can:
- Upload video, audio, and images
- Create recordings using Kaltura Capture (screen, webcam, audio, or PowerPoint)
- Manage and edit media (details, captions, trim/clip, etc.)
- Add bookmarks and chapters to videos
- Share media with others or publish to courses
- Download your own media
Accessing MyMedia in Canvas
- From the Canvas left menu, select MyMedia.
- You can also log in directly at coursemedia.gmu.edu.
How to Add Media
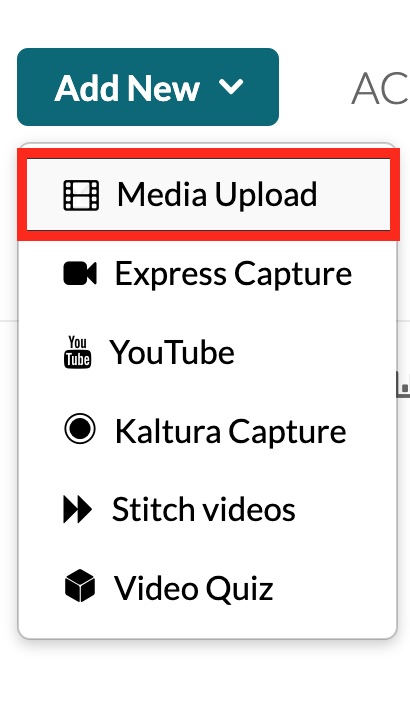
To add new media, click Add New at the top of the MyMedia page.
From here, you can:
Upload New Media from Your Computer
Step 1
In MyMedia, click Add New and select Media Upload.
Step 2
Click Choose a File to Upload and select a media file from your computer (or drag and drop the file into the upload area).

Step 3
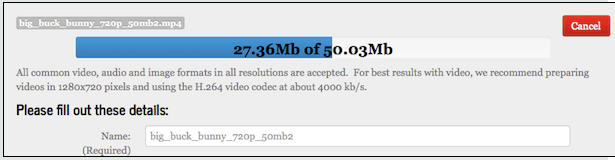
The file name and a progress bar will appear while your video uploads.
Step 4
While the upload is in progress, you can enter details such as:
- Title (required)
- Description (optional)
- Tags (optional, useful for searching and organizing media)
Step 5
Click Save to finish. Your video will begin processing in Kaltura and will appear in your MyMedia library when ready.
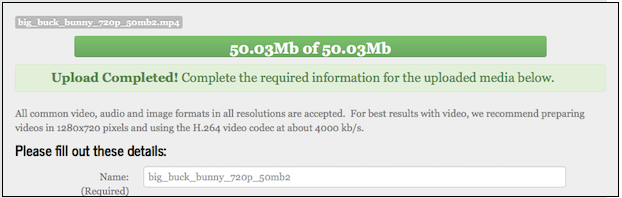
Note: Processing time varies depending on the size and length of the media file. It may take several minutes before the video is fully available for playback.
Create a Webcam Recording
Kaltura’s Express Capture tool lets you quickly record video (or audio-only) using your computer’s webcam and microphone. It’s best for short recordings such as introductions, announcements, or quick instructions.
Note: Express Capture does not save until you finish recording. For longer recordings, or if you are concerned about interruptions, use the Kaltura Capture desktop application instead.
Related Guides
Approving Media for the Course Media Gallery
How to Create a Webcam Recording (Express Capture)
Create a Presentation with Kaltura Capture
Use the Kaltura Capture desktop application to record presentations that combine your screen, webcam, and audio. This is ideal for lecture recordings, narrated PowerPoint presentations, demonstrations, or tutorials.
Managing and Editing Media in Kaltura MyMedia
After uploading a video to MyMedia, you can manage and edit it using the Edit (pencil icon) next to the media entry.
Note: To physically edit your media (trim, chop, splice), use the Launch Editor tool. See How do I launch and use the Kaltura Video Editing Tools?.
Available options include:
Details
- Update the title, description, and tags to make your media easier to find and organize.
Collaboration
- Share media ownership by adding Collaborators (co-editors, co-publishers, or co-viewers).
- Useful if you want another instructor, TA, or student to help edit or publish your media.
- See How to Share or Change Media Ownership in Kaltura.
Captions
- Request automatic captions (machine-generated) or submit a request for professional/manual captioning.
- Captions can be edited for accuracy.
Thumbnails
- Set the preview image students see before playback.
- Choose a still frame from the video or upload your own image.
Downloads
- Download the original source file you uploaded.
Timeline
- Add chapter markers so viewers can navigate directly to key sections.
- See How to Create Video Chapters.
Trim/Chop
- Use the video editor to trim unwanted content from the beginning or end, or chop out middle sections.
Additional Resources
- How do I launch and use the Kaltura Video Editing Tools? – Mason guide for launching and using the built-in editor.
- Kaltura Video Editing Tools – User Guide – Official Kaltura documentation with full feature list.
- Kaltura Video Editor – Slides, Chapters, and Timeline – Official Kaltura guide for working with PowerPoint slide detection, timeline markers, and chapters.
- How to Share or Change Media Ownership in Kaltura – Mason guide for adding collaborators or transferring ownership.
- Assistive Technology Initiative (ATI) – Request Captions, Transcripts, or Audio Descriptions – Mason’s office for accessibility services, including professional captions and audio descriptions.