When authenticating to the Cisco Secure Client VPN Client, Duo automatically determines the best approach to request the second factor for authentication based on your enrolled devices.
- If you have previously enrolled a device that enables push notifications (smartphone or tablet), Duo will send you a PUSH Notification requesting approval to the first such device listed in your account.
- If you wish to use an alternate method, refer to the instructions on how to use Append Mode with the VPN and see the List of 2FA Authentication Options.
Step 1
Open Cisco Secure Client VPN on your computer.
Note: If you are on a Mason-owned computer connected to the MESA or Jamf Pro (for Macs), the client should already be installed.
- Windows users can find it in the Start Menu under Cisco > Cisco Secure Client
- Mac users can find it under Go > Applications > Cisco
If you are not on MESA or Jamf Pro, follow the appropriate instructions to the install VPN:
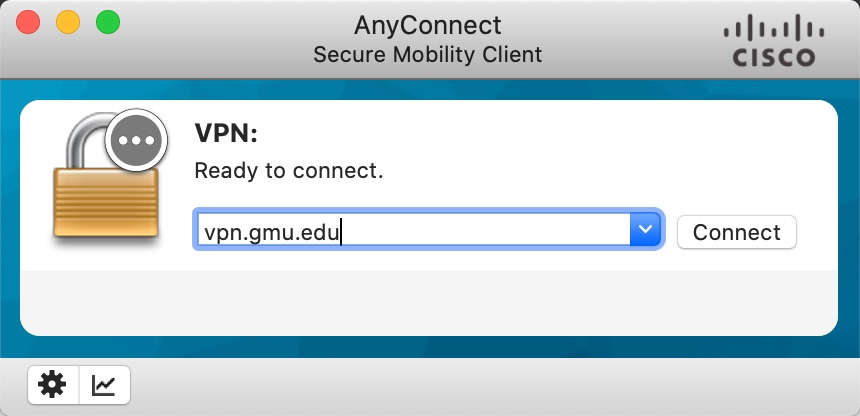
Step 2
Type your VPN Group URL and click Connect.
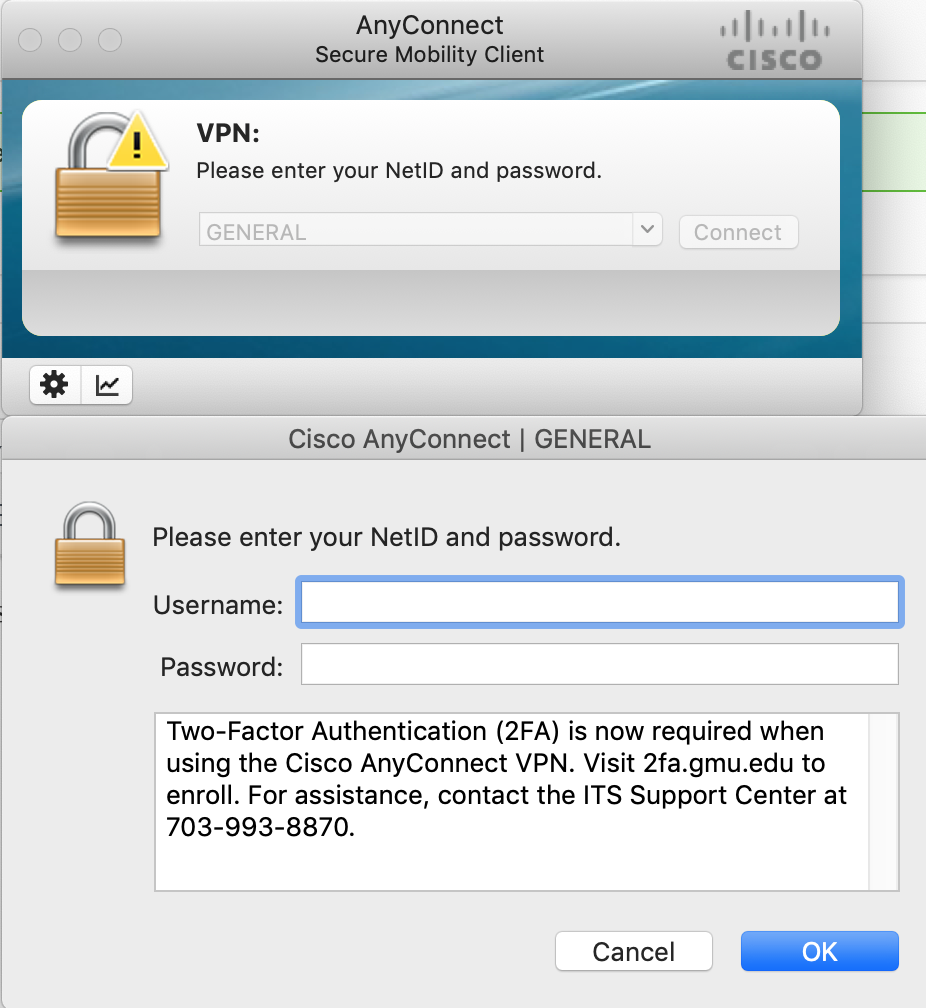
Step 3
Enter your Mason NetID (Note: NetID only; do not include @gmu.edu or @masonlive.gmu.edu) and Patriot Pass Password and click OK.
Step 4
The device you have enrolled will require you to approve the request.
Note: Duo will attempt to contact you six times if you do not respond.
Step 5
Smartphone/Tablet
- Your device will notify you of a Duo Mobile App request or you’ll need to open the App.
(Note: Verify on your phone that notifications are turned on for the Duo Mobile App.) - You will be asked to approve or deny the authentication request.
- Tap Approve on your device to complete the authentication request.
Passcode (Duo Mobile App, Yubikey, or Bypass Code)
Step 6
You will then be logged into Cisco Secure Client VPN.