George Mason University VPN allows you to connect to Mason networks as if you were on campus, making access to restricted services possible. To connect from your remote Mac to your Windows machine on campus, you will need to use Microsoft Remote Desktop.
You will need the computer name and/or IP address of the machine you are remoting to, so obtain that information before leaving campus.
Checking if Microsoft Remote Desktop is Installed on a Mac
Step 1
Connect to the VPN using Cisco Secure Client.
Step 2
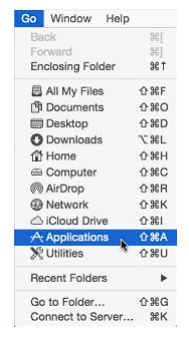
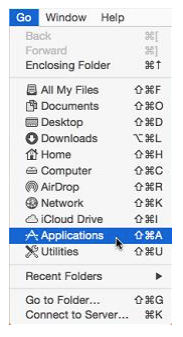
From the Finder, navigate to the Go Menu > Applications.

Step 3
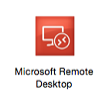
Look for Microsoft Remote Desktop.
Installing Microsoft Remote Desktop on a Mac
Step 1
From the Finder, navigate to the Go Menu> Applications.
Step 2
Click on the App Store.

Step 3
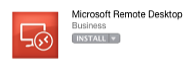
Search for Microsoft Remote Desktop.
Step 4
Select Microsoft Remote Desktop and click Install.
Step 5
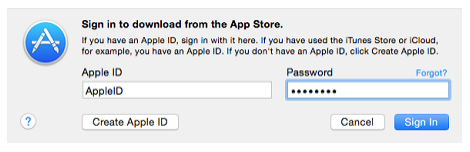
If prompted, input your AppleID and password and click Sign In.
Step 6
Once Microsoft Remote Desktop is installed, click Open, or access it from the Applications window.

Using Remote Desktop on a Mac
Step 1
Connect to the VPN using Cisco Secure Client.
Step 2
From the Finder, navigate to the Go Menu > Applications.
Step 3
Open Microsoft Remote Desktop.
Step 4
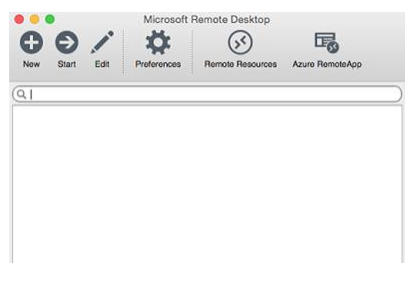
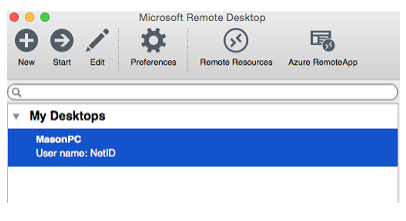
The Microsoft Remote Desktop window will appear.
Step 5
If you have already saved your work computer’s information, you can select it and click Start to connect. Otherwise, click New.

Step 6
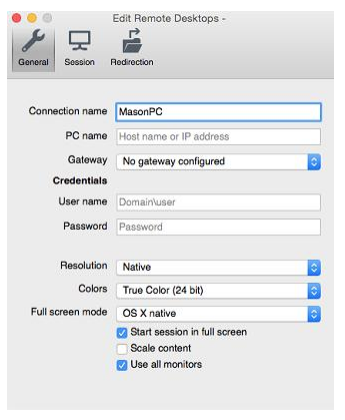
For the Connection Name, type MasonPC (if you prefer another name, use that instead).
Step 7
Put your Mason computer’s name or IP address in the PC name box.
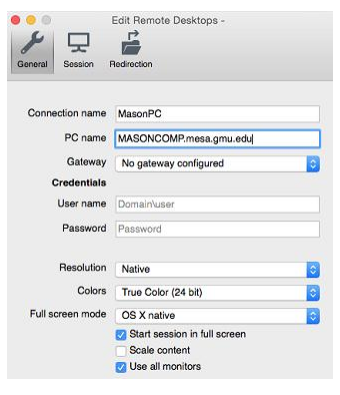
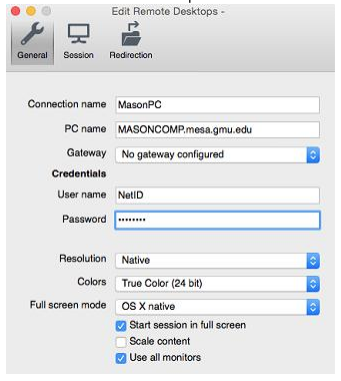
Step 8
Enter the following information and then click OK:
Username: Your Mason NetID
Password: Your Mason Patriot Pass Password
Step 9
You can leave all the other settings at their defaults.
Step 10
Close the Edit Remote Desktops window.
Step 11
Click the saved connection.
Step 12
Click Start.

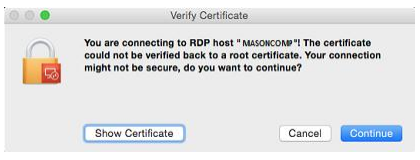
Step 13
If there is a certificate error, click Continue.
Step 14
You are now connected to your Mason Windows Machine.