Note: These instructions assume that you have already installed the Respondus Test Creation Application.
Before You Begin
Your test must be in a very specific Microsoft Word or txt file format. You can download a sample file and view the full documentation to help you prepare your file.
Step 1
Open the Microsoft Edge browser on your computer (just open it, you do not need to log into Blackboard or visit any website). There is a known Microsoft bug that requires Microsoft Edge to be open for some authentications.
Step 2
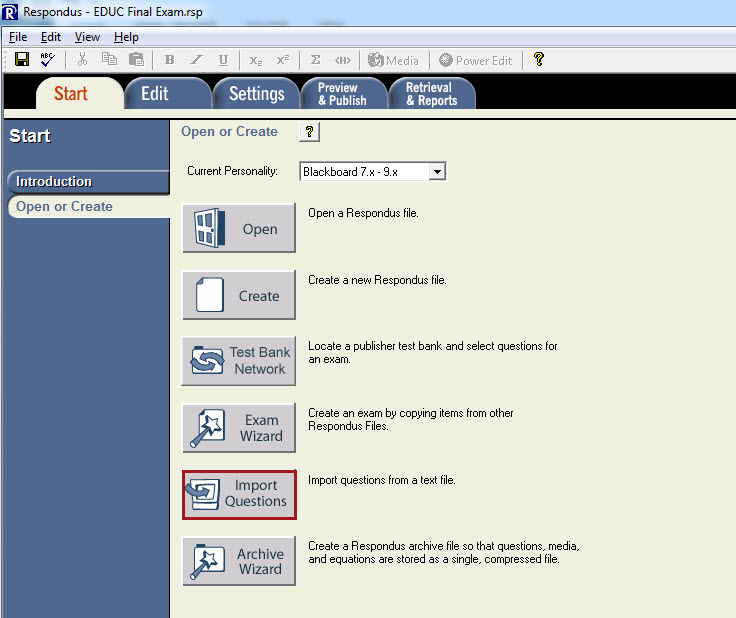
Open Respondus 4.0 Campus-Wide on your desktop. On the Start page, select the Import Questions button.
Step 3
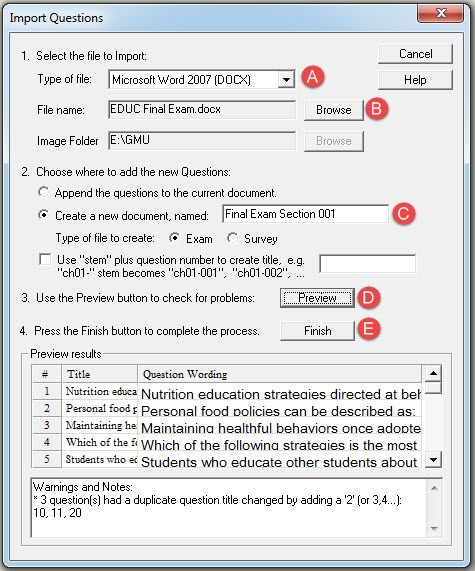
The Import Questions dialog box will display.
- Select the type of file to import from the drop-down menu. In this example, a test created in MS Word will be imported into Respondus.
- Next, select the Browse button and browse to the document you want to import into Respondus.
- In Section 2, enter a name for the file. In this example, the name will be Final Exam Section 001.
- Select on the Preview button. Note any Warnings and Notes that display at the bottom of the dialog box. In most cases, any changes can be made to the test once it is imported into Blackboard.
- Select Finish. A File Saved message will display. Select OK. The test questions will display at the bottom of the page. From here you can preview, edit, delete, etc., test questions.
Step 4
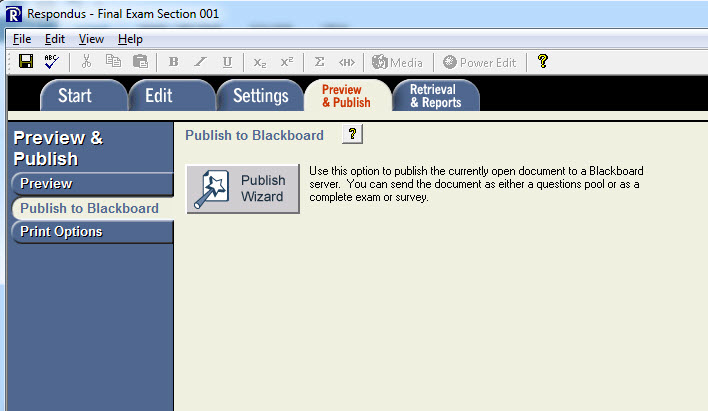
Select the Preview and Publish or Publish to Blackboard tab and then select the Publish Wizard.
Step 5
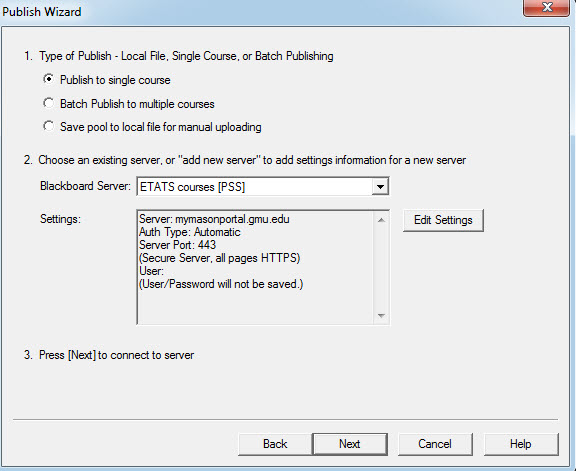
The Publish Wizard dialog box displays. Select the radio button next to Publish to single course and then select Next.
If this is your first time exporting a test from Respondus into Blackboard, you will need to set up the server settings as shown below.
Step 6
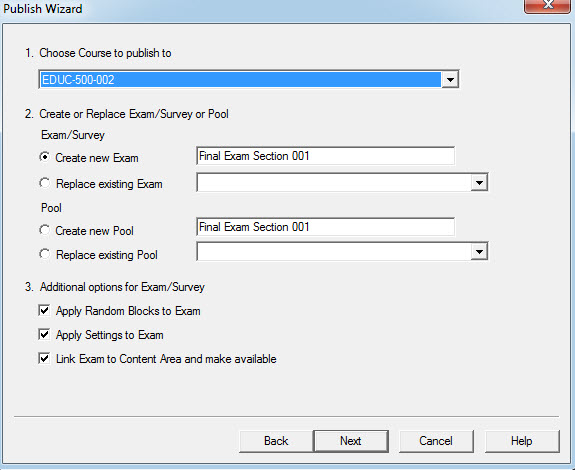
On the Publish Wizard page, choose the course you want to import the test into. In Section 2, leave the radio button selected next to Create new Exam. The name of the exam is what you entered in Step 2. You can leave the default settings under Section 3 as is. Select Next.
Step 7
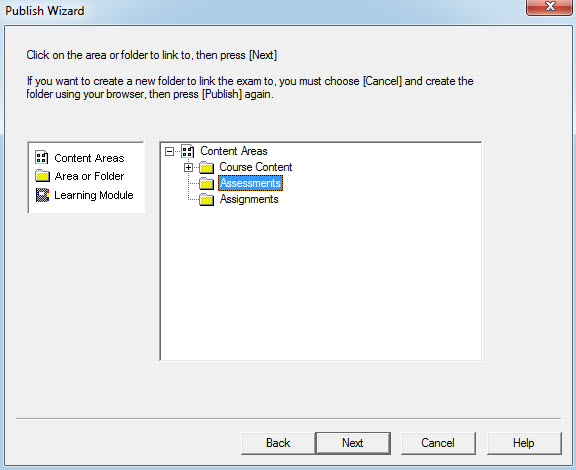
Select the folder in the course where you want the test to reside. Select Next.
Step 8
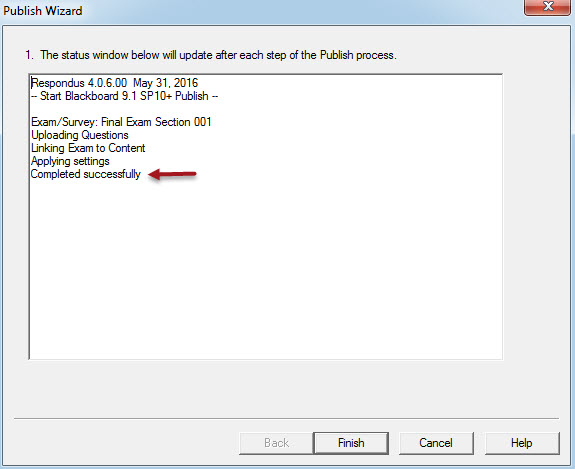
Within a few seconds, the Publish Wizard will open indicating that the questions have been uploaded to your course successfully. Select Finish.
Go into your course. The test will reside in the content area you selected above. Edit the test and update points per question and verify correct answers are properly selected. You will also need to Edit the Test Options and make the appropriate selections under Test Availability, Test Availability Exceptions, Due Date, Test Results, and Test Presentation.
