• Report an IT Security Incident
  • Request Help
  • Help & Support
    • Working/Learning Remotely
    • Request Help
    • Live Chat
    • Track a Ticket
    • Knowledge Base
    • Getting Started
    • Contact Us
    • ITS Alerts Sign Up
  • Service Catalog
    • Accounts & Access
    • Communications & Collaboration
    • Computers & Software
    • Data, Reporting & Analytics
    • Network & Internet Services
    • Pilot Services
    • Professional Services
    • Research Computing
    • Teaching & Learning
    • University Applications
    • Web, Servers & Hosting
  • About ITS
    • Our Team
    • Strategic Plan
    • Annual Reports
    • Awards
    • Student Employment
  • Working with ITS
    • Architectural Standards Review Board
    • Projects & Project Management
    • Technology Investment Request Lifecycle
    • Governance Committees
    • Business Intelligence
    • Enterprise Data Integration Services (EDIS)
    • GMU-TV
    • IT Security Office
  • Alerts & Bulletins
    • Unplanned Outages
    • Phishing Alerts
    • Maintenance
    • Bulletins
    • Spotlights
    • After Action Reports
    • Archives
  • Report an IT Security Incident
  • Request Help
X Hide

Information Technology Services

Skip to content
  • Help & Support
    • Working/Learning Remotely
    • Request Help
    • Live Chat
    • Track a Ticket
    • Knowledge Base
    • Getting Started
    • Contact Us
    • ITS Alerts Sign Up
  • Service Catalog
    • Accounts & Access
    • Communications & Collaboration
    • Computers & Software
    • Data, Reporting & Analytics
    • Network & Internet Services
    • Pilot Services
    • Professional Services
    • Research Computing
    • Teaching & Learning
    • University Applications
    • Web, Servers & Hosting
  • About ITS
    • Our Team
    • Strategic Plan
    • Annual Reports
    • Awards
    • Student Employment
  • Working with ITS
    • Architectural Standards Review Board
    • Projects & Project Management
    • Technology Investment Request Lifecycle
    • Governance Committees
    • Business Intelligence
    • Enterprise Data Integration Services (EDIS)
    • GMU-TV
    • IT Security Office
  • Alerts & Bulletins
    • Unplanned Outages
    • Phishing Alerts
    • Maintenance
    • Bulletins
    • Spotlights
    • After Action Reports
    • Archives

Knowledge Base

Home > Help & Support > Knowledge Base > Web, Servers & Data > Web Dev > How to Fix Server Upload Permissions

How to Fix Server Upload Permissions

UMASK Configuration

User file-creation mode mask (UMASK) is a server command the sets the default file permissions for newly created folders and files on a server. The two recommended UMASK configurations for Mason end-users are:

  • umask 022: This results in files that are world-readable and only writable by the owner of the files.
  • umask 002: This results in files that are world-readable and writable by both the file owner and the group the owner belongs to. This setting is ideal in situations where multiple users need to edit the same files.

The default UMASK on the mason.gmu.edu web server is umask 022. This results in files that are world-readable and only writable by the owner of the files. If you work in a team environment, editing shared files, you will need to edit your UMASK to 002 BEFORE you upload the files into your folder. 

How to Change the UMASK

IMPORTANT: Changing your UMASK permissions will NOT fix permissions on files previously uploaded or if you just overwrite the file on the server. It will only fix the permissions of files you upload AFTER you changed your UMASK. In order to change the UMASK permissions on folders or folders, you will need to:

  • Change UMASK permissions.
  • Delete the file or folder with incorrect permissions from the web server.
  • Upload the files again.

Step 1

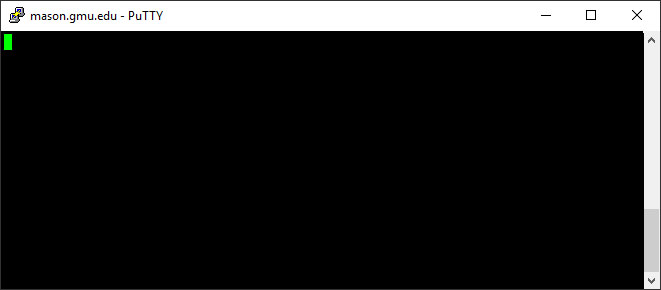
Connect to the Mason Cluster via PuTTY.

Step 2

Login using your credentials.

Step 3

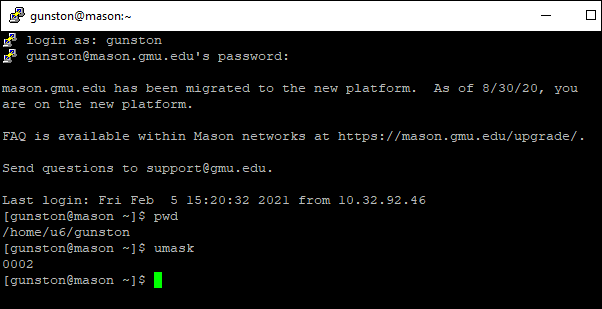
You should now be in your home drive, you can confirm this by typing pwd and selecting enter. Your current directory will be displayed. It should say /home/netid. If you are not in your home drive, please navigate to your home drive before continuing with the commands below. Enter cd /home/netid, replacing netid with your NetID and select Enter.

Step 4

Check your current umask setting by typing umask then select Enter. Please note: there is no ‘n’ in umask.
In the examples below, the netid is gunston your prompt will say your netid@mason.

Step 5

Once you are logged in, and after you are done with setting up your web folder (public_html), enter the following command:
   pico .bashrc 

Note: pico<space>.bashrc

Step 6

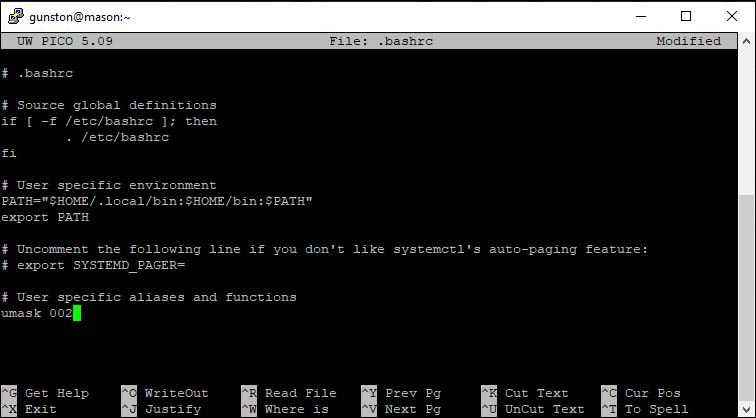
This will put you into a text editor. If there is a UMASK line, edit it so it reads umask 022 or umask 002 (See UMASK configurations). Otherwise, simply add the line to the end of the file. Refer to the screenshot below.

Step 7

Save the file (Ctrl+O) (letter O).

Step 8

File Name to write: .bashrc  will display towards the bottom of the window. select Enter.

Step 9

Exit the file (Ctrl+X).

Step 10

Log out of the session by entering the command mason> logout, then log back in again.

Note: This step is REQUIRED to see the change. You must log out of all connections to the web server, including Dreamweaver.

Step 11

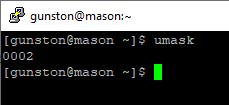
Type umask at the mason> prompt. If you have successfully set up the permissions, you should see umask 22 or umask 2 at the mason> prompt.

Note: While entering these commands into the mason prompt, if you happen to make any typing enters, you can use the Delete button instead of Backspace button.

If you are trying to fix permissions on your personal website (i.e., mason.gmu.edu/~userID) please refer to how to create a web folder on a personal site.

Issues

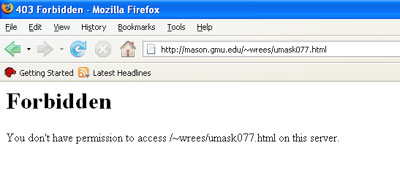
Forbidden Permissions

  • This permission error normally occurs when a file on the server is not world-readable. By default, when new files are uploaded, they are only readable by the user that uploaded them. While this is good for security, this means that newly created files will not be available to web site visitors. The setting that controls this is called the UMASK. Please be aware, if you change your default permissions to be world-viewable and upload a file that should NOT be visible to the world, you will need to manually change the permissions on that file.
  • This issue also appears when you happen to set all permissions correctly but do not upload the index.html file in your public_html folder. Please see how to upload files for further details.

Umask Line

Sometimes you won’t see a umask line in the file files. In such cases, just insert umask 022 or umask 002 at the position of the cursor shown in the screenshot and then continue from Step 4.

Last modified: February 21, 2022

Previous

How to Connect to the Mason Cluster via Terminal (Mac)

Next

How to Password Protect a Directory

Related articles

  • How to Set Up a Personal Site
  • How to Install PuTTY SSH for Windows
  • How to Set Up a Mason Website
  • What is the mason.gmu.edu server?
  • How to Upload Files with CyberDuck (for Mac)

Get Started at Mason

Whether you are a student, faculty, staff member, or a guest visiting the Mason campus, we have resources to help get you started.

Read More

Quick Links

Patriot Pass Password Reset
Submit a Ticket
Track a Ticket
PuTTY
Cisco AnyConnect VPN

Read More

Explore IT Services

A B C D E F G
H I J K L M N
O P Q R S T U
V W X Y Z #

© 2022 George Mason University
4400 University Drive
Fairfax, Virginia 22030

Latest tweet

George Mason ITS Follow

The official Twitter page for George Mason University's Information Technology Services

GeorgeMasonITS
George Mason ITS @georgemasonits ·
23 Jan

After October 14, 2025, Microsoft will no longer provide security updates or support for Windows 10 systems. As a result, all Windows 10 systems must be upgraded to Windows 11 or removed from the Mason network. Learn more ⬇️

https://its.gmu.edu/bulletins/microsoft-windows-11-announcement/

Reply on Twitter 1617560494176620547 Retweet on Twitter 1617560494176620547 Like on Twitter 1617560494176620547 Twitter 1617560494176620547
View All
ITS Support Center
703-993-8870
support@gmu.edu
live chat
Monday – Thursday, 8 a.m. – 9 p.m.
Friday, 8 a.m. – 5 p.m.
Saturday, Closed
Sunday, 1 p.m. – 9 p.m.
(closed Thursday 3 p.m. – 4 p.m. for a team meeting) Modified Winter Hours Monday –Thursday,
8 a.m. – 7 p.m. Friday, 8 a.m. – 5 p.m. Saturday & Sunday,
Closed Normal business hours will resume on Sunday, January 22 at 1:00 p.m.
  • Webmaster