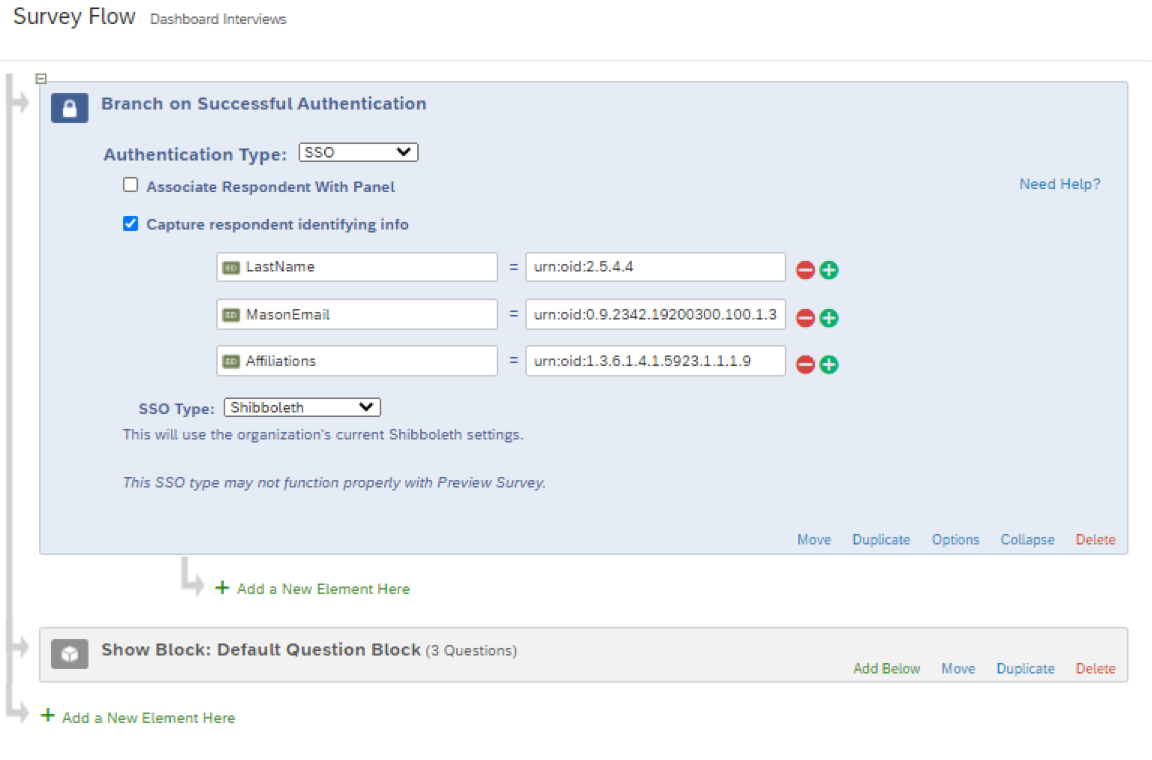
Step 1
From the Survey tab, click Survey Flow at the top of the page
Step 2
From the Survey Flow page, click +Add a New Element Here
Step 3
From the list of options available to add, click Authenticator
Step 4
From Authentication Type, select SSO
Step 5
Remove the checkmark next to "Associate Respondent With Panel"
Step 6
Place a checkmark next to "Capture Respondent Identifying Info", then click the "Add Embedded Data..." when link the appears.
Step 7
You will then need a descriptive field name in the "Embedded Data To Set" field, and the appropriate string from the table below in the "Field from SSO" field.
For example: If you would like to capture the NetID or email of a respondent, you could use "Username" in the Embedded Data to Set field and the corresponding object identifier in the Field from SSO field (urn:oid:0.9.2342.19200300.100.1.3).
| Data Description | String to use in the "Field From SSO" field |
| Last Name | urn:oid:2.5.4.4 |
| @gmu.edu email address | urn:oid:0.9.2342.19200300.100.1.3 |
| Affiliation with Mason | urn:oid:1.3.6.1.4.1.5923.1.1.1.9 |
Step 8
From the SSO Type, select Shibboleth.
Step 9
Click Move (under the blue authentication box), and drag the blue box up to the top of the survey flow (this should be the first item in your survey flow if you wish to have respondents authenticate in order to access the survey).

Step 10
Click Save Flow at the bottom of the screen.
You will now be able to view the respondent's captured identifying information in your survey results. There is no need to add any additional content to the survey, the captured fields automatically populate any results (including exports).
