Class Collaborate (formerly Blackboard Collaborate Ultra) is an always-on, real-time, online meeting tool available in all Blackboard courses. It lets you share your audio and video, add files, share applications, and use a virtual whiteboard to interact. Class Collaborate opens right in your browser, so you don't have to install any software to join or manage a session.
Quick References
Collapse All
Recommended Browsers
How to Get Started
Blank screen or spinning circle? Try another browser, or view these directions to enable third party cookies in your browser.
Please share our student guide to Class Collaborate with your students.
Security & Guest Access
Top tips
- Do not share the guest link with your students. Students do not see the guest link when they access Collaborate in your Blackboard course.
- Consider turning off the anonymous dial-in phone number in session settings. While this removes this backup audio option, accessing Collaborate via your phone’s browser or the Blackboard app is a good alternative.
- Consider removing student default privileges, also in session settings. You can turn off the ability to write on the whiteboard, chat, turn on the mic and video. These options can be changed anytime during a session, or you can promote a student to a Presenter role if they need to talk or share content.
Detailed information
Collaborate sessions are best secured by NOT sharing the guest link, or minimizing who you share the guest link with (for example only to a guest speaker, but not to students). The guest link requires no Mason login and therefore can be used by anyone to access your session. As long as you do not use the guest link, everyone (instructors and students) must access the session through Blackboard. Students DO NOT see the guest link in Blackboard. When users access Collaborate through their Blackboard course, their Mason chosen first name and their last name are included in the session participant list and become part of the attendance report.
By default, students can also see the anonymous dial-in phone number to the session. This number can be turned off in the session settings by unchecking Allow attendees to join the session using a telephone. This prevents an anonymous user from calling in and forces everyone to use audio through their computer (unfortunately, this also prevents users from dialing the number as a backup if they are having computer problems.)
The instructor can also remove participants (students) ability to use their microphone, camera, chat, or whiteboard. To do this when creating or editing a session, look under Session Settings to uncheck these permissions. During a session, select the Settings gear icon in the purple tab, then Session Settings. These settings can be changed multiple times during a session.
For a very secure session, in addition to the above instructions, the instructor could remove all participant tools and then promote one person at a time to the "presenter" role if that person used the hand raise function and needed to speak or present content.
Finally, the instructor can remove a participant if needed. In the Participant Panel (under the purple tab) select the control menu (circle, three dots) next to a name, and choose Remove from the session. If the participant joined from within a Blackboard course, they cannot rejoin. However, guest users can rejoin a session.
Guest Link
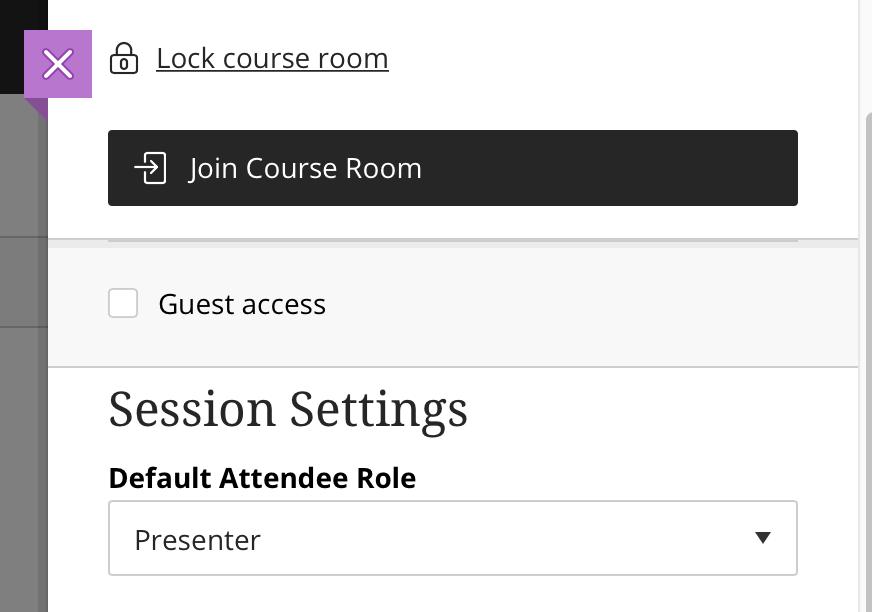
Use the guest access link to allow anyone (no login/Mason NetID required) to attend your session. This is not recommended for students but can help invite a guest speaker or another instructor. When created or editing a session, check the box for Guest access.
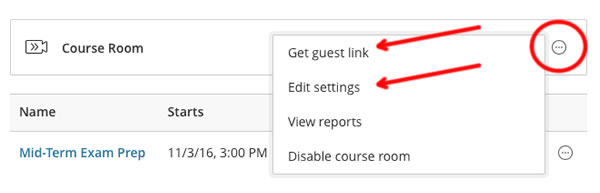
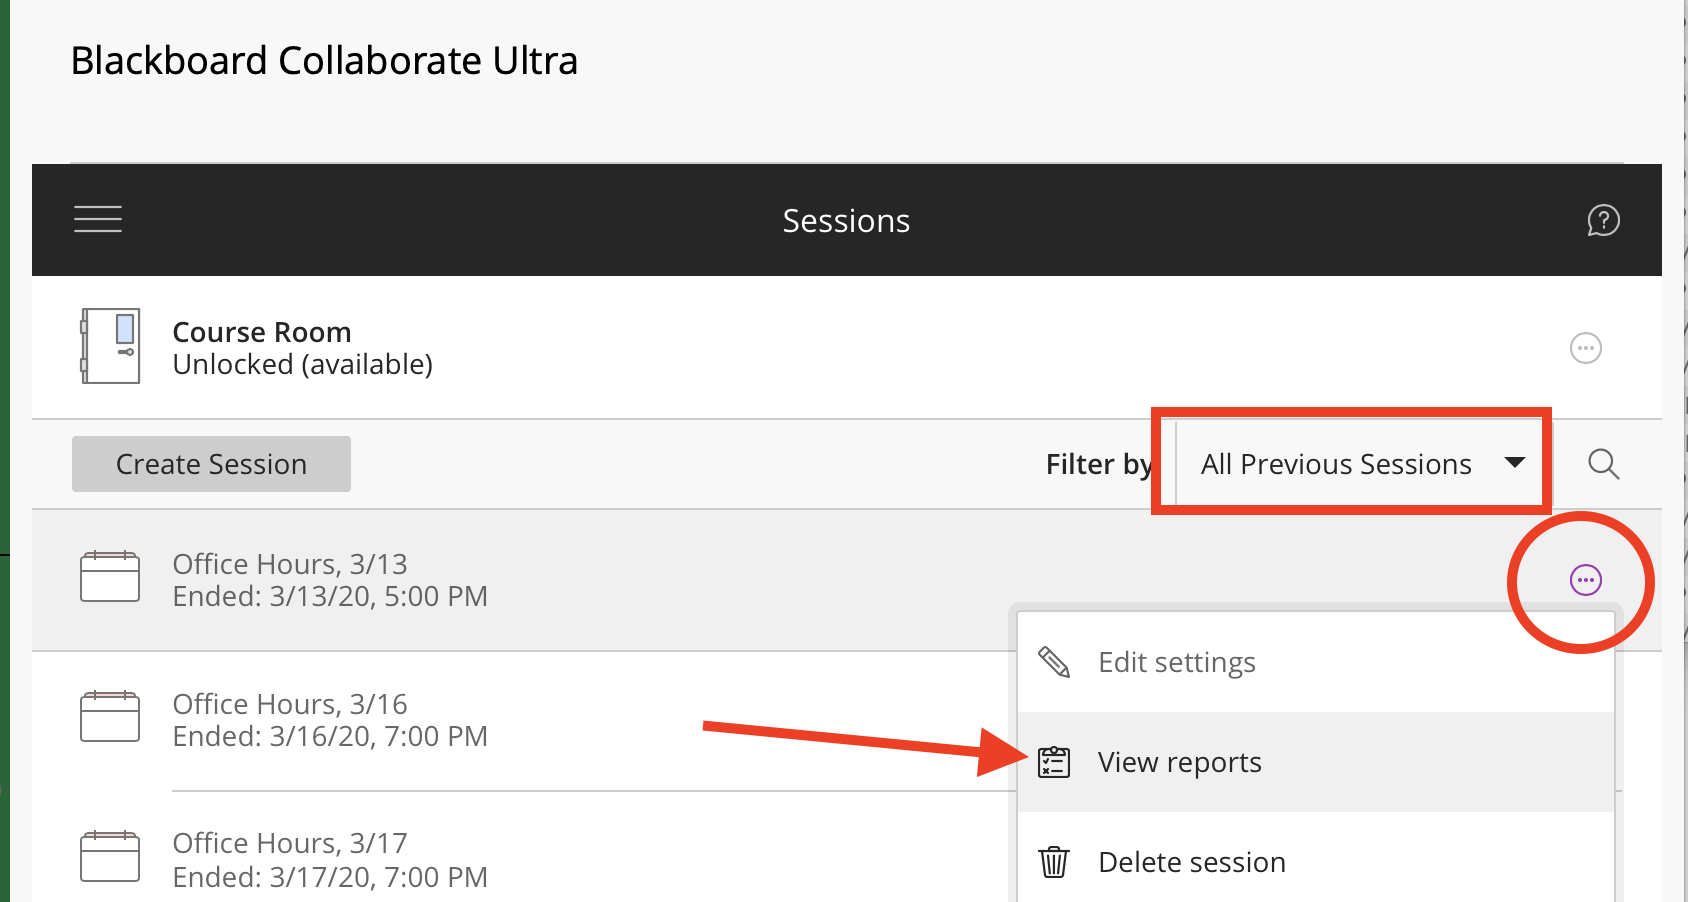
Next to the course room or a scheduled session, select the more button and then choose either Get guest link or Edit settings to view and copy the guest link. Choose if guests will be participants or have a role with additional privileges. Send users the guest link via email other methods. Do not post the guest link publicly (on an open website, etc.). Students never see this guest link in Blackboard - only the instructor can share the link.
Attendance & Poll Results
Recordings
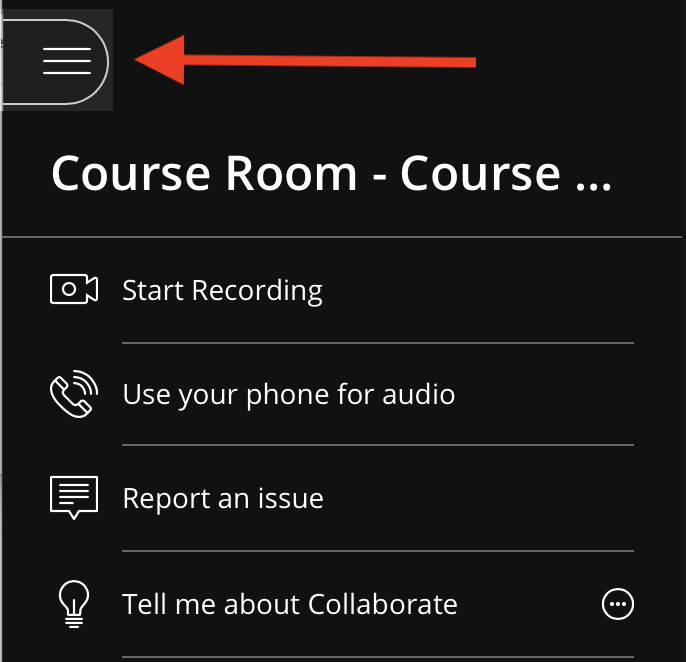
A separate recording is created each time you start and stop recording during sessions. The recordings live in your Blackboard Course or Organization, in the Class Collaborate tool. Select the Menu button and change to Recordings.

- If you don't see your recordings, change Show Recent Recordings to Show Recordings in a Range.
- In order to allow recordings to be downloaded, go back to the session settings and check the Allow Recording Downloads option.
- Recordings are in mp4 format and can take up to one hour to display in Blackboard after the recording ends.
- Chat from the sessions is available by selecting the purple tab at the bottom right of the recording.
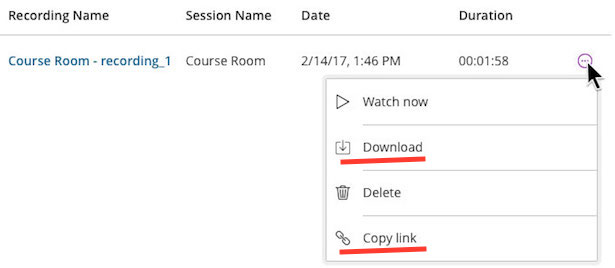
- Instructors can change the name of the recording by selecting the options icon to the far right of the recording name.
Share Recordings
- First make the record link public. On the recording page, select the options button for a recording and select Edit Settings. Select the Allow public access box and the Save button. Then in the options menu select Copy link.
- Download the recording as an mp4 file (Download). You can share the downloaded file as needed. For future courses, you can upload to Kaltura (see the instructions for How to Upload and Publish Media to a Course with Kaltura Using Build Content). Important Note: In session settings, you must enable Allow recording downloads before you will see the download option.
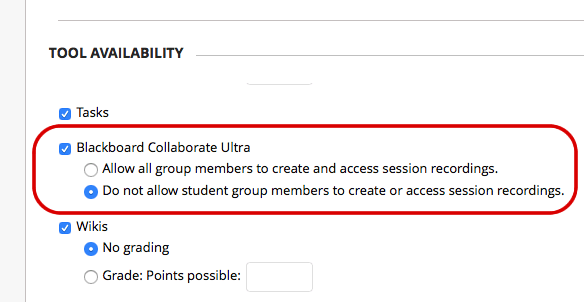
Group Work/Student Rooms
If you want to give the students the ability to record, change that option under Tool Availability when setting up the group. Recordings are only visible to students in the group and the instructor. Students cannot get a link to, download, or re-name the recording; however, instructors can view the recording via the group's Collaborate page and can get a guest link to share with the rest of the class if needed (see above).