Instructors can make a Class Collaborate online meeting room available inside groups, and optionally allow students to record their session. For example, one or more students could upload PowerPoint slides and narrate the presentation for an assignment. Please note: webcams video is only part of the recording if there is no files or screens being shared. Once a file is shared or a screen is shared, the webcam will not be recorded.
Step 1
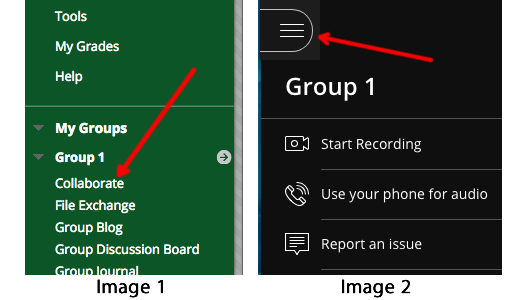
Access your group from the course menu (see image 1 below). Choose Collaborate then click Join Room (see image 2 below).
Once in Collaborate, prepare your session by uploading any files and confirm your microphone is on and working.
Choose the menu at the top left and begin the recording (see red arrow in image 2 below).

Step 2
After your session is over, the recording will become available in about as much time as the length of the recording. It will be located on your group's Collaborate page.
The recording is only available to group members and instructors/TAs via the group's Collaborate page. Students cannot share a link or download the recording. Only the instructor/TA has the ability to get a link to the recording, edit the name, and delete the recording.
Where to view recorded sessions
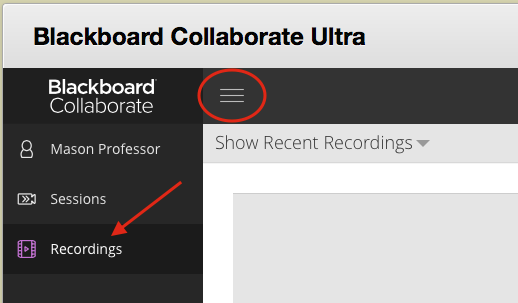
In your Blackboard Course or Organization, in the Class Collaborate tool, click Menu ≡ and change to Recordings.
Note: If you don't see a recording, change Show Recent Recordings to Show Recordings in a Range.
Chat is available by clicking the purple tab at the bottom right of the recording.

