What is Express Capture?
Express Capture is Kaltura’s browser-based webcam recording tool. It lets you quickly record video (and audio) directly in your browser without installing any software. Once you finish recording, the video is uploaded straight into your Kaltura MyMedia library in Canvas, where you can edit or publish it in courses.
Express Capture is best for short, simple videos—such as student introductions, course announcements, or quick instructional clips.
⚠️ Note of Caution: Express Capture does not save progress until the recording is completed. If your internet connection is interrupted or the browser closes before you finish, the video will be lost. For longer recordings, we recommend using the Kaltura Capture, which saves files locally as well as uploading them to My Media.
Note: You will need a webcam connected to your computer. Express Capture works best in Chrome or Firefox.
Step 1
Open Kaltura MyMedia from the global navigation menu in Canvas.
Step 2
Click Add New > Express Capture

Step 3
If prompted by your browser, allow permission for Kaltura to access your webcam and microphone.
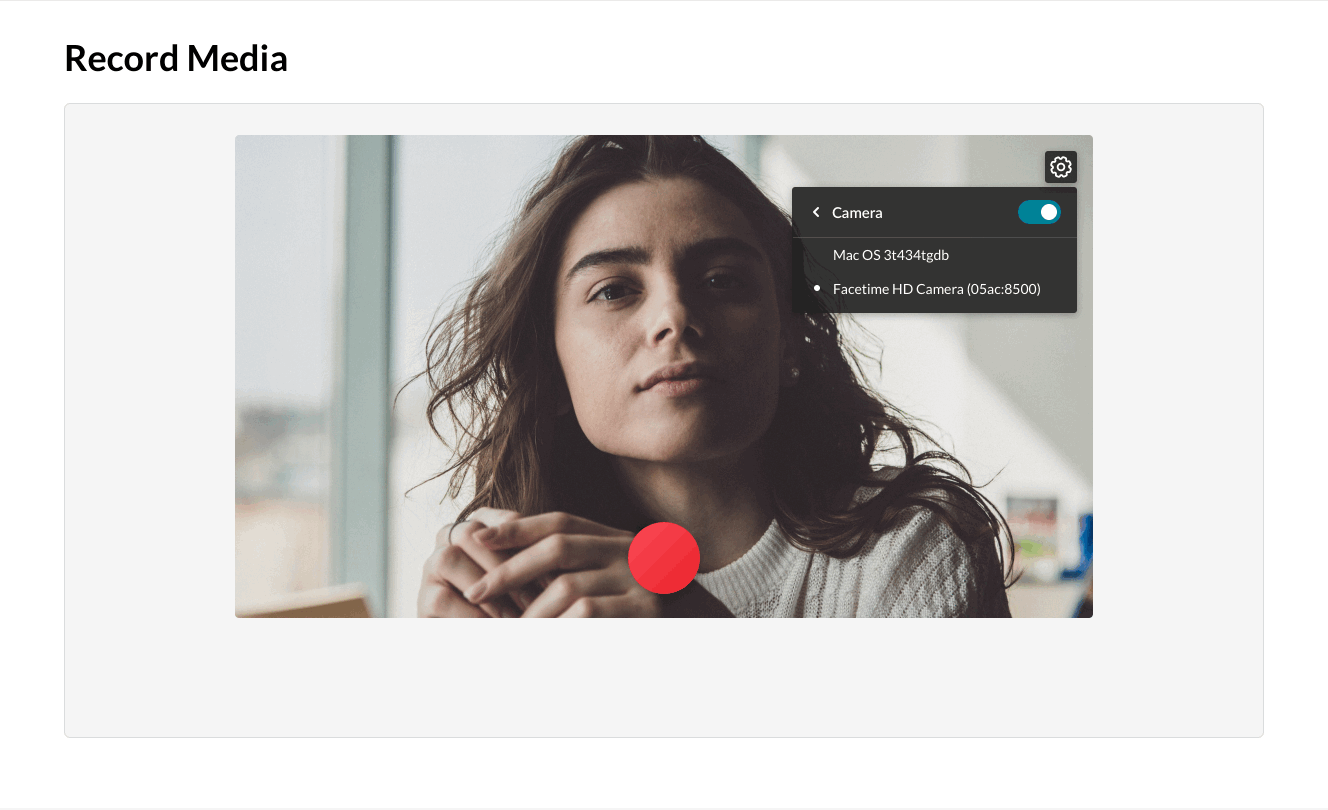
Step 4
Use the settings icon (top right) to adjust options before recording—for example, turn off the camera to record audio only.
- When ready, click the red Record button.
- Click Stop when finished.
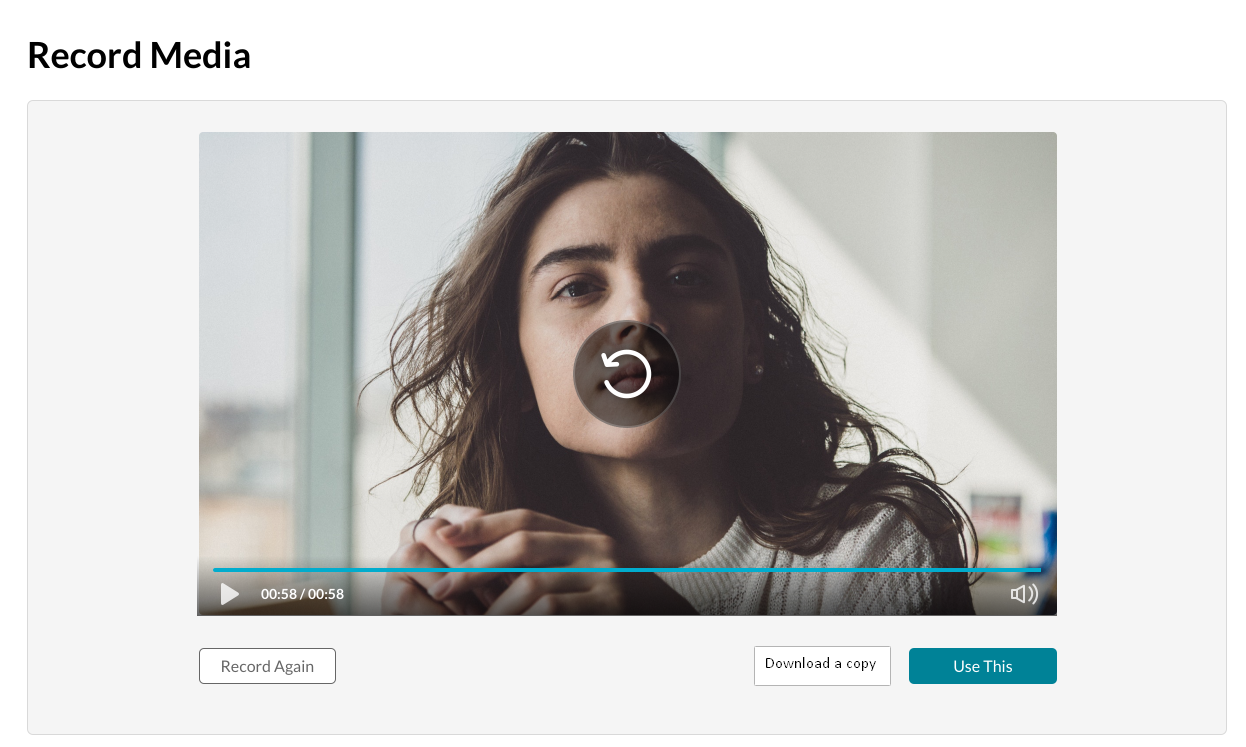
Step 5
Preview your recording.
- To redo, select Record Again.
- To save, click Use This.
Step 6
Edit the video details (title, description, tags) if needed, then click Save.
The video is automatically uploaded to your Kaltura MyMedia library.
Step 7
To share the video inside a course:
- Go to an Announcment, Discussion, or Page.
- Use the Rich Content Text Editor → Kaltura Media tool to embed the video.