When courses are created, they are unavailable to students by default and show the word Private with a lock icon. Students see the course but cannot click into it. The availability must be changed in order for students to be able to access the course. The instructor can optionally choose to make the course unavailable to students at the end of the semester by reversing the steps below.
Student View of a course not available:

Option 1
Courses can be made available by accessing the course, then clicking the lock icon located on the top right of the course.
A red lock indicates that the course is unavailable (private) to students. Select the lock to make the course available.
![]()
A gray and open lock indicates that the course is available to students. If you select this icon, the course will be made unavailable and students will not be able to access it.
![]()
Option 2
On an instructor's Courses page, click the More Options three dots next to a course and choose Open Course.

Option 3
 On the course menu, go to the Control Panel and select Customization. Select Properties from the options.
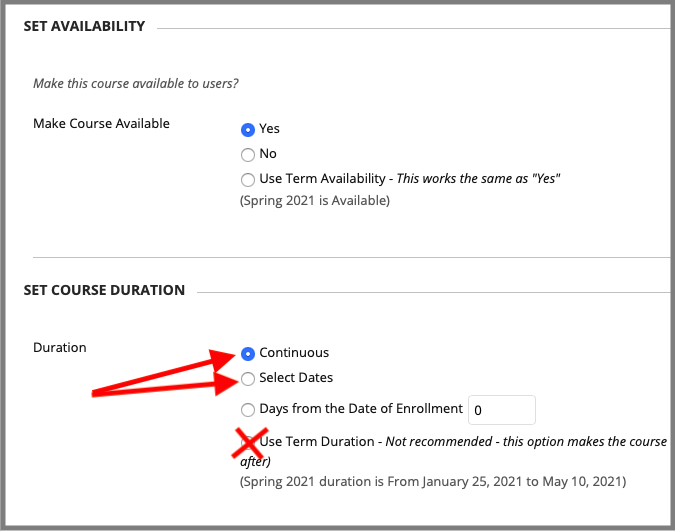
On the Properties page, scroll down to the SET AVAILABILITY section.
Set Make Course Available to Yes.
Important! Make sure that Duration is set to Continuous OR choose "Select Dates" - the dates you enter will be the only dates when students can access the course.
Submit.
