• Live Chat
  • Report an IT Security Incident
  • Request Help
  • Help & Support
    • Live Chat
    • Request Help
    • Track a Ticket
    • Knowledge Base
    • Getting Started
    • Working/Learning Remotely
    • Computer Labs & Classrooms Information
  • Service Catalog
    • ITS General Help
    • Accounts & Access
    • Communications & Collaboration
    • Computers & Software
    • Information Security
    • Network & Internet Services
    • Professional Services
    • Research Computing
    • Teaching & Learning
    • University Applications
  • About ITS
    • Our ITS Team
    • Strategic Plan
    • Annual Reports
    • Awards
    • Student Employment
  • Working with ITS
    • Architectural Standards Review Board
    • Banner Admin
    • Business Intelligence
    • Data Governance
    • Enterprise Data Integration Services (EDIS)
    • GMU-TV
    • IT Business Analysis
    • IT Security Office
    • Projects & Project Management
    • Technical Business Solution Intake Request Process
  • Alerts & Outages
    • Unplanned Outages
    • Phishing Alerts
    • Maintenance
    • After Action Reports
    • Archives
    • ITS Alerts Sign Up
  • News
    • Bits & Bytes Signup
    • Bits & Bytes Submissions
    • Spotlights
    • Bulletins
George Mason University
  • Live Chat
  • Report an IT Security Incident
  • Request Help
X Hide

Information Technology Services

Skip to content
  • Help & Support
    • Live Chat
    • Request Help
    • Track a Ticket
    • Knowledge Base
    • Getting Started
    • Working/Learning Remotely
    • Computer Labs & Classrooms Information
  • Service Catalog
    • ITS General Help
    • Accounts & Access
    • Communications & Collaboration
    • Computers & Software
    • Information Security
    • Network & Internet Services
    • Professional Services
    • Research Computing
    • Teaching & Learning
    • University Applications
  • About ITS
    • Our ITS Team
    • Strategic Plan
    • Annual Reports
    • Awards
    • Student Employment
  • Working with ITS
    • Architectural Standards Review Board
    • Banner Admin
    • Business Intelligence
    • Data Governance
    • Enterprise Data Integration Services (EDIS)
    • GMU-TV
    • IT Business Analysis
    • IT Security Office
    • Projects & Project Management
    • Technical Business Solution Intake Request Process
  • Alerts & Outages
    • Unplanned Outages
    • Phishing Alerts
    • Maintenance
    • After Action Reports
    • Archives
    • ITS Alerts Sign Up
  • News
    • Bits & Bytes Signup
    • Bits & Bytes Submissions
    • Spotlights
    • Bulletins

How can ITS help you?

Our services are designed to help you succeed at Mason—
search our services, knowledge articles, how to guides, FAQs, and more.

Knowledge Base

Home > Help & Support > Knowledge Base > Teaching & Learning > Blackboard > Kaltura Information > How to Trim or Make Clips of a Video
Set the Range |

How to Trim or Make Clips of a Video

Use the trimming tool to trim the start and/or end of your media or to make clips from a longer video.


How to Trim or Make Clips of a Video

Step 1

In  MyMedia>Select Video>Actions>Launch Editor set the range of the video you would like trim or copy.

Step 2

Click Save or Save As to create a new video.

WARNING: Trimming media will modify the source media permanently if you click SAVE. To create a shorter clip (a copy) and preserve the original media click SAVE AS.

Sample Use Case for Trimming/Clipping

Step 1

Go to MyMedia and select the video you want to trim or create a clip from.

Step 2

In the media view window click Actions>Launch Editor.

Step 3

In this example, the desired start time will be one minute. Drag the handlebar to the 1.00 point on the video. You can also select to input the 1:00 time manually.


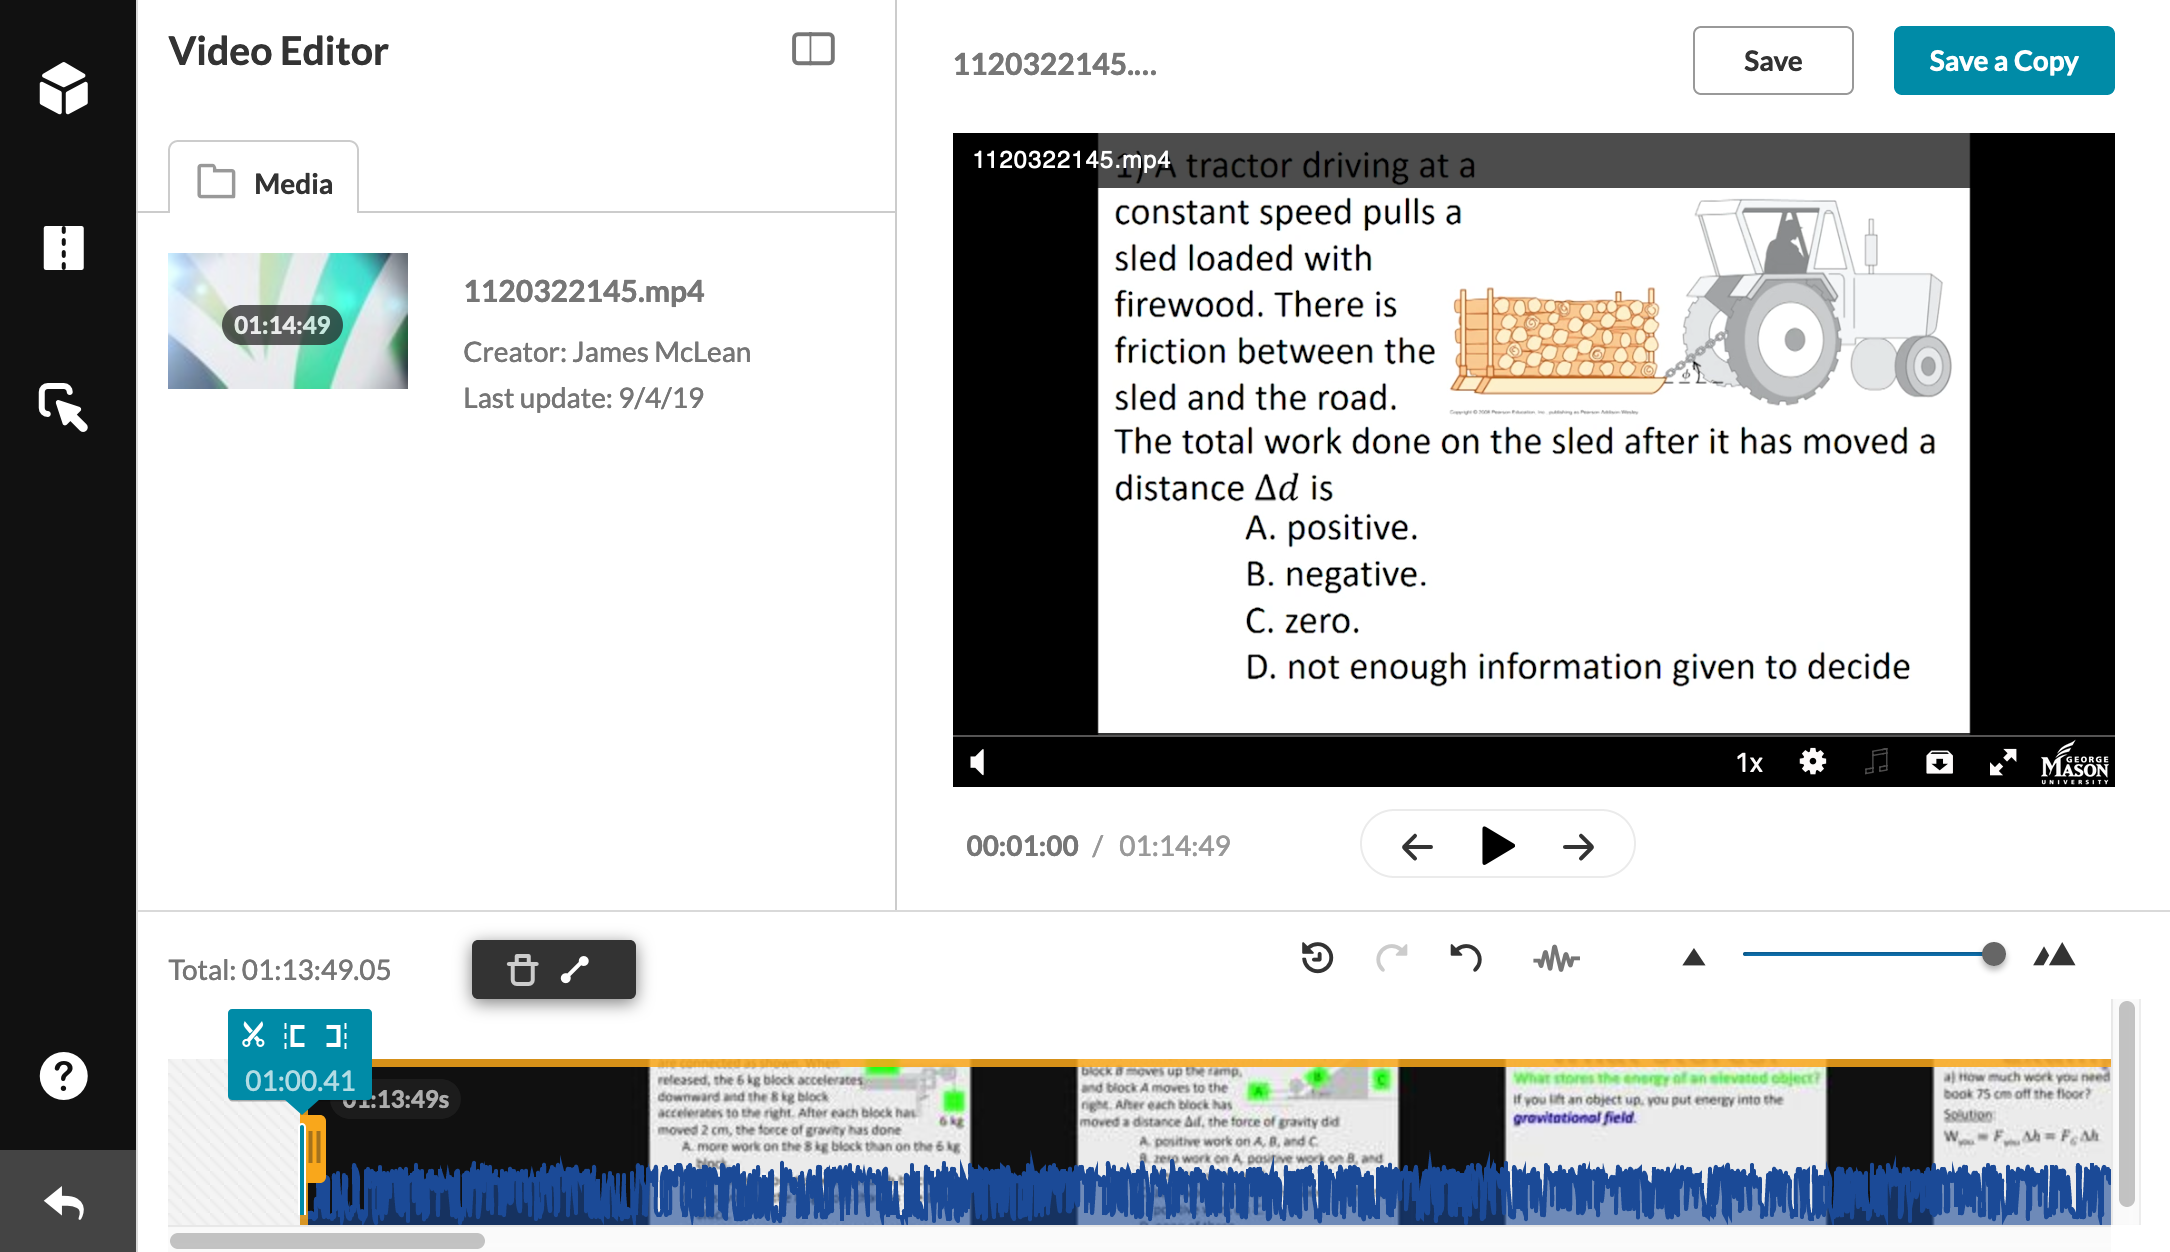
The manual input time set on the timeline with the blue edit marker on the film strip syncs with in the player. Playing the video will also move the blue edit marker in the timeline.

Step 4

The handlebar should snap to the blue edit marker. Drag the other end to the time mark 30 seconds less prior to the end and use the manual time input as a guide to the exact time.

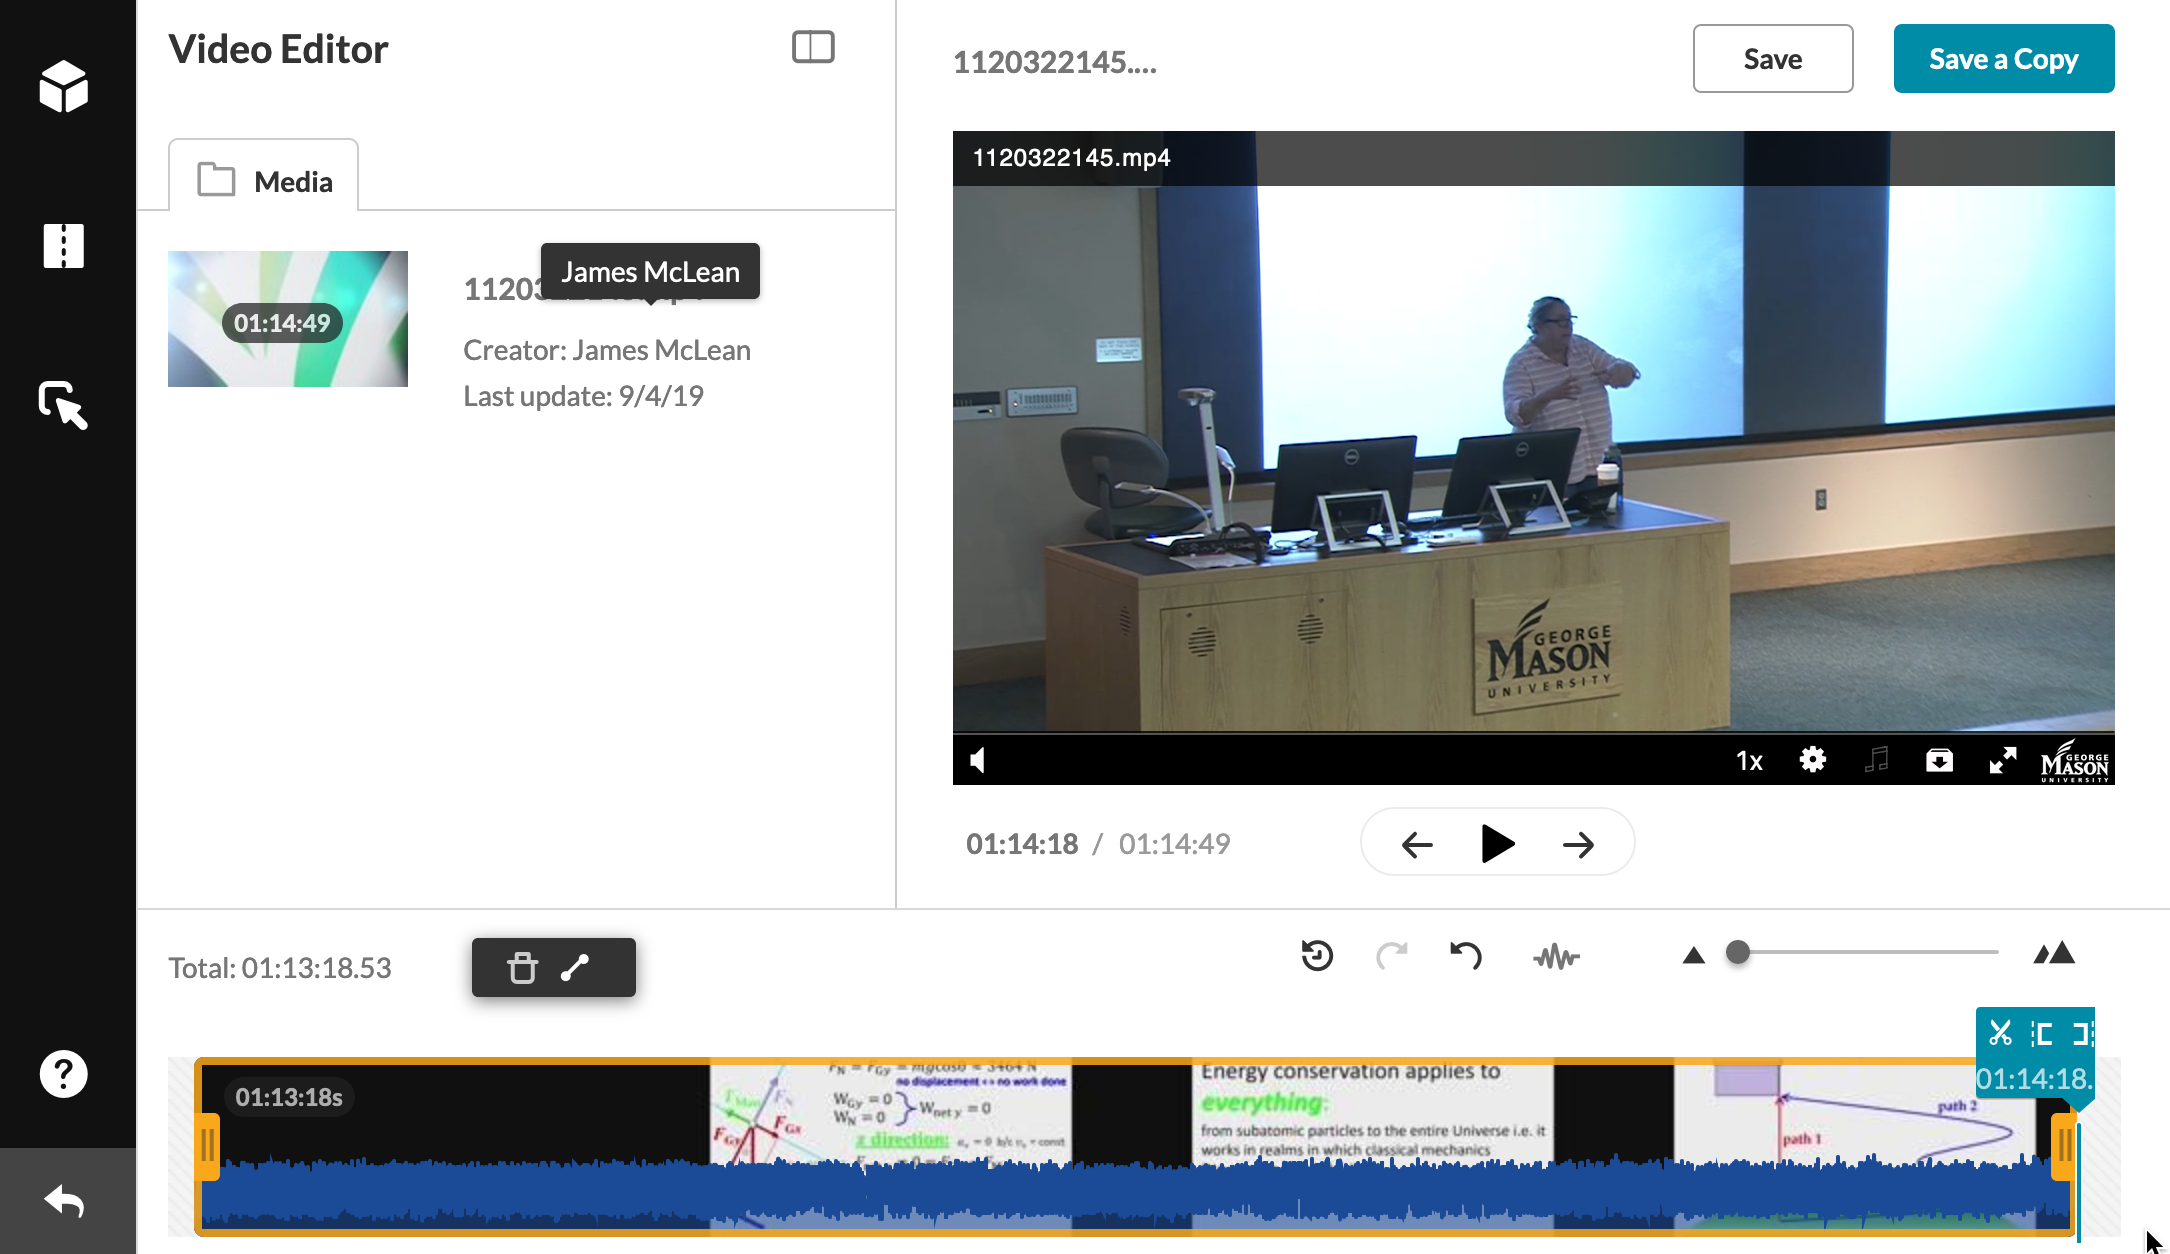
You have now the desired segment of the original video.

Step 6

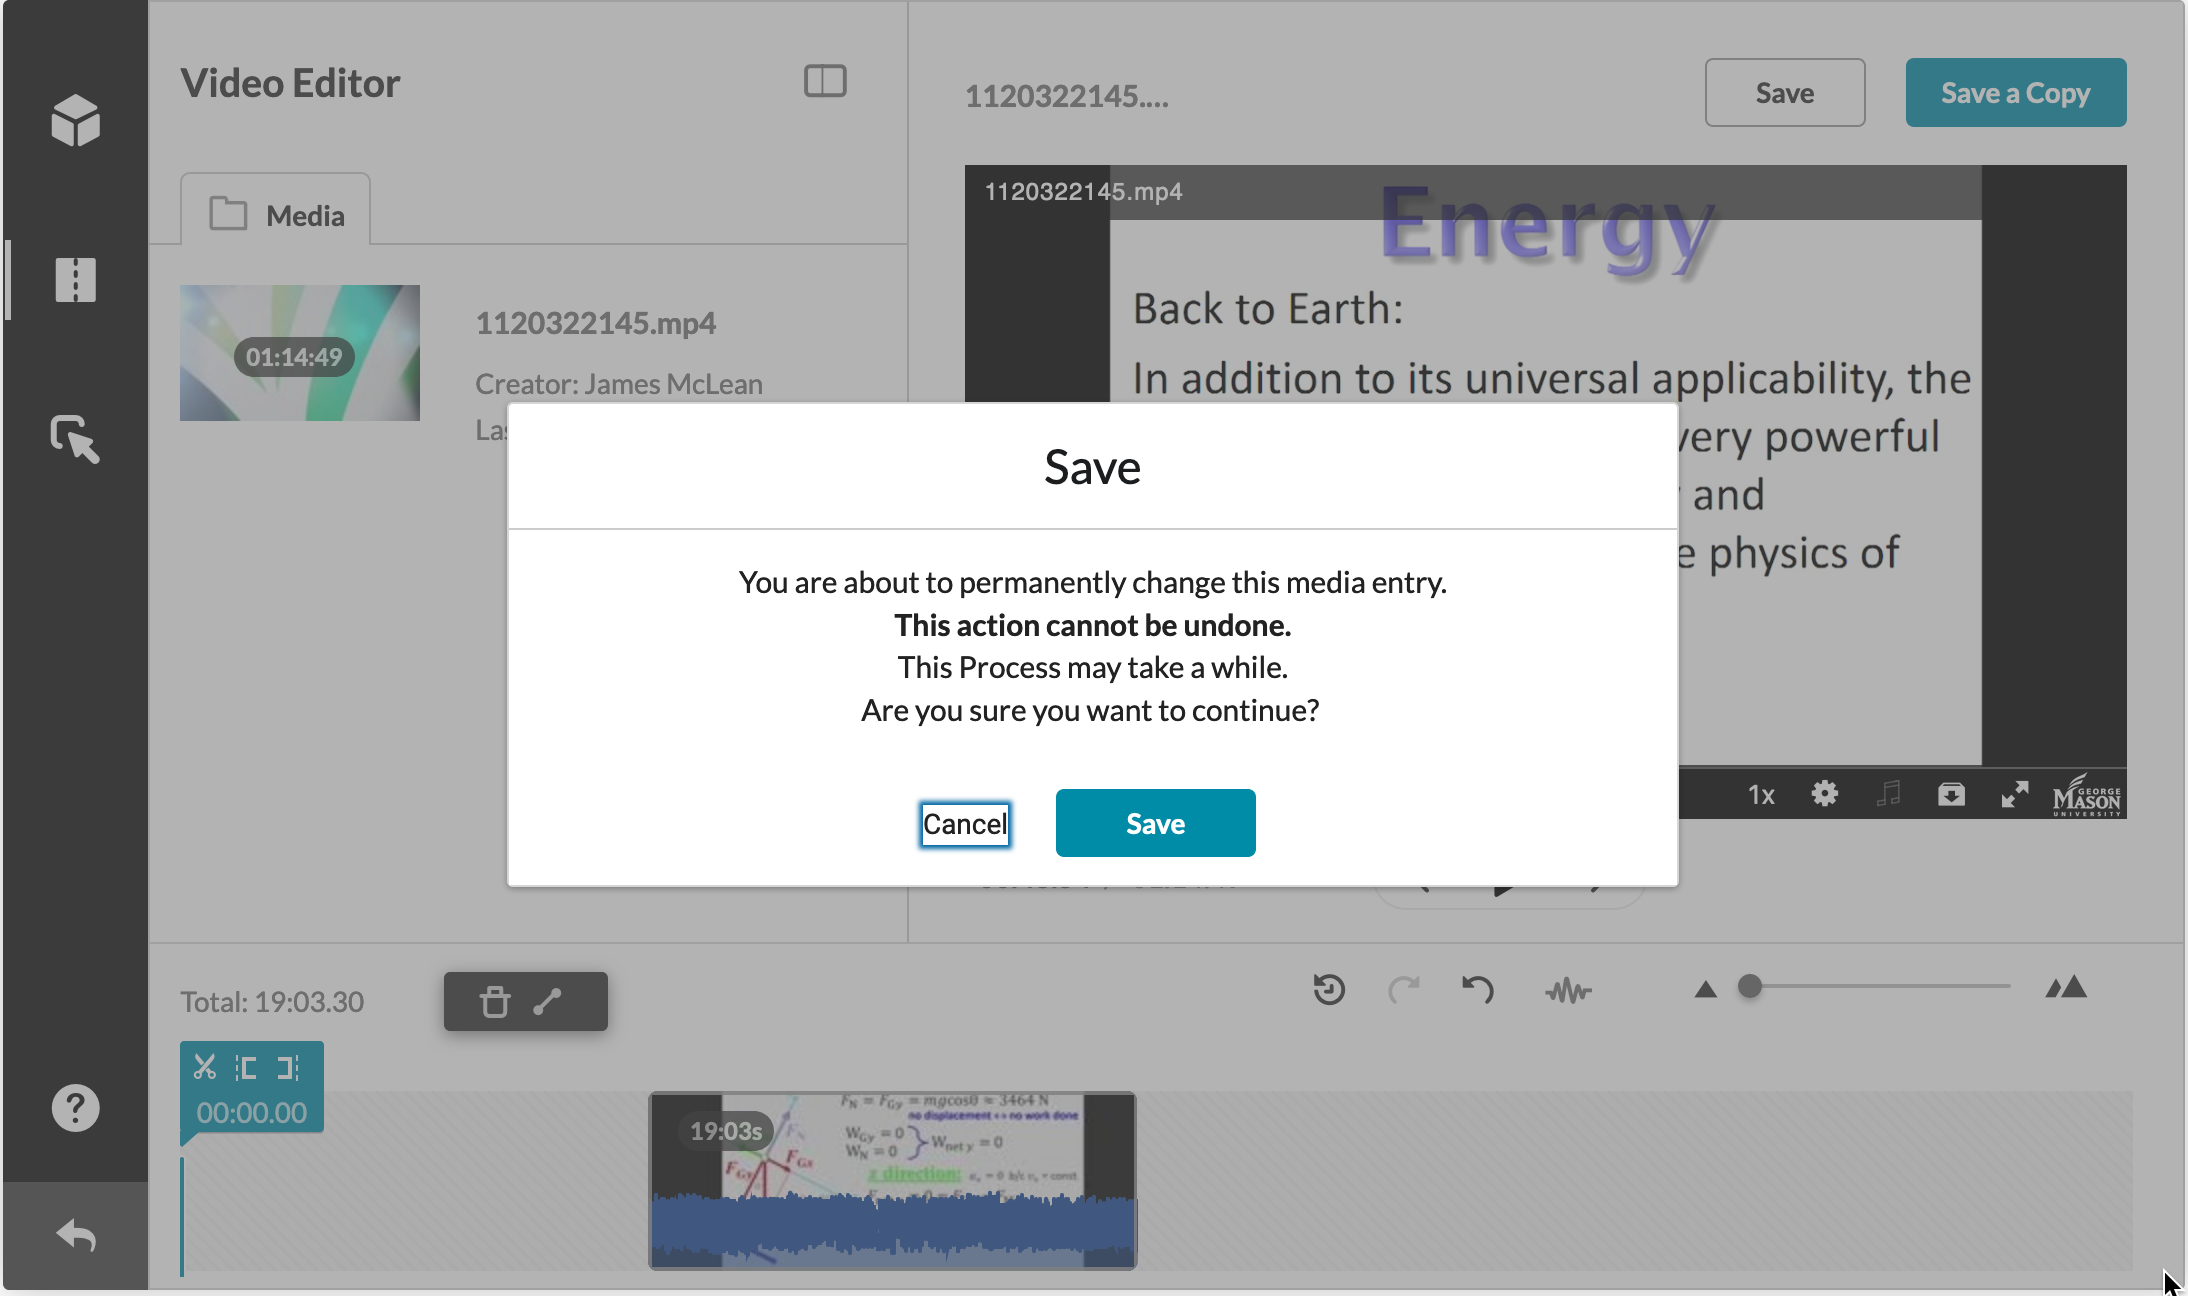
Click Save. The following window is displayed—click Save again.

Remember, this will permanently modify the source video.

Step 7

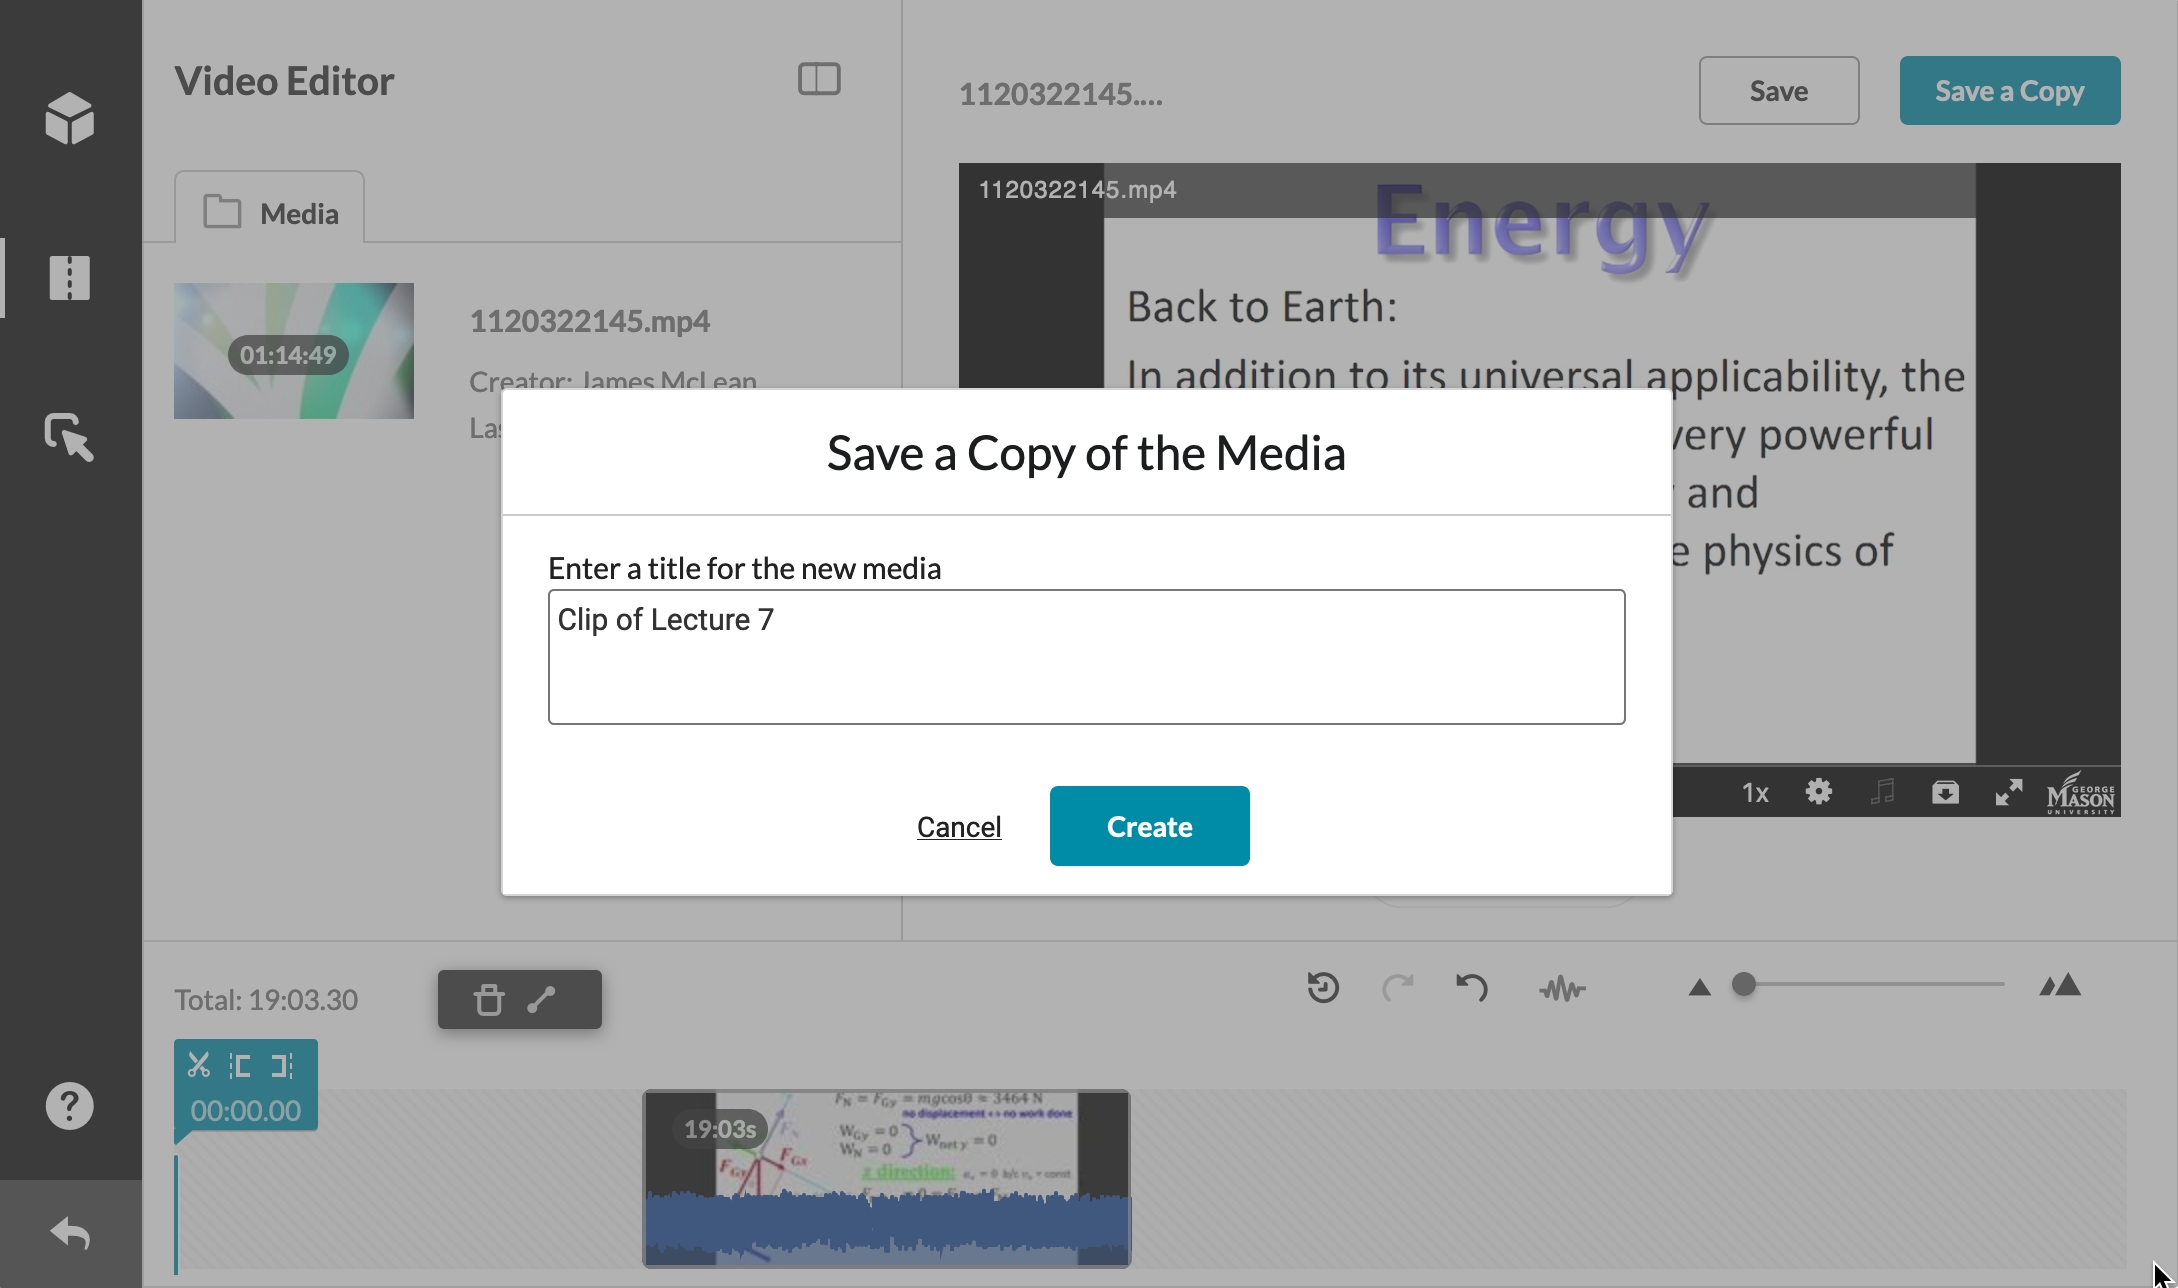
To Save as a clip (as a copy) and not permanently alter the source video- click SAVE AS
You can rename the video, but do not use any line spaces in the text field.


Last modified: March 1, 2022

Previous

How to Clip a Media Item in Kaltura Video Editing Tools

Next

How to Launch the Kaltura Video Editing Tools

Related Articles

  • What media does Kaltura Video Editing Tools support?
  • How do I clip and trim media with multiple video streams in Kaltura Video Editing Tools?
  • How do I zoom in and out and reset the timeline in Kaltura Video Editing Tools?
  • How do I clip and trim media with multiple audio tracks in Kaltura Video Editing Tools?

Get Started at Mason

Whether you are a student, faculty, staff member, or a guest visiting the Mason campus, we have resources to help get you started.

READ MORE

Quick Links

Patriot Pass Password Reset
Create a Ticket
Track a Ticket
PuTTY
Cisco AnyConnect VPN

READ MORE

Explore IT Services

A B C D E F G
H I J K L M N
O P Q R S T U
V W X Y Z #

I T S Logo

© 2024 George Mason University
4400 University Drive
Fairfax, Virginia 22030

Follow Us
location pin for in-person IT support   @GeorgeMasonITS
location pin for in-person IT support   @georgemasonits
ITS Support 24/7
   703-993-8870
   Live Chat
  • Webmaster
X

ITS Technical Support Now Available 24/7

Students, faculty, and staff can receive technical support any time—day or night, on weekends, and even on holidays. If you need IT help, call 703-993-8870 anytime or create a ticket.