
WordPress is integrated with Canvas. Instructors and TAs can automatically generate a WordPress site from within any Canvas course. Access to WordPress will always be from within Canvas in order to authenticate users to the correct role in WordPress.
Add WordPress Course Blogs to your Canvas course menu
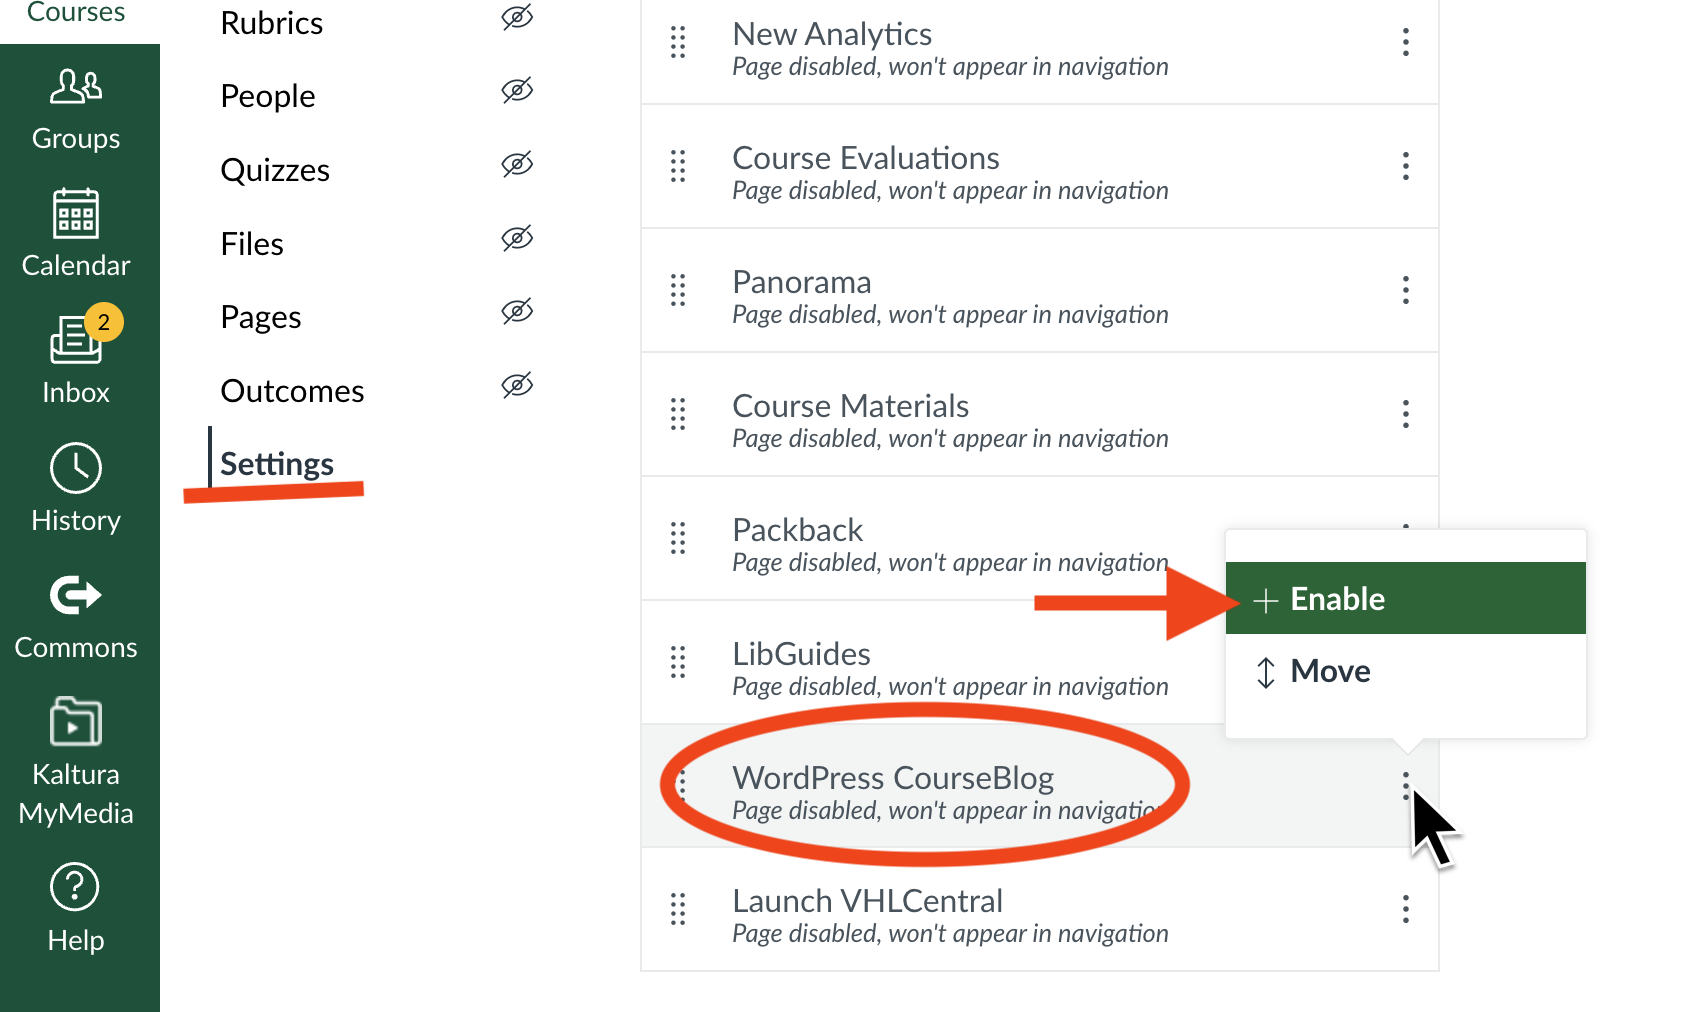
- Go to Settings in the course menu.
- Choose Navigation
- Find WordPress CourseBlog in the list (toward the bottom)
- Click the three dots next to it and choose Enable.
- Click Submit.
WordPress CourseBlog will now appear in your course menu. As the instructor (or TA) you must click the link once to activate the site, so that students can access it.
Please note: While you can change the name of the WordPress site in the settings, the name will always default back to "WordPress CourseBlog" - this is a limitation of the integration with Canvas.
WordPress Roles
WordPress has 5 role types for its users. Students automatically receive the Author role.
| Role | Description |
|---|---|
| Administrator | Gives the user access to all administration features. This is the role instructors and TAs are given from Canvas. |
| Author | Gives the user the ability to write and publish their own posts and comment. This is most common for students and a student's default role from Canvas. |
| Contributor | Requires the instructor to moderate posts and comments before they are published. |
| Editor | Gives someone the ability to publish and manage other users posts. |
| Subscriber | Allows the user to view content, but not post or comment. |
Plugins and Themes
A small number of plugins and themes are installed and can be activated in the site. Submit a ticket if you would like consideration of another plugin.
How to Change WordPress Course Blog Site Visibility
By default, new WordPress Course Blog sites are private to enrolled students. You can change this setting to make the site public. This is only recommended with student approval and after ensuring all FERPA guidelines are met.
- Access your WordPress site from your Canvas course.
- In the left-hand menu, choose Settings then Reading.
- In the Site Visibility area, choose Allow search engines to index this site.
- Use the URL of the site to share.
Export/Copy a Site
WordPress site administrators (instructors/TAs) can export their site for archiving purposes, or to import the site to another WordPress instance.
Export:
- Access your WordPress site from your Canvas course.
- Go to the Dashboard.
- Select Tools > Export.
- Download the file.
Import:
- In a new WordPress site go to the Dashboard, then select Tools > Import.
Note: The download file's format, called WordPress eXtended RSS or WXR, will contain your posts, pages, comments, custom fields, categories, and tags. While the downloaded file is not readable by itself, it can be imported into another WordPress site.