Folder Sharing lets you give others access to your mail folders. You specify which folder, and the level of access, that is, whether the delegate can simply see items in a folder, or whether they can create, edit, and/or delete items.
If you want to allow someone to send messages “on behalf of” you, you need to use Delegate Access.
Note: Items in any existing sub-folders of the folder you share are not available to the person unless you change the sharing permissions on each sub-folder. However, new sub-folders (created after sharing rights were set) inherit the folder access permissions of the parent folder.
If you are sharing any folder other than your Inbox, be sure to follow the steps in both part one and part two below.
Part One – Sharing the Contents of a Folder
This example shares your Inbox, but you can share any of your mail folders on the Exchange server. (You cannot share a local folder)
Note: If you share a folder other than your Inbox, be sure to follow the steps in Part Two below.
Step 1
In the Navigation Pane, right-click the folder you want to share.
Step 2
From the drop-down menu that appears, select Sharing Permissions. A Folder Properties dialog box will open with the Permissions tab selected.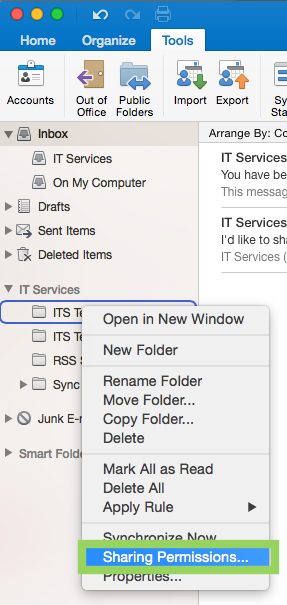
Step 3
Click Add User.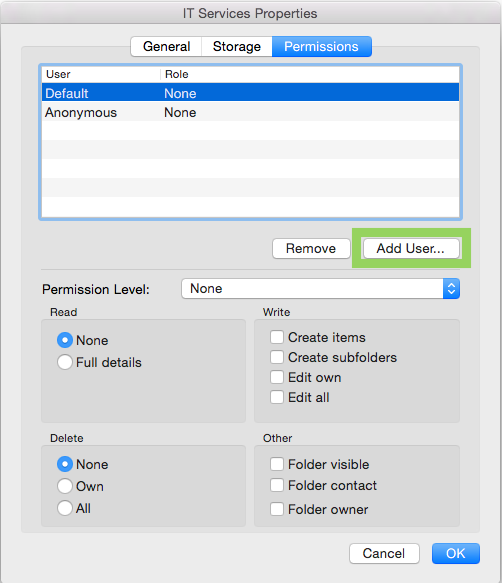
Step 4
In the Search box, type the name/email address of the person who you would like to have access to the folder. Select the name and click Add.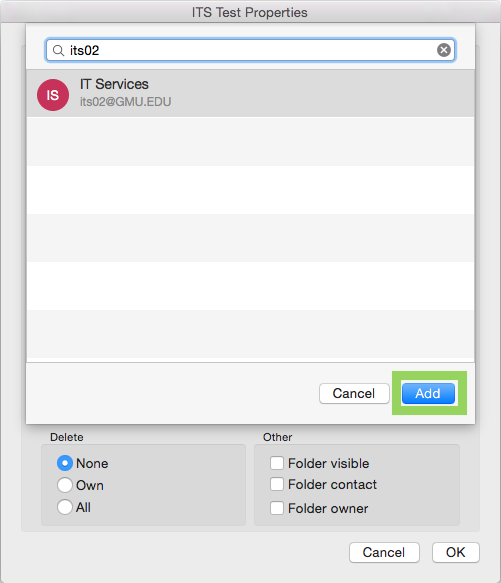
Step 5
Then select the user from the list and choose the Permission Level from the drop-down list. As you select different permission levels you will see the check boxes reflect the permission differences.
-
- If you just want to let this person read your messages, use Reviewer.
- If you want them to read AND be able to drop messages into a folder, use Non-editing Author.
Step 6
Click OK.
The recipient will be able to view your shared mail folder.
Part Two – Making Higher-Level Folders Visible
If you only want to share your Inbox and have followed the steps above, you do not need to read any further or do any of the steps here in Part Two.
If you shared something other than your Inbox, that is, you’ll also need to make the “parents” of that folder visible, right up to the Inbox. Your delegate will not be able to see the items in each parent folder (unless you use the steps above for each one), but they need to be able to see the folders themselves in order to see the sub-folder where you want them to see the contents.
Step 1
In the Navigation Pane, right-click the Parent folder of the folder you want to share.
Step 2
From the drop-down menu that appears, select Sharing Permissions. A Folder Properties dialog box will open with the Permissions tab selected. Click Add User.
Step 3
In the Search box, type the name/email address of the person who you would like to have access to the folder. Select the name and click Add.
Step 4
Then select the user from the list and choose the Contributor Permission Level from the drop-down list. This is the lowest permission level that allows the user to see the folder. Note: The user will see the right to send mail on behalf of your account, but the function does not work as you have not given all the required access.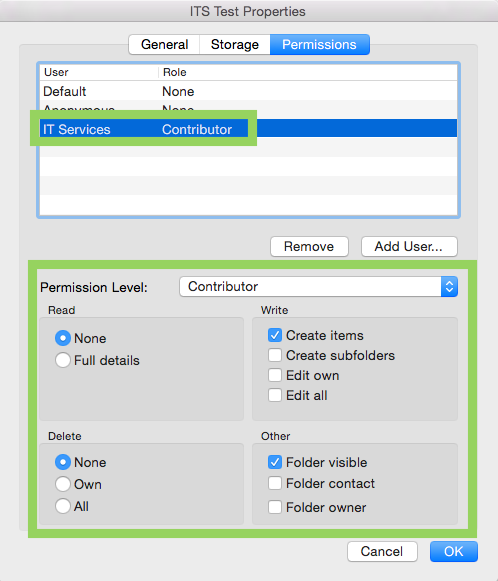
Step 5
Click OK.
You’ll need to repeat this process for each parent folder of the folder you are intending to share including the inbox.