These instructions assume that you have already added files to a Content area such as My Content or your department's Institution folder.
Note: When using this method to add content to your course, you do not need to grant any special Permissions to a folder or item in the Content area. This is done automatically when adding files to a course.
Step 1
Once in a Blackboard course, choose a content area (such as Course Content) where you want to add the file.

Step 2
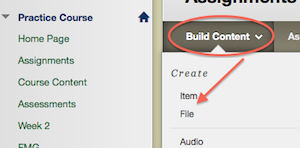
Hover over the Build Content button, and choose Item or File, from the drop-down list.
Step 3
Enter the Item Name and optional description.
Step 4
In the Attachments area, click the Browse Content Collection button to search the Content Collection for the resource that you intend to link to.

Step 5
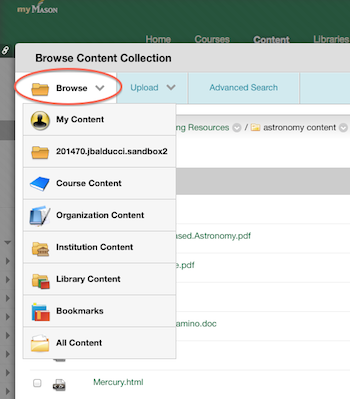
Navigate to the file location by hovering your mouse over Browse and navigate to an area such as My Content or Shared Content.

Step 6
Check the box next to the resource file you wish to link to, then click Submit.
Step 7
Click the Submit button again to make the item available in your course.
