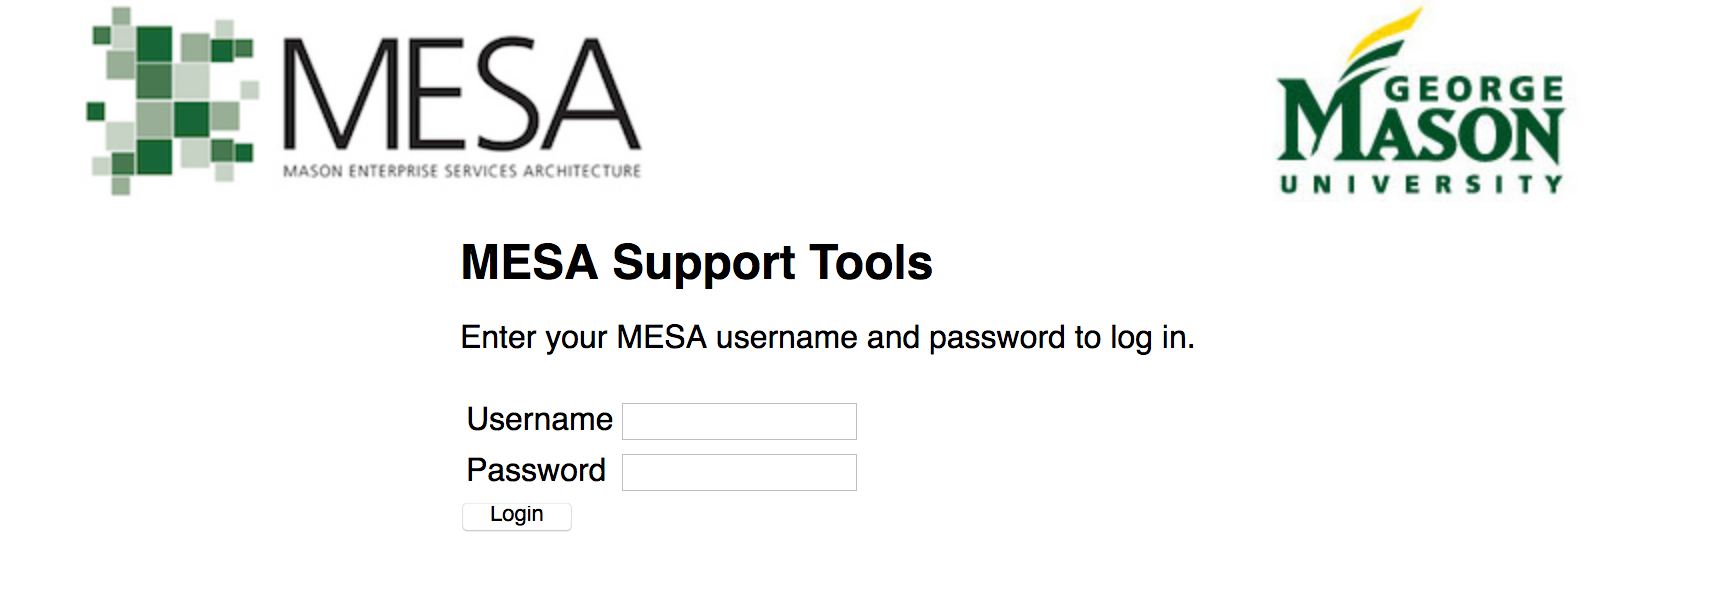
Step 1
Open a web browser and navigate to tools.mesa.gmu.edu. Log in with your Patriot Pass credentials.
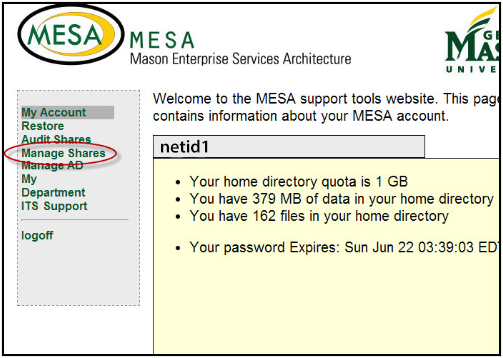
Step 2
Select Manage Shares from the left-hand menu.
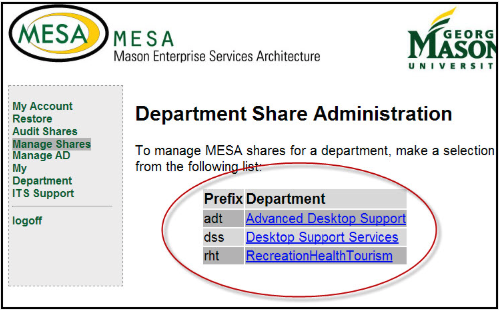
Step 3
Select the department for which you would like to add or delete a share.
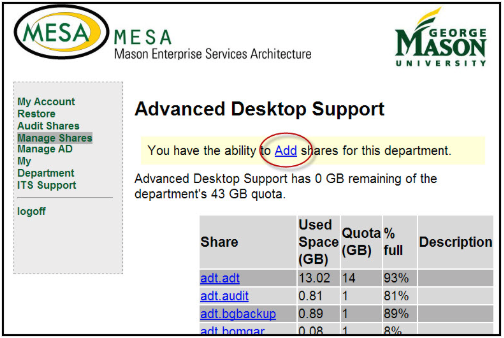
Step 1
Select the link to Add.
Step 2
Complete the form.
- If you would like, provide a brief description of the share.
- Ignore the box asking about sensitive and/or restricted data.
- Name your share.
- Give it a quota, the default is 1 GB.
- Provide two users who will be the Share Administrators. These people will be responsible for adding and removing users from the share and auditing the share once per year.
- Select Create Share.
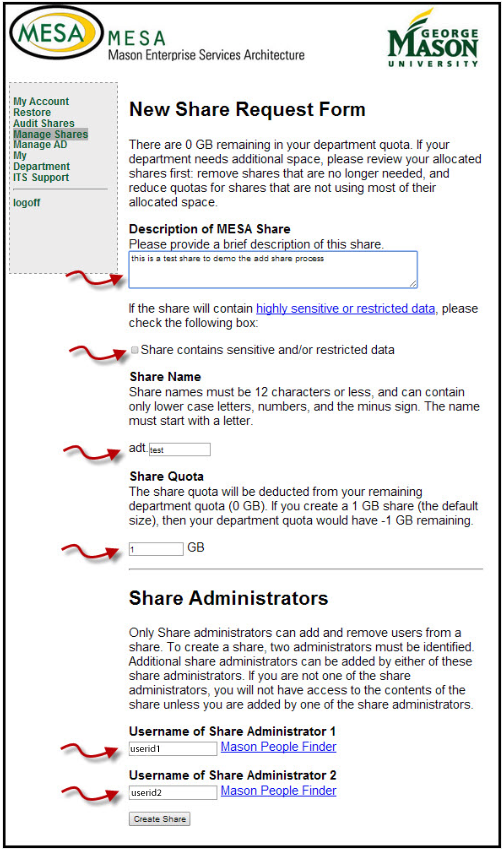
Your new share is now created.
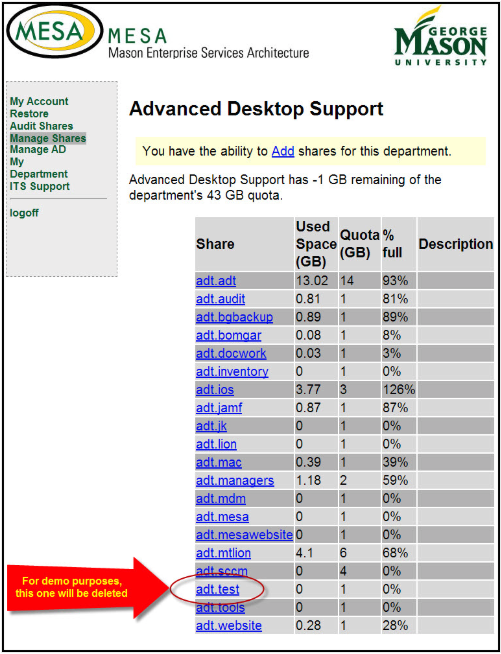
Step 1
Select the share that you would like to delete.
Step 2
You will see a warning that you are about to permanently delete the share.

WARNING: Clicking on Delete Share will permanently delete the share and its contents. Please make backup copies of necessary files.
Step 3
If you are sure that you want to continue, check the two boxes and select Delete Share.
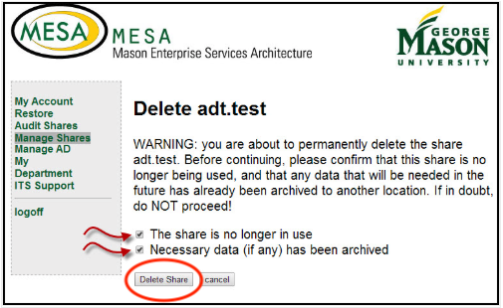
Your share is now deleted.
Last modified: September 20, 2018